Monday, February 28, 2011

Shrimp gyoza (Japanese steam-fried dumplings)

After craving for gyoza for days, I finally made it. Shrimp gyoza, to be exact. The regular gyoza recipes usually call for ground pork. So, if you`re not into seafood version, just go with the pork. I believe beef and chicken will do great too.
Like in other kinds of dumplings, gyoza are made by preparing the filling and wrap individual portions of it with dumpling skins before finally cooking them. The pack of dumpling skins I bought has recipe on it and I kept the pack in the kitchen because I wanted to copy the recipe for you. But, here the but comes, he saw an empty package on the kitchen counter when I wasn`t around and threw it away. So it`s gone ad this post is going to be a measurementless recipe again as usual.
Anyway, each dumpling will need like a tsp or tbs of filling (depends on the size of the skin), so you can roughly estimate the amount of filling you need. If you still end up having leftovers, you can use them later for gyoza again or other dumplings. I actually never mind having the leftovers I because I  can use the filling for omelets and the skins for mini pizzas.
Alright, let`s cook then.
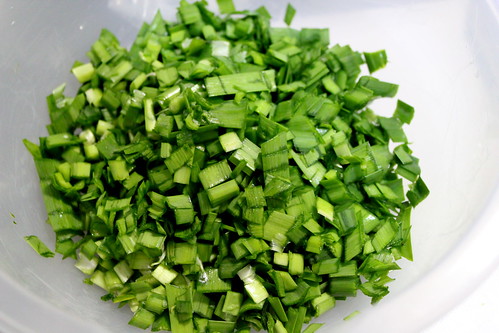
Start with preparing the filling. Chop garlic chives and place them in a mixing bowl.


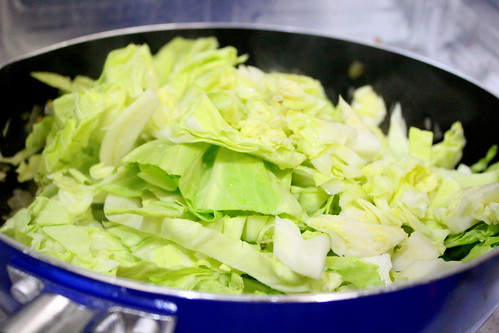
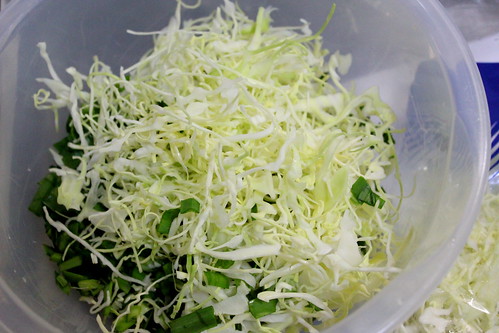
I hope you are not sick of seeing cabbage in my recipes. Other than garlic chives, gyoza needs cabbage. Really. Only this time the cabbage has to be very thinly shredded to make the wrapping process (and your life) easier. Fortunately, it`s very easy to get shredded cabbage here. This kind of thinness is beyond what I my knife can do.


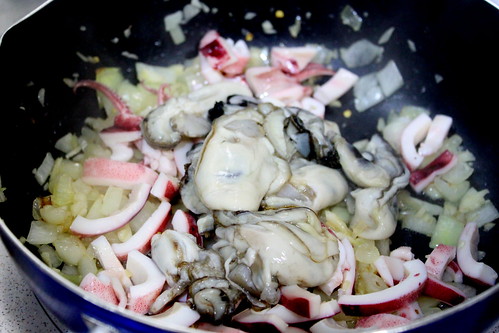
After deshelling and deveining shrimps, mince them up using knife. Or you can just use a food processor for this. Season minced shrimps with salt, pepper, coriander, and cayenne pepper. 


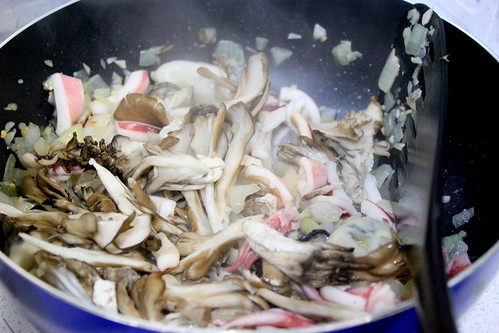
 Toss in the seasoned shrimp to the vegetables.


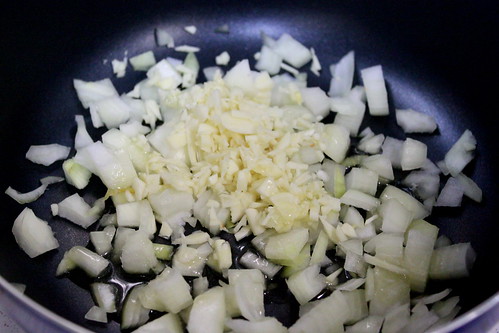
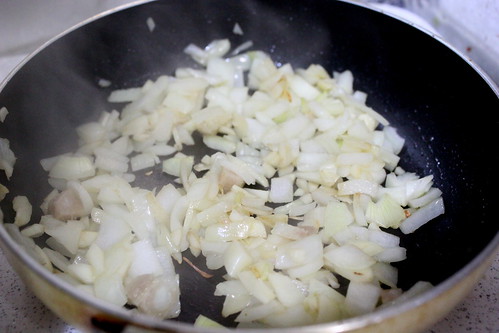
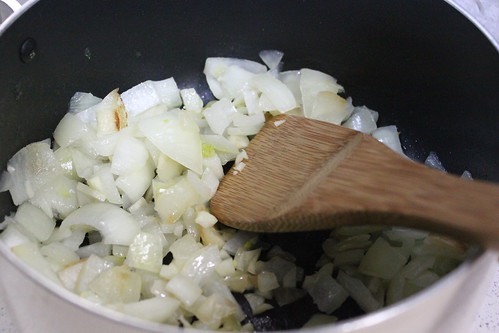
The seasoning is actually not over yet. Brown chopped garlic, dried shrimps, and ginger until fragrant.


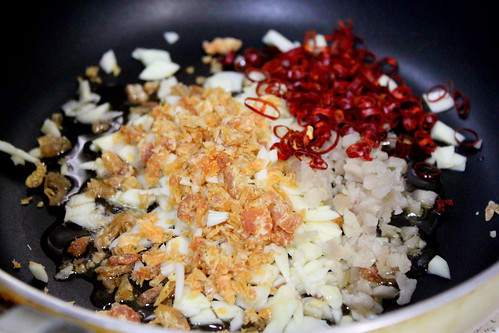
I just love these dried shrimps with their pungent flavor. If you are using pork or beef, try adding these shrimps too. You might love it.


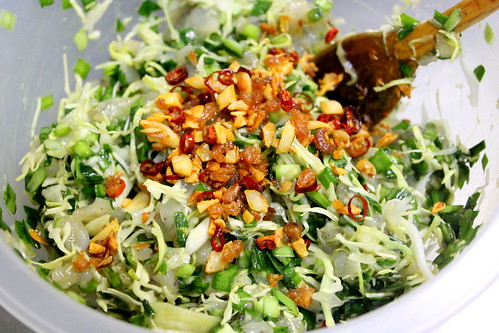
Dump in the sauted spices to the fillings and toss, toss, and toss.
Gyoza recipes usually call for corn starch to prepare the filling, but I ran out of it. So, I just left it out. 


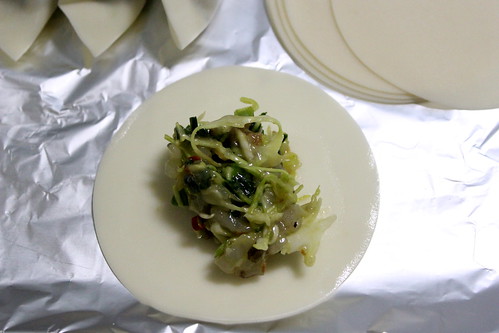
Time to wrap up. Get a sheet of round-shaped dumpling skin and place the filling on the middle. Just keep in mind that placing too much filling will make the skin easier to get torn during wrapping and difficult to close. The dumpling skin I used was about 10-cm in diameter and 1 tsp of filling was just enough. 
After placing the filling, wet the dumpling edge with water.


Fold it into half-moon shape and make sure that it`s perfectly sealed.


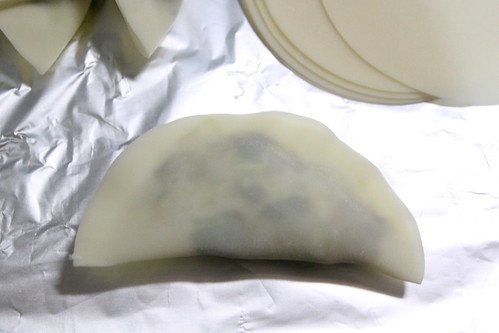
Then, pleat the top curve to make this decorative shape. Skipping it won`t hurt at all, though.


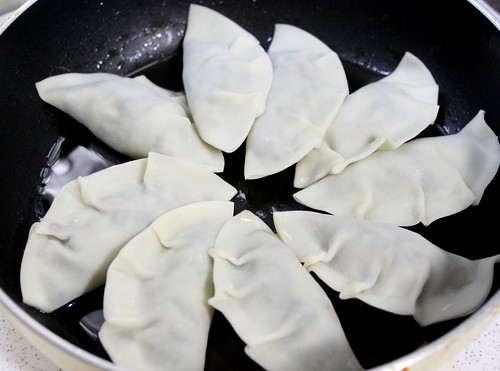
Heat oil on medium heat. Arrange the gyoza in it and let it fry until the bottom side get browned. This will take like 3-5 minutes.


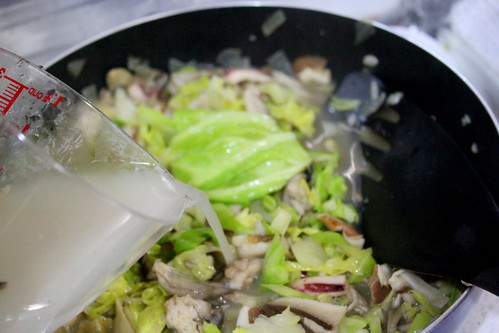
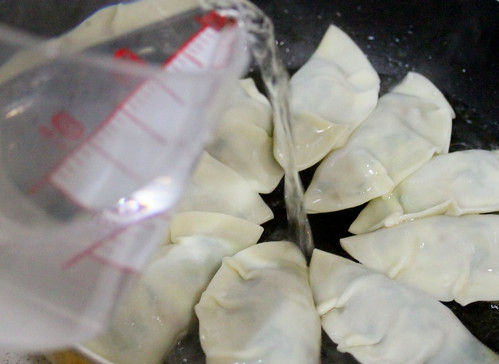
If it`s browned already, pour in water until 1/3 to 1/2 of the dumpling height. This will make a loud sizzling sound. We`re about to steam them.


Shortly after pouring in water, put a lid on and cook on high heat. We need the steam to be trapped inside.


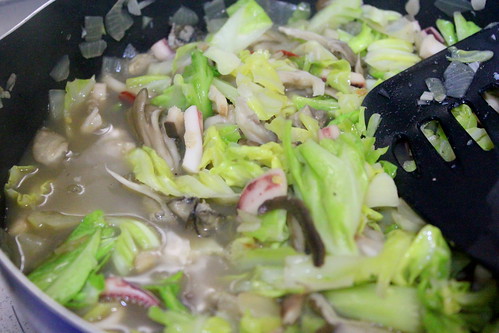
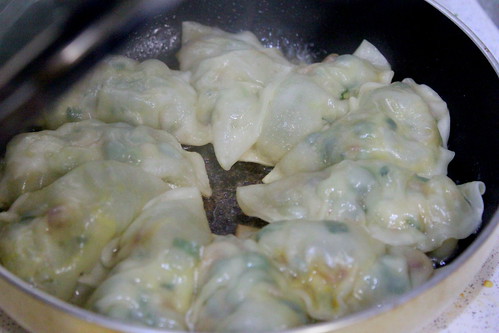
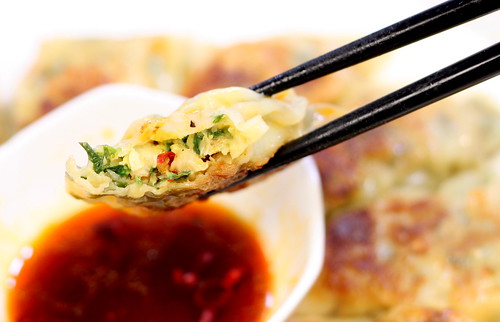
The dumplings are ready when most of the liquid has evaporated, the skins has softened and turned slightly transluscent, and you can see the filling. Five minutes should be enough for this.


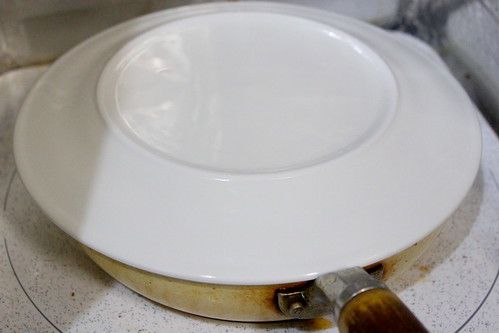
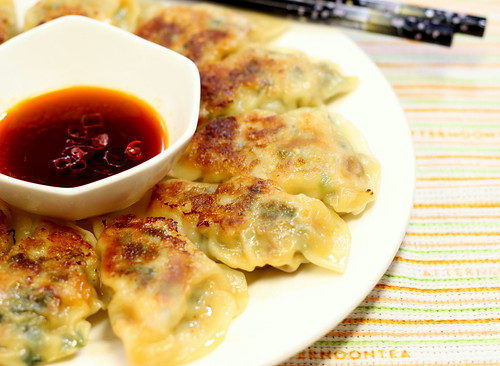
When the water`s gone and dumplings are cooked, place a plate on the pan and flip the pan over. This will give you the browned side of the gyoza facing up on the plate. Or just use your spatula.


Serve it with dipping sauce, which is usually a mixture of soy sauce, chilli-infused sesame oil, vinegar, and lemon juice.


Dip dip....


..and have a bite.


Ingredients:
Garlic chives, chopped
Cabbage, thinly shredded
Shrimp, minced
Cayenne pepper
Coriander
Salt
Pepper
Garlic, chopped and sauted
Ginger, chopped and sauted
Dried shrimp, chopped and sauted
Chilli, sliced and sauted
Corn starch
Dumpling skin (round-shaped type)

Sunday, February 27, 2011

A shoe, two cats, and chicken teriyaki donburi

Don`t know why, but I`m in the mood in showing you pictures (taken by us) other than food.

Like this one. I just love the autumn colors. And the pine cone too. Always got tempted to bring some home, but don`t know what to do with them.
What was my foot doing there? No idea. I just felt like putting it there. I hope showing leg or feet is not an offensive thing in any cultures, though.


And this one, where we found one fat stray cat in the park sitting proudly for the picture session. The way he sits just cracked me up and we`re pretty sure that it`s not his tail on his left (my left) bottom.


Or this one, where a sweet little cat was willing to sit quietly for me. These cats in the park are really good models, I tell you.


And this is the best shot I got.
I hadn`t had the gut to turn my camera button into Manual mode. And I`m not a tripod user too, even in this kind of lighting situation. So yes, this is the best one came from the worst technique.


So I just can`t help taking picture of food. Like this. Sukiya`s chicken teriyaki ricebowl with onsen tamago for topping.


Well, let`s just call it my random thoughts. And no ingredients this time.

Stir-fried cabbage and seafood

This afternoon I spent like 4 hours enjoying some chit-chat time with my girlfriends while sipping a cup of hot Caramel Macchiato. And one macadamia cookie. And one sakura macaron with matcha ganache. What a sweet sugary day, indeed. Then, I just came to realize how I missed having my coffee time with girls. Girls only. Nothing can beat the joy as in laughing and giggling like crazy with friends. I don`t know if it`s because we`re high on sugar or the giggly thing is highly contagious. Anyway, my Saturday afternoon was a blast. Thanks, girls!

Now, I`m going to share another simple homey dish with you, so simple that I was worried if this is good enough to be shared. Well, if it`s not, let me just write it down here for my own journal.
Start with soaking a fistful (or more) of dried shiitake mushroom slices in a bowl of water. Oh yes, I`m being a good girl now. Following the instruction on the pack is what I (should) do.


 While the mushrooms are getting rehydrated, saute garlic and onions with a bit of olive oil.


I used a pack of boiled and sliced squid. Convenience: yes. Freshness: (probably) No. But this is a recipes collection of a me-want-no-fuss housewife. So, please, bear with me.


Chop them up into smaller pieces and toss them into the pan. And add maitake mushrooms too. I know, the mushrooms made a sudden appearance here. Again, bear with me.


Another convenience here is a pack of raw oyster supposedly prepared for sashimi. Just wash it lightly and it`s ready. Unless you live in the same place with me, it`s very likely that you`ll get different kind of packed oysters, please read the pack first to make sure the safe way to consume them.
By the way, I happen to live in Miyagi, a region famous for its oysters. The second largest oyster producer in Japan after Hiroshima. That`s what I`ve heard. But I never tried oysters from other places, so I`m not sure how they are different from others.


Toss them in and season with soy sauce, sesame oil, oyster sauce (oyster sauce doesn`t taste like oysters at all for me), salt, and pepper.


And this is a half cut of 30% off cabbage. Meet me, the shameless wife. I do use (discounted) cabbage like A LOT in my daily cooking. You witness it too here.


Slice it up and toss in. Remember the mushroom? Now is time to add the hydrated mushroom slices and pour in the stock too. But not the whole stock. Save some for the next step.
Stir it a bit and let the cabbage get wilted.


Stir in corn starch in remaining stock. Yes, we`re going to thicken the soup. For a rough measurement, I used 600 ml of water to soak the mushrooms and to the stock I stirred in 1/2 tsp of corn starch.


Pour in the starch mixture and cook it on low heat.


I wanted the soup to be a bit thick (just a bit), but it depends on your liking. If you prefer it soupy, then just leave out the starch. Or if you want it thicker, add some more starch.


Enjoy it with hot steamed rice and seaweed flakes for topping.


p.s. I`m not sure if naming this dish as "stir-fried" is proper, but "braised" seems to be too watery for it. Any idea?


Ingredients:
Garlic
Onion
Dried shiitake mushroom, rehydrated
Maitake mushrooms, chopped
Squid, sliced
Oyster
Cabbage, sliced
Corn starch
Water

Friday, February 18, 2011

Oxtail soup

Have I told you that I-heart-beef? Well, I do. And that includes this oxtail soup. Yes, the tail. Despite how small and meatless it looks on the cow, it really makes a great soup.
So this is the deal about cooking the tails. If you want a cleaner soup (with less fat), there are 2 methods you can do:
1. Boil them, cool the soup, and keep in fridge for overnight to let the fat excess forms a hard fat layer on the surface. This will enable you to skim the fat off easily from the soup.
2. This one also comes from Holy at Beyond Kimchee. Boil the tails for a while and discard the water. Then, you can pour in new batch of water, boil the tails again, and continue cooking.
Either way, add the spices after you`re done with cleaning the soup.

I, however, want to make the whole process to be speedier. I never did either of those cleaning up process. Maybe next time I`d use Holy`s method.
If you choose method no 1, or just like what I did (aka. no fat-removal), you can start the cooking process from here. Brown them to get the caramelized bits.
I`ve heard people grill the tails to avoid frying, but I choose to pan-grill them without oil. Quicker.


Let the meaty surface gets caramelized.


And put them in a pressure cooker.


Next, saute onion, garlic, and ginger to bring out the fragrance. I love my soup to have a bit of gingery kick, but you can skip it of course.


Put the sauteed spices in the pressure cooker with the tails. Then, pour in water just enough to cook them through. Not too much, though. You can always thin out the soup later after "pressing" them.
Close the cooker`s lid and cook it for 30 mins with the heat on. Or don`t listen to me. Referring to your manual is the right thing to do.


After it`s done cooking and the pressure has been completely released out, open the lid. Check if the meat has fallen off the bones or if it can be easily pulled out with a fork. Cook it some more if you need to. There`s no such thing as overcooking the tails. They`ll just get better and better.

(Pretend you can see a picture of cooked tail in a pot)

Veggie time. Throw in carrots. Please don`t say you hate them. They`re one of the most wonderful things in the world.


I usually add potatoes, but this time I went for radish instead. Less carb was the reason. Ahem.


And one last important ingredient for the umami. Tomatoes. You`ll be happier with them in the soup.
Close the cooker`s lid and cook it again for another 5-10 mins. When the carrot and radish got tender enough, season the soup with nutmeg, salt, and pepper. No need sugar this time because the carrot and radish are good enough to balance the savoriness.Thin it out with water if you need to.


Get a bowl and ladle the soup in. Oh, you must, really really must try this soup. Devour it using spoon, fork, and your hand(s). Definitely not the most elegant table manner because oxtail soup is wild!


Ingredients:
Garlic
Onion
Ginger
Tomato

Oxtail pieces
Carrot
Raddish (daikon)
Water
Salt and pepper
Nutmeg
Cloves

Sunday, February 13, 2011

Detoxing Sunday

After our super beefy menu this weekend, I could feel how my body desperately needed fruits until I finally made us this embarrassingly easy dessert.
I got strawberries, blueberries, and pineapple. Y-u-m!
Cut up the strawberries and pineapple as you like. When the fruits are ready, mix plain yoghurt (I used low-fat one), honey (or sugar) and vanilla essence with a stick blender (or in a blender) until yoghurt turned runnier like smoothie.


Pour in yoghurt to a glass or mug until half to two third full and throw in the fruits until reaching the top.
That`s it. Dessert is ready, baby. Gosh, not that I would take any credit for this beauty, but these fruits look simply divine!


Enjoy your Valentine`s day, everyone! Love you!


Ingredients:
Plain yoghurt
Honey/sugar
Vanilla essence
Strawberries
Blueberries
Pineapple

Friday, February 11, 2011

Lasagna or not?

One thing I know for sure: This is not an authentic one. I hadn`t cooked for days and today I finally made something in the kitchen. Something meaty. On weekday. Ooops...(whispering voice) I broke the rule....
It was lasagna, for my beloved Garfield. To make the whole process sounds simpler, there are 3 things to prepare: bolognese sauce, cheese sauce, and lasagna noodles. In this post I only show you how to make the bolognese sauce (my version) and to assemble the lasagna. I`ve previously posted about cheese sauce here.

The bolognese sauce first. It`s basically meat-based sauce, but you`ll see how I made it a bit different.
Saute the onion and garlic as usual. Oh..how I missed this goodness!


Toss in minced beef. Did I feel guilty? Yes. And no. No?


Because I got these. Shiitake and maitake mushroom. Not a nutritionist here, but they sure make my beef issue sounds lighter. So, stir in the mushroom when the beef turned color.


Now here comes my question.
Why do canned tomato or tomato ketchup come in such intense red color? I`ve pureed tomato so many times yet all I get is rather light orange color.I suppose simmering lots of tomatoes until they loose most their water content might give the concentrated color. But I don`t know, never tried it myself. So, since I haven`t solved the question, I made my own "tomato sauce". I pureed some fresh tomatoes and red bell pepper to make it redder. I also added lemon juice and a pinch of sugar to give some sweet tang. Not exactly like the canned one, but at the moment I`m happier with my DIY tomato sauce.


Yes, I`m on my right mind when I added gochugaru (chili powder) to the sauce. The sauce color wasn`t red enough and gochugaru is just perfect to do the job. My gochugaru is not spicy at all, another plus here.


I was still dealing with my meaty guilty feeling when I thought mushrooms weren`t good enough. So asparagus come to the rescue. It`s fibrous and green.


Chop it up and stir in. I felt triple better now. Now is time to season it with basil, oregano, salt, and pepper.


Confession: I completely forgot both basil and oregano. I only put salt and pepper. Can you believe it? The only ingredients that make this food looks Italian are just pasta and tomato. And the weird thing is, I was happy with how it tasted that I didn`t realize that those two were missing!
Anyway, now you knew where the post title came from.


Assembling time. Get a casserole dish, laddle in some bolognese and cheese sauce, and spread them out to the whole bottom surface. This layer will be the non-stick agent for your lasagna noodle.


Now the pasta. My lasagna noodles don`t need to be pre-cooked because it says on the pack that they absorb the liquid very well. Read the pack first, please.


Assemble the noodle over the sauce.


Laddle in some bolognese sauce again.....


...then the cheese sauce...no need to be neat here..


...and place the noodles again.
Alright, a little math would greatly help in assembling this lasagna so that you don`t end up having left over of this and running out that. Check first how the lasagna noodles will fit into your dish and how many layers you can (or want to) make with them. After deciding the layers, you can roughly estimate how much sauce to spread in every layer. To avoid thinking too much (math isn`t my thing), I usually make 3-5 layers, no more. And for the first time in my cooking life, I finished the noodle and the sauce perfectly for the last layer. A happy coincidence.


So, after finish layering (the top is the sauce, not the noodle), spread some more cheese (mozarella or natural cheese will do great) and pop it in the oven for 15 min baking.
That green thing is seaweed. I`m crazy about seaweed flakes. Baking them will bring out the fragrance and it goes really well with the melting cheese.
Some tips here: cover the dish with aluminium foil when start baking, then after 10 mins, open the foil and continue baking to let the cheese get crusty.


Garfield smiled and smiled looking at a dish of smoking hot lasagna.


We shared eating from this plate. Burp. Sorry.


Ingredients:
For 20x20x6-cm casserole dish

Bolognese sauce
Onion, 1 large, chopped
Garlic, 5 cloves, chopped
Beef, 250 g, minced
Shiitake mushroom, 150 g, thinly sliced
Maitake mushroom, 100 g, chopped
Tomato, 2-4 large, pureed
Red bell pepper, 1, pureed
Lemon juice, 3 tbs
Water, 1 cup
Basil
Oregano
Sugar, a pinch
Salt and pepper to taste

Cheese sauce

Butter/margarine, 3 tbs
Flour, 3 tbs
Milk, 2 cups
Whole egg, 1, beaten
Cheese, 200 g

10 sheets of lasagna noodles