Tuesday, December 28, 2010

Nasi goreng sambal ijo (green chili fried rice)

Good news: Holiday is officially starting tomorrow for me. Yaaay!
Bad news: My kitchen`s ceiling has been leaking. Water is dripping everywhere. Since last night. Forget the yaay.
Another bad news: The soonest I get my kitchen repaired will be Jan 5. That`s the soonest.

No, I won`t let myself complain on this. Having my kitchen flooded with water from the neighbor above (on long holidays!) does suck. But it`s not her fault. Our building is just old.
The universe is probably telling me to stop cooking for a while. The kitchen is now filled with buckets and towels for the leaking water making it impossible for me to cook there, indeed. I can only hope that the leaking will not get worse or spread to other room.

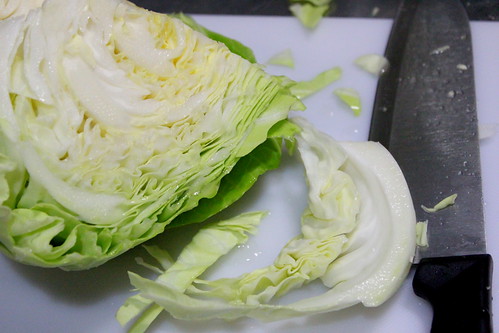
And in my efforts to cheer up, I just remembered that I have one dish I`d like to share with you. Oh yes, sharing the happiness (and deliciousness) in my life always cheer me up.  It`s not a fancy dish, but I llllllove it. I`m 70% sure that you`ve heard of Indonesian fried rice called "Nasi goreng". The general idea of nasi goreng is mixing sambal with leftover steamed rice and cooking them altogether. Meat, seafood, vegetables, or eggs are common as additional ingredients. It`s often recommended to use day-old cold steamed rice, not the fresh hot one, as the old rice has less water content and thus making the nasi goreng lumps-free and nicely dry. However, perfection isn`t my thing. I would have run away from the kitchen if I just let it bother me. And in fact, nasi goreng in our house usually comes without a plan. So, I inevitably always use hot steamed rice. I really don`t mind having my nasi goreng a bit mushy. Few lumps don`t bother me and him either.

So, if you happen to have old steamed rice, use it. Or if you purposely spare it, even better. I salute you. But if you want to be spontaneous, don`t hold back. You`ll still be happy with your nasi goreng.
Now, first thing to do (after you make sure that you have steamed rice), we need to prepare sambal ijo. You can check out the preparation here. But, this time I made some changes: 1, I didn`t steam the ingredients prior chopping and 2, I omitted dried shrimps. But I`m sure your nasi goreng would be equally (or more) tasty if you use sambal ijo prepared like I did before.
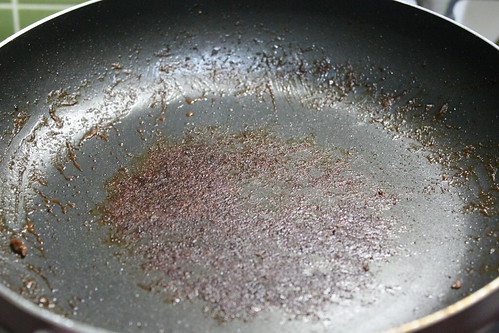
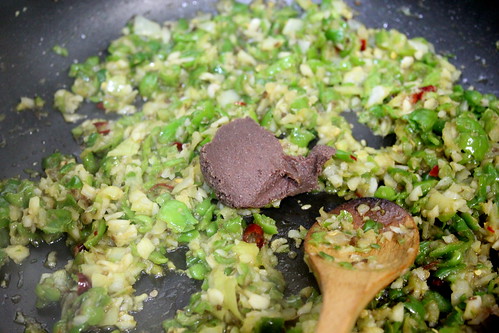
So, after chopping chilies, garlic, and onion, saute them with olive oil on medium heat and toss in shrimp paste (optional).Good fishy smell!


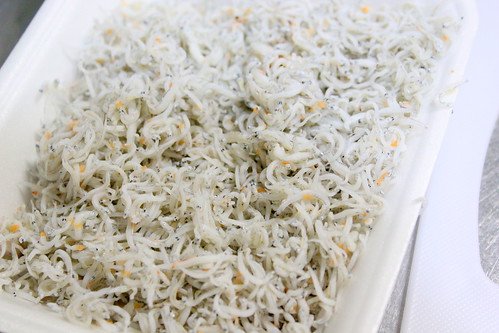
And I use this tiny white fish, which I completely forgot the name in Japanese (despite how frequent I use this in my dishes) and have no idea what it`s called in English. I`d be really glad if any of you can help me with this.


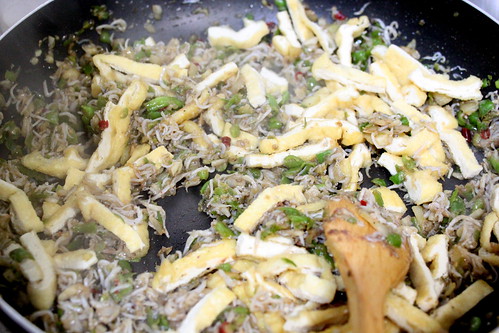
To the sambal toss in the fish.


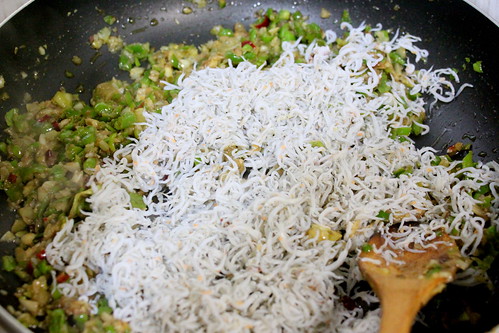
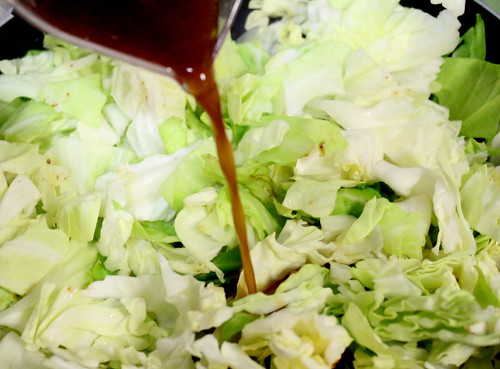
Add fried tofu strips to the pan and toss again. Now is time to season it. I used soy sauce, fish sauce, salt, and pepper. You can add cayenne pepper if you need to spice it up. Remember that you`re going to add rice to this mixture, so you need to a little bit overseason it.


Bring in the rice. Hot or cold (not fridge cold, though), it doesn`t matter. For me. Apologies to any of you who`s about to scream at me on this. Keep stirring, try breaking any lumps, and adjust the taste. The more rice you stir in, the more powerful your arm and spatula need to be. Good luck.


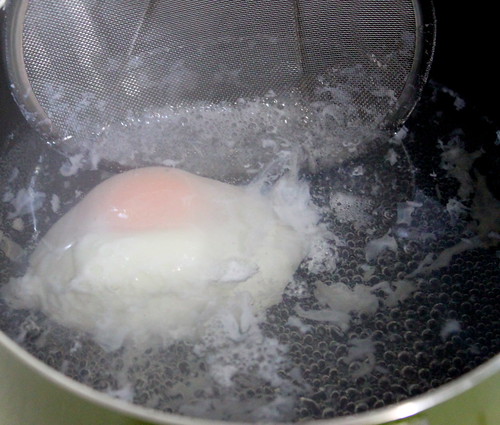
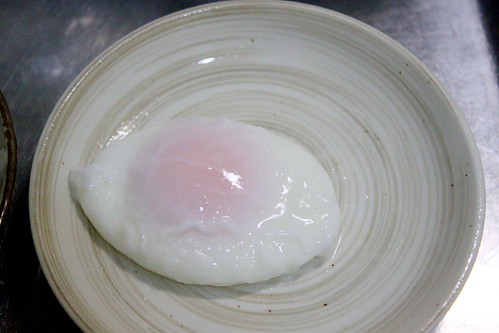
Look what you`ve earned! A plate (or two, or three. I won`t judge) of green chili fried rice. You can top it with fried egg and add some shrimp crackers for crunchy kicks.
Fun fact: whatever the meal is, and whenever possible, Indonesian always eats with savory crackers or chips. And sambal. It`s in our genes.


Ingredients:
For sambal (for this nasi goreng)
Green chili
Garlic
Shallot
Shrimp paste
Salt pepper
Fish sauce

Fried tofu strips
Fish
Steamed rice

Sunday, December 26, 2010

Marbled chocolate bark with assorted nuts

I know, I know, many of you probably still taste too much sweetness from the Christmas feast in your mouth. But I just couldn`t help making my chocolate bark ever since I heard about peppermint bark. I saw many people displaying their pretty barks and I was very surprised to know that it`s incredibly easy to make. The only thing is, as much as I keep drooling every time I look at those barks, I`m not a sweet tooth person. So, instead of placing candies over sugary chocolate, I chose plain (non-fry, unsweetened, unsalted) mixed nuts contain of almond, walnuts, and cashew nuts. You can also try dry fruits, crackers, biscuit, et cetera et cetera.


For the bark, I used dark (bitter) chocolate and white chocolate. We`re about to have fun here.


Back to the nuts, place them in a food processor and let them chopped.


Keep processing until you get the consistency right. I stopped at this point. Not too fine, not too coarse. Set aside when you`re done.


Now, break the chocolate bars into small pieces and place them in separate microwaveable bowls.


Heat them in microwave at 800 W for 1 minute. I didn`t cover the bowls with plastic wrap because I wanted to avoid any water coming in from the steam that might be formed during the heating.
After 1 minute heating, take out the bowl, stir up the softened chocolate with a spoon and see if it needs more heating. If it does, reheat it for few more seconds. Mine was done with 1 min and 20 secs, both for the dark and white chocolate.

So here`s the melted dark chocolate. Gorgeously glossy. Try say it outloud. I ended up saying "grogeously groly", "golgeously golly", or "gorljsly gossy". I really wish it only happens to me.


And here`s the white one.


Line a baking pan with parchment paper (I didn`t butter the paper and it worked just fine). Place dollops of dark chocolate randomly on the pan.


Then, place dollops of white chocolate on remaining spaces.


Here comes the fun! Get your rubber spatula and let`s paint! Oh...I love doing this. The white and the brown swirl and swirl and swirl all over the pan with my finger, err..spatula.


Alright, I finally managed to stop my self before I overmix the color. Depends on your liking, the more you brush them, the less marbling looky you`ll get. I smiled a lot in the kitchen doing this.


Put down your spatula and now is time to sprinkle the nuts. Sprinkle the happiness and crunchiness all over the place. Only on the pan, please. Not on the kitchen floor. I was carried away.


Gently push down any loose nuts so they properly stick to the chocolate. When you think it looks alright, let it set. You`ll find in many recipes to keep it in freezer for a while. But, if your room temperature is cold enough like mine, which is about 10 C, just let it sit outside. Mine was set after 1.5 hours. On top of my TV.


After it set, slowly dislodge the bark from the paper. I had no problem at all, so I think you`ll be fine too. And look at how thin it is.


As much as you want to bite it right away (I wanted to), break the chocolate into chunks and serve them to your husband or boyfriend. He`ll buy you a nice gift. Or to your kids as a holiday treat. You`ll win The Most Favorite Mother award this year. Or to your friends. They`ll remember how sweet you are. Just tell`em all to brush their teeth afterward.


Ingredients:
For 24x18-cm baking pan
Dark chocolate, 50 g
White chocolate, 90 g
Mixed nuts, 80 g

(Not mac but) Corn and cheese

I did make macaroni and cheese weeks ago, but then I thought I wanted to have something cheesy yet lighter than pasta. Corn. Sweet corn. So, I substituted the pasta for sweet (or sweetened??) corn kernels.
By the way, my fingers are freezing right now. I wonder if there are mouse and keyboard installed with warmers/heaters. I`ve tried typing with my gloves on. Of course it didn`t work.

Corn and cheese, corn and cheese.
Heat your pot on medium heat and melt butter. Or margarine.


Soon after your butter melted, toss in same amount of flour and stir up. It`s alright if the flour turns into lumps. Just keep stirring.


Then, turn down the heat to low heat, pour (cold) milk in batches into the mixture, and stir up. The flour lumps will gradually dissolve when milk is incorporated.


Now crack an egg in a cup and whisk up. I always think that egg is pretty. The yolk is pretty. I sometimes spend sometime in the middle of my cooking only to admire the yolk. If I were a princess, I would wear this yolk as my crown.


Alright, now we`re going to tamper this egg before adding it into the higher temperature of butter-flour-milk mixture. So, bring a laddle of the mixture, touch the laddle to the cup wall, gently let the mixture flow in through the wall  (this will slightly lower the mixture`s temperature before finally touching the egg), and whisk up.


Do this several times until you think the egg looks much paler, well combined with the milk, and ready to pour into the pot. Still on low heat, gently pour the egg into the milk and stir up. You`ll see the milk getting creamier with the egg.


 Now, The Cheese. Toss in your favorite cheese to the pot. I use what I have in my fridge. Natural cheese, gouda, and cheddar. I have no idea what exactly natural cheese is (I always assume that every kind of cheese has a name), but it gives a mozarella-like texture when it`s baked. And it`s cheaper than real mozarella.


 When cheese is completely combined, season with salt, pepper, cayenne pepper, and nutmeg. Stir well.


The Corn. The main cast comes the last. If it`s frozen, let it sit at room temperature for a while, or rinse with hot water. Squeeze out excess water with kitchen paper and dump it into the pot. Stir well and adjust the taste if necessary.


Start to heat up your oven at 190 C and get a casserole dish and pour in half of the corn mixture. Just half. Because...


....Olive wants to serve this to her beloved Popeye. Alright, you can certainly skip this item, but I just want something leafy and green in my corn and cheese. So, spinach it is. I just washed fresh spinach, drained, stir-fried it with a bit of olive oil until wilted (steaming will do great too), and drained the juice (I was thinking to drink it in the name of nutrition fact, but I didn`t). So if you want the spinach too, top the corn with the cooked spinach.


 And pour in the remaining corn and spread some cheese for the crust later.


Bake it at 190 C for 35 minutes and Popeye gets his corn-spinach-cheese.
Yum yum. The outside is crusty and the inside is creamy. It`s corny and cheesy, in a good way of course.


Ingredients:
For  20x20x6-cm dish

Butter/margarine, 3 tbs
Flour, 3 tbs
Milk, 2 cups

Whole egg, beaten, 1
Cheese, grated, 120 g
Sweet corn kernels, 500 g
Cooked spinach
Cayenne powder
Nutmeg powder
Salt and pepper

Bake in preheated oven at 190 C for 35 minutes

Saturday, December 25, 2010

Beef ricebowl with poached egg

A week! It`s been only a week, but I felt like ages since my last post. I have tons of (extremely lame) reasons for delaying my cooking-snapping and editing pictures-posting routine. Now here I am, ready for my posting marathon.
Oh, before I continue, let me wish you Merry Christmas!! I hope you and your beloved ones enjoy, or enjoyed the celebration and the food!

As for me here, it`s getting colder and colder and the snow just keeps falling since last night. After feeding him store-bought food for days, I knew it`s time to make it up to him today. So, off we went to the store this afternoon despite the snow and the temptation to stay under my warm blanket. And as today is Saturday, beef is on the menu.
Look at this baby. Don`t you want to have a steak sizzling on your plate?
I do. I really do. And he certainly does. I could hear him drooling. But if I do make steak, he`ll finish the whole meat in seconds. And I`m not going to let it happen.


So I diced it up instead. I wanted to caramelize these cubes, so I just used a little sesame oil and dry seasoning for the flavors: black peppers, salt, garlic powder, cayenne powder, and ginger powder.You can certainly use your favorite ingredients for flavoring, but I think it`s better to use dry ingredients to avoid adding water content during cooking the beef.


Now, set your non-stick frying pan on high heat until it gets smoking hot. It has to be really hot, otherwise the beef won`t get caramelized. No oil, please. So, when it`s hot already, dump in the cubes, try to separate each cubes so they don`t stick each other. I clearly put too many cubes here and that wasn`t good because the heat is trapped between the meats and it will turn into steam, which is not a good thing for caramelization. But, what can I say, I`m too lazy to cook them in batches, so I just turned the heat up to the highest and let them cook that way.


After the beef is done to your liking (always well done for me), set the beef aside on a plate. Now look at the grease left from the beef. It`s something between yucky and yummy. It`s up to you whether you want to clean it up, or use it. I did the latter one.


Meat without vegetable(s) is no good. It`s like messing up with the good balance of yin and yang (choose your own version of which is which here). So I went for cabbage. Wash and chop. Chop chop chop.


And toss them in the frying pan with or without the grease from the beef. Stir fry the cabbage until it gets wilted and looks a bit greener.


Get a cup and mix water, salt, pepper, soy sauce, oyster sauce, sesame oil, and ginger powder in it. Pour the sauce into the cabbage, stir well, adjust the taste, and set aside when it`s done.


Another item for the dish. Poached egg. Oh yeah, I (am learning to) poach eggs now.You can find sooo many many many ways to poach eggs in the internet, but here`s how I do it.
Simmer water in a pot. While it simmers, crack an egg and place it in a small cup or bowl. You can get a laddle with holes (I`m pretty sure it has a name), or a skimmer like what I used.


Then, slowly and gently pour the egg into the simmering water.


The egg white will instantly spread out and curdle at this point. With your skimmer, quickly bring the white toward the yolk so that the yolk is tightly wrapped around by firm white. Try to shape the egg into a round shape if you can. My skimmer is too big so it`s difficult to make a nice round poached egg. Or probably I just suck at this thing. I choose to blame my skimmer, though.Or him for going in and out the kitchen.


And here`s what I`ve got. An elliptic-shaped poached egg with a pointy edge. But egg is an ellipse, right? Oh, I need more and more practice to make it looks better.


Well well, time to arrange the items into a dish.
Get steamed rice in a bowl, top it with stir-fried cabbage, place the poached egg on the center, arrange the beef cubes around it, and sprinkle green onions to bring out the beauty.


The egg? Despite the look,  it was just delicious. The white was firm and the yolk was beautifully runny. And orange. I just love its orangeness.


Happy holiday!!

Ingredients:
Beef steak (if I may call it as steak)
Beef, cubed
Black pepper
Salt
Garlic powder
Ginger powder
Cayenne powder
Sesame oil

Stir-fried cabbage
Cabagge, chopped
Soy sauce
Oyster sauce
Sesame oil
Garlic powder
Salt and pepper

Poached egg
Whole egg

Saturday, December 18, 2010

Chicken braised with miso and tomato

When it`s freezing outside and my stomach is loudly growling, I need to whip up something warm for dinner in a matter of minutes. So, what`s for dinner...I kept thinking when I was about to go home from work. We usually have meat in our menu only for weekend (thanks to his BMI), but that day was different. He had his research presentation at lab, so I thought I wanted to make a little celebration for him finishing the work. By little celebration I mean having meat.
So, chicken it was. I wanted chicken with miso and tomato. I wondered how the combination of miso and tomato would taste.

Start with sauteing the chicken with the skin (if any) at bottom first. If you use a non-stick pan, no need oil for this. The chicken fat, especially from under the skin (bad but yummy, yummy but bad, your call), will melt out and thus layering the whole pan surface.
By the way, I was hungry and cold, so I bought the chicken chunks. It saved me from chicken cutting process.


Look at the "oil" coming out from the chicken. You may wipe off this oil with a kitchen paper clipped between chopsticks the way Japanese cooks usually do, or you can just let it stay there. Keep sauteing until the surfaces browned. Don`t worry about the chicken not getting cooked properly. We`ll work on it later.


When they`re browned, slice spring onions and toss them in. Smell is getting even better.


Meet "bunapii shimeji", a white colored shimeji mushroom. Remove the bottom part and detach every mushroom.


Throw them into the pan. The more the merrier!


This time, I don`t want to stir up the whole things. You`ll find out the reason very soon.
Mix up the sauce and seasoning in a cup. I used shoyu, sesame oil, chilli powder, salt (a bit!), pepper, and fish sauce. Add water to dilute the sauce and bring up the volume of liquid because we`re going to braise the chicken.
Note: I forgot one important ingredient for the seasoning mix. MISO. 
So, don`t forget add miso into your seasoning mix. In case you`re not familiar with this ingredient, miso is a fermented soy paste with a very concentrated and salty taste. To avoid oversalting the dish, it might be good to add salt (if you still need it anyway) later after miso is added.


Stir well the sauce mix in the cup, drizzle it over all ingredients in the pan, and start braising on low heat. I added my miso at this step, by the way.
Then, another ingredient is tofu blocks and I don`t want them to be mashed during stirring. I want them to look pretty when the dish is served. That`s why I mixed up the sauce before adding it to the pan.


Another note: I forgot to add tomatoes. So I added them at this step.
If you want to use them too, toss tomato chunks into the pan after the chicken is browned and lightly mash them to release the juice out.
Not only I`m a clumsy person, I`m forgetful as well. I`m aging!
By the way, the chicken will be cooked throughout the braising.


Here it is, a very homy and soul-warming dish prepared in 30 minutes. Or 40 minutes if you include time required for "Hhmm...this feels strange..I must have forgotten something here..think..think..." moments.
Tomato and miso turned out nice. Really nice.


And guess what, his presentation was rescheduled until next week. So, he got to eat meat for nothing. He was totally happy that day.

Ingredients:
Chicken
Spring onions
Bunapi mushroom
Tofu
Miso
Tomato
Soy sauce
Sesame oil
Fish sauce
Chilli powder
Salt
Pepper