Sunday, December 23, 2012

An early greeting from Sendai

It might be still early for sharing the Christmas and New Year`s greeting, but while I`m enjoying some quality time on weekend after my experiment marathon, why not sit down and write about our recent photo-walking in the city?
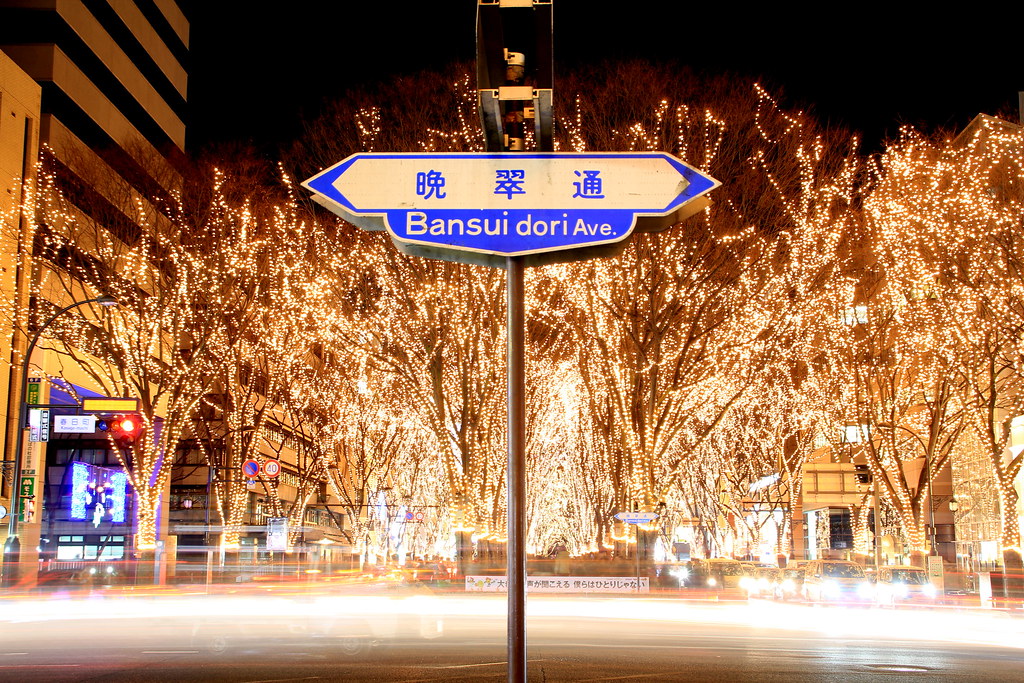
Sendai Pageant of Starlight, or what people simply call "Illumination" is one of the famous annual events held every December where all the trees in some main streets and parks are decorated with lights and lit on every night until December 31. 

The streets are crowded with visitors not only from Sendai but also from other cities despite the frostiness. My husband and I are not big on places packed with people, but for this spectacular view, oh, we`re so ready to join the crowd!  

If you remember my previous post on Jozenji avenue, this is exactly the same place, only the trees are now without their leaves and everything looks glowing thanks to the magical transformation by the lights.

Beautiful. Not so many people here.

Now say cheese!

Busy. Busy busy busy. That was the word that kept coming out on his camera. But I think the camera was as happy as the owner!

These are probably the first white Christmas trees I`ve ever seen, but I was so into the colors that I wouldn`t leave them! 

 Now finally, here comes our greeting!

Thank you for all your visits to A Box of Kitchen this year (and the years before too, probably), which I truly appreciate, and we wish you a very happy, delicious, and successful 2013!

Sunday, November 25, 2012

Eat. Work. Ride.

Happy (belated) Thanksgiving! 
I hope you all enjoyed the celebration with good food and surrounded with your beloved ones.
My disappearance for almost one whole season has made me think that my blogging days were over. Joining into a new research project and increasing my part-time works are what keep me busy like a bee. Not the queen, of course. Now add to those works a regular headache that comes every time I encourage myself to be more serious (and not stubbornly picky) in finding me a job for next year.So, I really apologize to my blogger friends because I haven`t visited their blogs for these past few months, but I promise I`ll drop by more often.
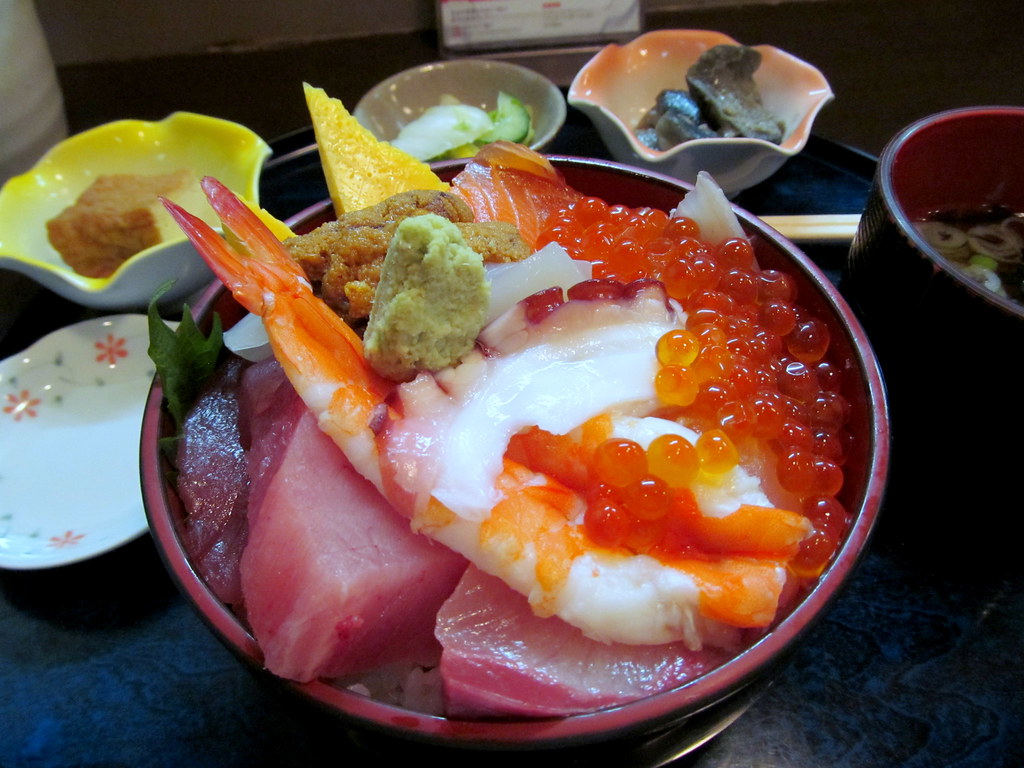
Do I still cook? Yes. And an incredibly fluffy souffle cheese cake is what I wish to share with you next time. Do I still take pictures of food? Err...yes...and no. Yes for lovely food I have outside. Like this beautiful sashimi rice bowl containing piles of tuna, salmon and the roe, shrimp, octopus, and sea urchin with a dollop of wasabi on top. Ah, just lovely.

But no for my cooking rituals. Not that I won`t take pictures again, but maybe I need to take a break for a while.  And in the mean time, this is actually what I`ve been doing after works and during weekends. Here is me riding a 4-cylinder Honda CB400 at my driving/riding school, which I`d totally recommend to those of you who live in Sendai and are interested in getting driver`s license. I need to complete at least 17 hours of training sessions before taking the final test to get the license and I`m still like half-way from finishing everything.

Have I told you that I got my car driver`s license in summer? Well, if I haven`t, I did. Yaay! 
But, as buying a car for me seems to be a long term plan, a motorcycle would be a better option for me. I`m perfectly happy with my current 50-cc scooter, which is apparently not a "motorcycle" according to the motorist terms, except that it`s difficult not to exceed the 30 km/h speed limit for 50-cc vehicles when riding on a big road along with the faster cars and sometimes the bigger motorcycles too. That`s why I`m planning on upgrading my commuter to 250-cc motorcycles and for that I need a new driver`s license, again. Now here`s the tricky part for me. What I want is being able to ride a 250-cc motorcycle, but the system in Japan requires me to practice riding on a 400-cc motorcycle and get a license with that. I couldn`t find any better chart to explain the driver`s license categories in Japan, but I hope this Wikipedia link can help you understand what I`m saying.

This handsome Honda weighs about 200 kg. I, on the other hand, weigh one forth of that and I (and the instructors) have lost count on how many times I dropped the bike, especially on my first days of training. And I still sometimes do until now. Dropping the bike must sound awful to you, but believe me, trying to lift it up is the hardest part for me. The second hardest? Putting it on the center stand. I`m not sure whether it`s because my lack of muscle strength (and height maybe?) or my ability in excelling the technique. Anyway, if it wasn`t for its weight, I would ask Santa to bring me this CB400 for my Christmas present as I`m seriously in love with it.


Now here are some videos during my practice showing some parts of the motorcyle riding skills that are going to be scored during the test. Riding a motorcycle in a straight direction with fast speed is easy, even for me on this 200- kg bike. It is, however, super difficult to ride slowly and maneuver it in a zig-zag direction while keeping it balanced. You`ll see in the video that I need to work harder in improving my skills.

Cone weaves. 
I need to weave through a series yellow cones under 7 seconds. If I touch the cones or put my feet down during an actual test, the test will be terminated. 

Quick stop
Within a quite short distance, I need to speed up to 40 km/h and brake the bike so it stops before the second white line. I think my speed was still not enough, but my front tire passed the line. I`d definitely fail if this was a test.

Slow ride on a narrow track. 
I need to ride on this very narrow track and finish it at least within 7 seconds, which means speeding up is not an option no matter how tempting it seems.

Slow turns on multiple curves. 
I`ve got bruises and muscle pain from the fallings and bike droppings, but the part that made me utterly frustrated and literally sob is this one. Working on the throttle, clutching, back braking, turning, and counter-weighting simultaneously is what it takes to pass the curves without putting down my feet. Or worse, falling down. After tons of failures and two extra sessions only on this part, I`ve finally made some progress and I really really hope I won`t mess up during my test later.

I can go on and on when it comes to my motorcycling practice, but the bottom line is, riding is so fun! Riding also makes me sweat and it`s like 7 degrees C outside. Another bottom line: I would probably stick with anything less than 200 kg even if my future license allow me to ride the bigger ones. And speaking of future license, please wish me luck so I can pass the test before the snow falls hard.

Thanks for reading and I hope you enjoy preparing for the holiday season!

Tuesday, September 18, 2012

The summer end on Jozenji avenue

Hi folks, is summer already ending at your place? In Sendai, we are still having humid and scorching hot days, although lately the nights and early mornings have been bringing some cool air into our house. When I started to have the feeling that this summer seems to never end, I saw some stores has already hung up Halloween decorations and there`s where I realized that fall is coming!

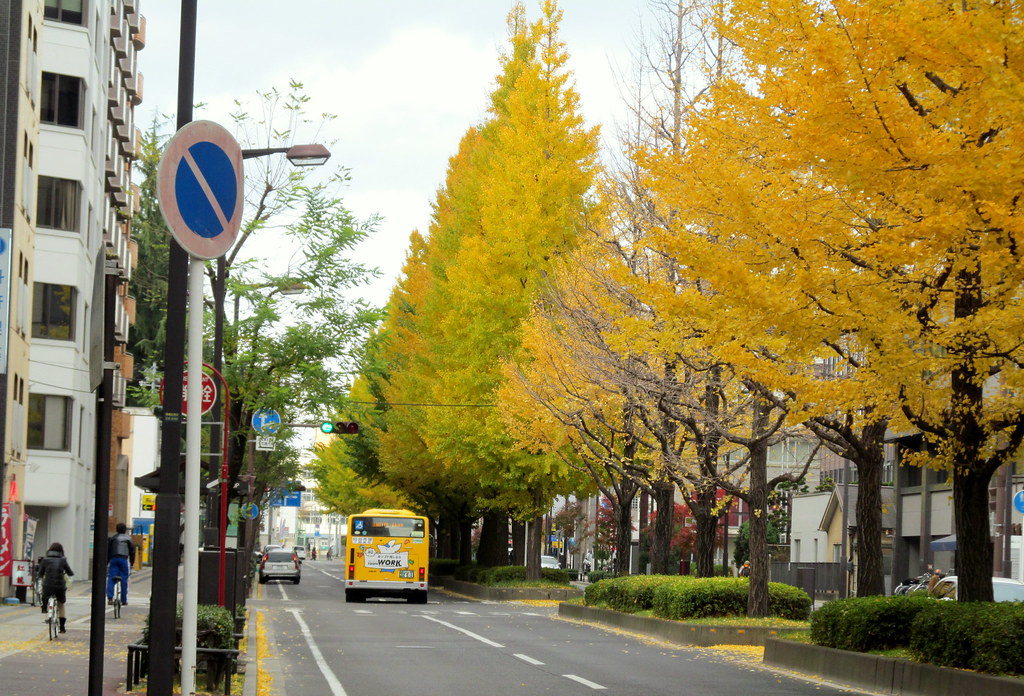
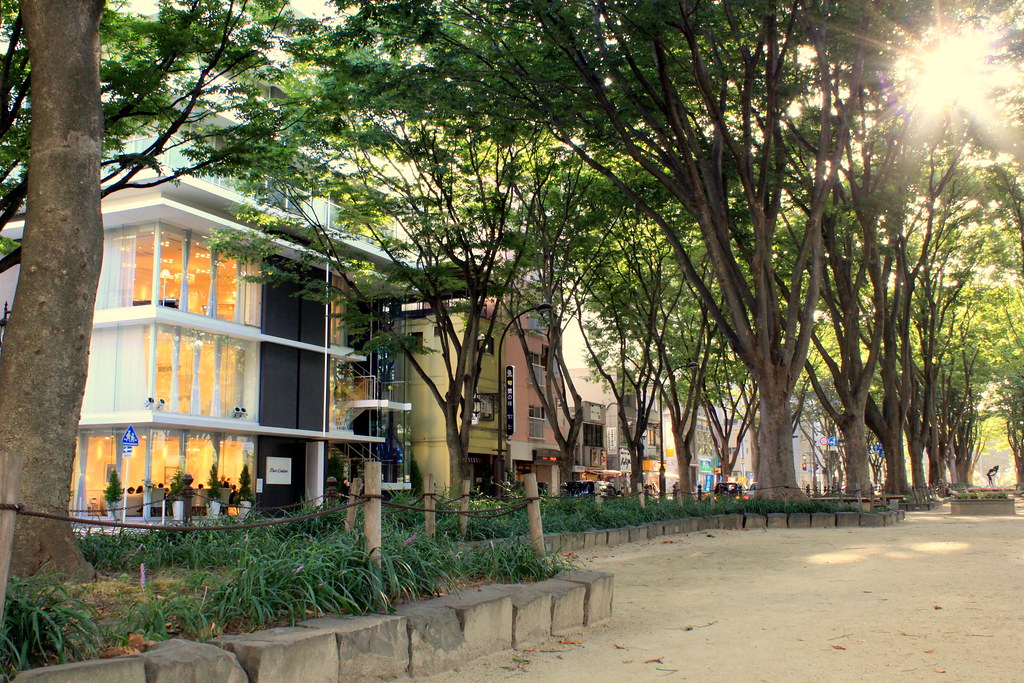
With the heat, the driving lessons, and tons of other excuses, I`m particularly looking forward for this fall and to getting back to cooking/baking since I seemed to be nowhere near my baking tools practically the whole summer and even my husband lost his appetite for baked goods.  Other than that, I just have to go outside to photograph the fall colors of Sendai before leaving to Shizuoka. For now, please let me share these views that I recorded on a windy but cozy afternoon on Jozenji avenue, one of Sendai`s landmarks where the street is lined with zelkova trees that provide shade and refreshing air in the summer heat. 


This green scenery actually transforms into another amazing view in winter because the leafless trees would be decorated with hundreds of lights that are lit during snowy nights in December. This too is definitely in my to-photograph list, but in the mean time, you can take a peek to see how magical they are through my husband`s Flickr page.

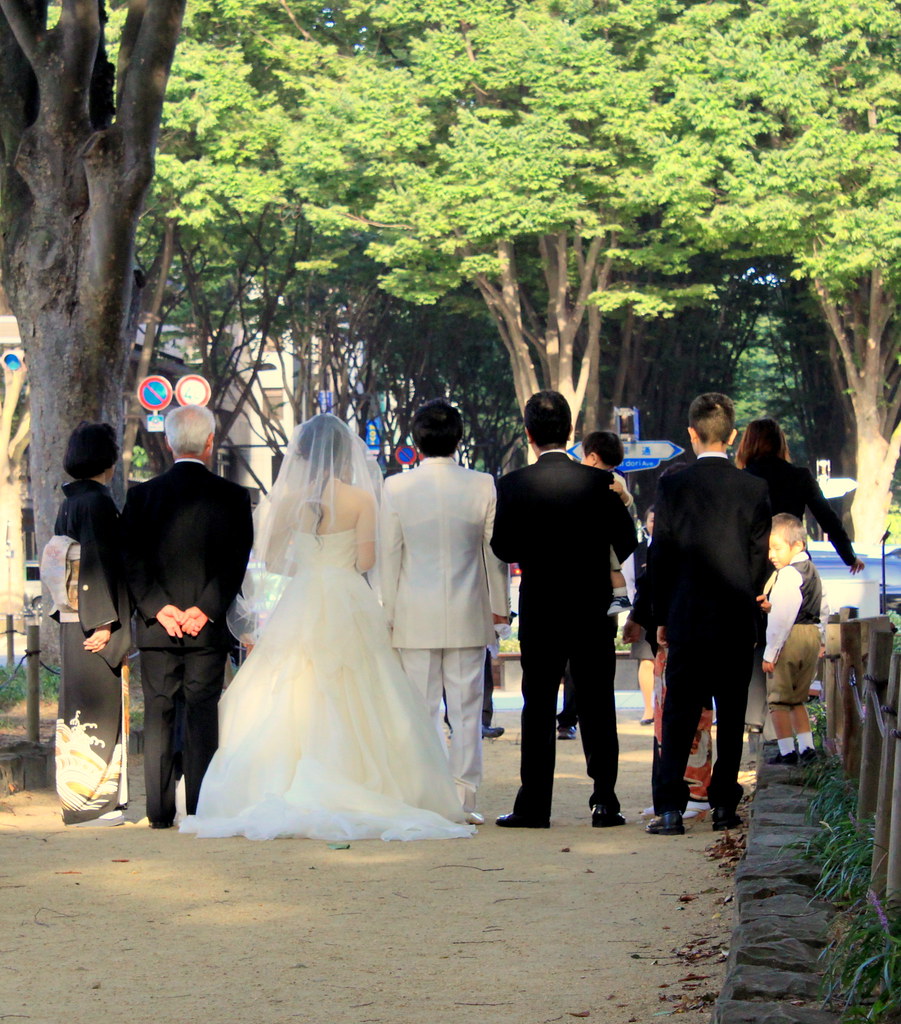
Now back to present time, which is summer, don`t you want to get married and kiss your husband under those trees? And if you do, apparently you`re not alone. Like this couple, who happened to came and have their photographs taken near where my husband and I sat.
Congratulations to the newly wedded couple!


A beautiful afternoon with beautiful shady trees and a beautiful bride. 
I must have been very lucky to be there that day.


I feel like I had not appreciated Sendai`s beauty as much as I should have been before and now I wish I could bring all these places with me when I leave.

Anyway, have a lovely day and hope to see you again soon!

Tuesday, August 14, 2012

Stir-fried shrimp with lemongrass and an early announcement

Hello everyone! How are you doing there? I hope you all are well hydrated and having nutritious food to combat the heat.
On my side, I`m in the middle of my 5-day summer holiday, which will end tomorrow and I`ve been attending driving lessons right from the beginning of the holiday. I`ve always been happy and contented with my little scooter, but it seems like I have to get a car-driving license this year because..here comes the announcement:

My husband got a job in Shizuoka prefecture and we are going to move there next spring!

After all the years we`ve been spending in our beloved Sendai, we finally have to move to other city and Shizuoka now becomes the next stop in our journey. We`ve been checking out about  life in Shizuoka and looking for possible areas to live in. Although currently I`m still trying to land a job there, living in Shizuoka seems to require us to commute on a car regardless of where I will end up working. So, here I am, dealing with my fear and confusion in car driving and hoping to get the license as soon as I can. 

Now on the kitchen side, I just made this very aromatic shrimp dish, which was really quick to make, and I hope you`ll give it a try and enjoy it as much as I do.

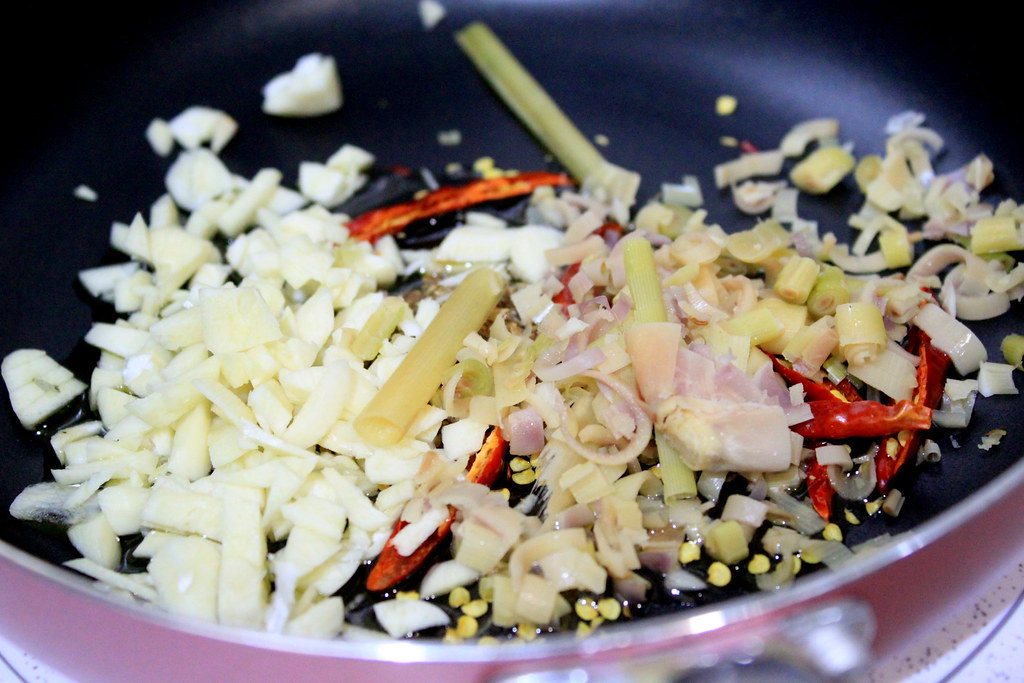
Heat oil on a pan and add finely (or roughly) chopped lemongrass stalk (I left some of the stalk as is for visual purpose) and garlic, chili, and coriander.
I used to throw away the lemongrass stalk after finishing the dish, which was a shame as it`s actually edible especially for the inner white-color flesh at the bottom. Now I see it as a fibrous food and I usually finely chop it up and eat the whole part.

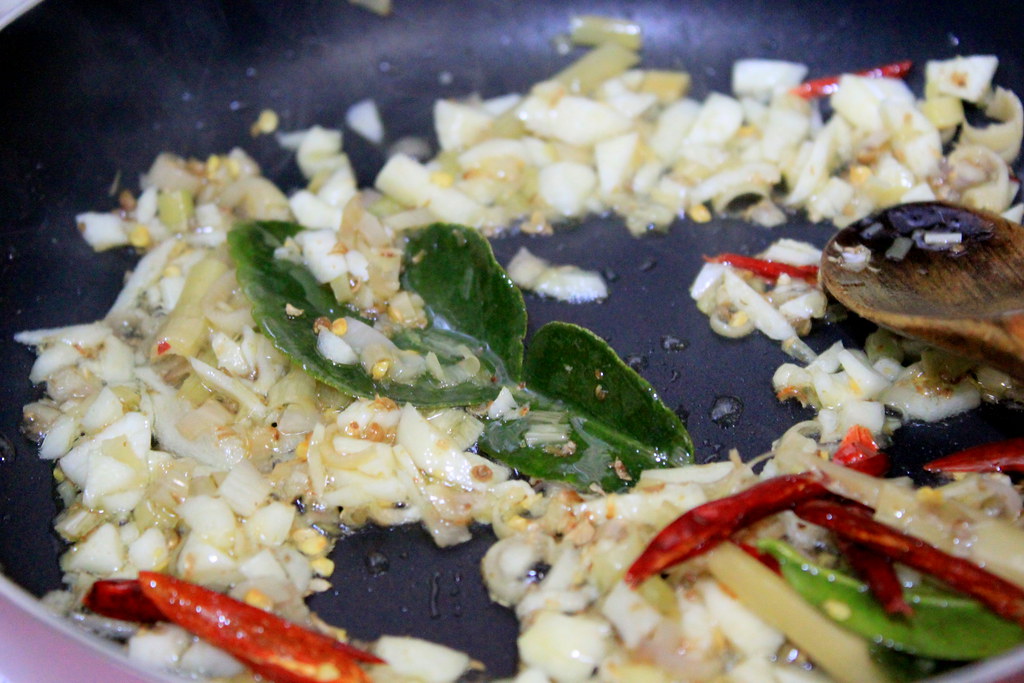
And by all means, add kaffir lime leaves too because they marry beautifully with the lemongrass.

Cook until the warm lemony fragrance filling up your whole kitchen.

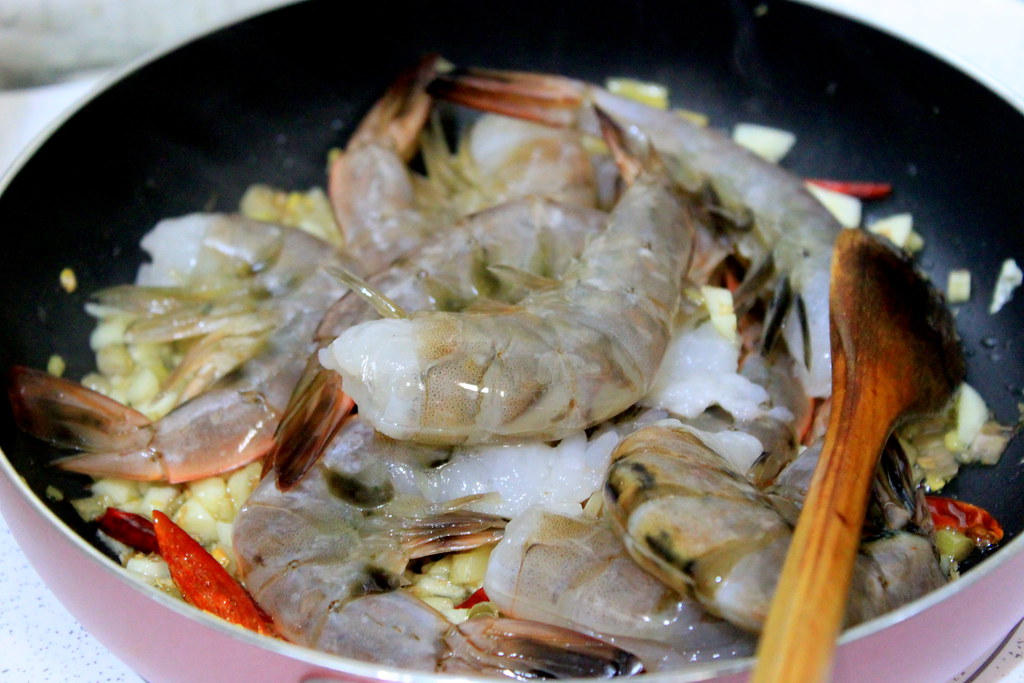
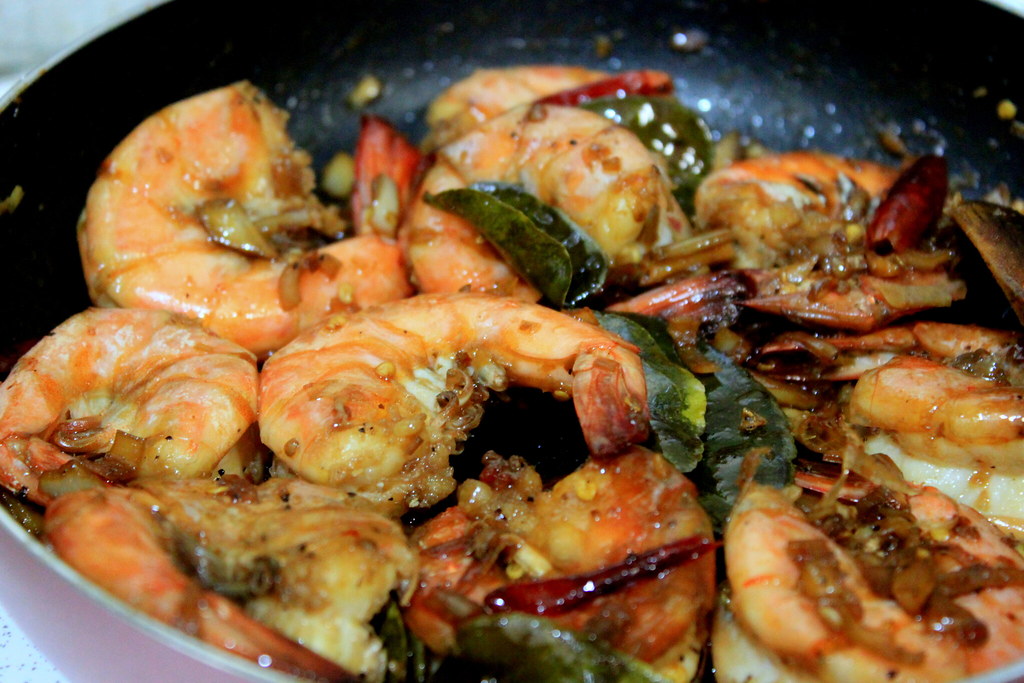
Now stir in deveined shrimps (I like them with the shells on) and cook until they start turning color.

Season with soy sauce, honey, salt, and pepper.

Adding honey works very well in giving the balance to the savoriness as well as adding nice glossy touch.

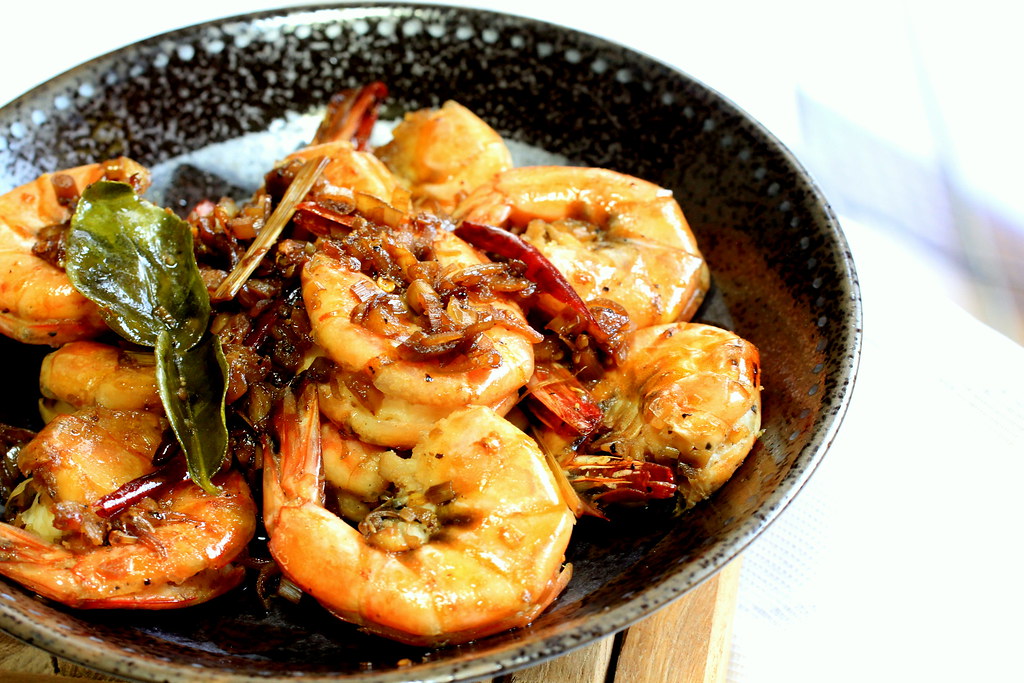
And that`s it!
Now you have a plate full of plump and juicy shrimps coated with the aromatic lemongrass and garlic bits, which are finger-licking good and perfect for the scorching hot days.
Enjoy!
STIR-FRIED SHRIMPS WITH LEMONGRASS
Serves 2

Ingredients:
10 medium-large shrimps, deveined
1 lemongrass stalk
4 cloves garlic
1 tsp coriander
3 chili
4 kaffir lime leaves
3 Tbs soy sauce
1 Tbs honey
Salt
Pepper

Method:
1.  Heat oil on a pan and add finely chopped lemongrass stalk and garlic, kaffir lime leaves, chili, and coriander.
2.  Stir in deveined shrimps and cook until they start turning color.
3.  Season with soy sauce, honey, salt, and pepper.

Wednesday, August 1, 2012

Vegetable rolls

It has been incredibly hot these days and I even have lost my appetite and gotten sick because of it during last week. I used to (shamelessly) boast to everyone here about my tropical nature that makes me almost heat-resistant and prevents me from getting the commonly known "natsu bate" in Japanese, or in my understanding, "summer sickness". And boy, this time, I was wrong. Very very wrong. It all started with me loosing appetite and not eating enough, continued with frequent dizziness, stomach aches, and fatigue, and ended with laying on my bed for two days realizing that after all these years, the heat finally beat  me. What healed me? A bowl of super fiery spicy hot chicken curry. I don`t know if that was because I finally got hungry at that point or the soup really brought back my appetite, but the bottom line is I got well very soon after the soup treatment. I really don`t know what I will do without chili and ginger in my kitchen.
Now, with my appetite fully functioning, I finally have something fun and colorful to share with you. This is actually only my second time making Thai-style vegetable rolls, or third time if preparing the make-yourself rolls at a Thai buffet restaurant counts, but I think I really should make them more often. 

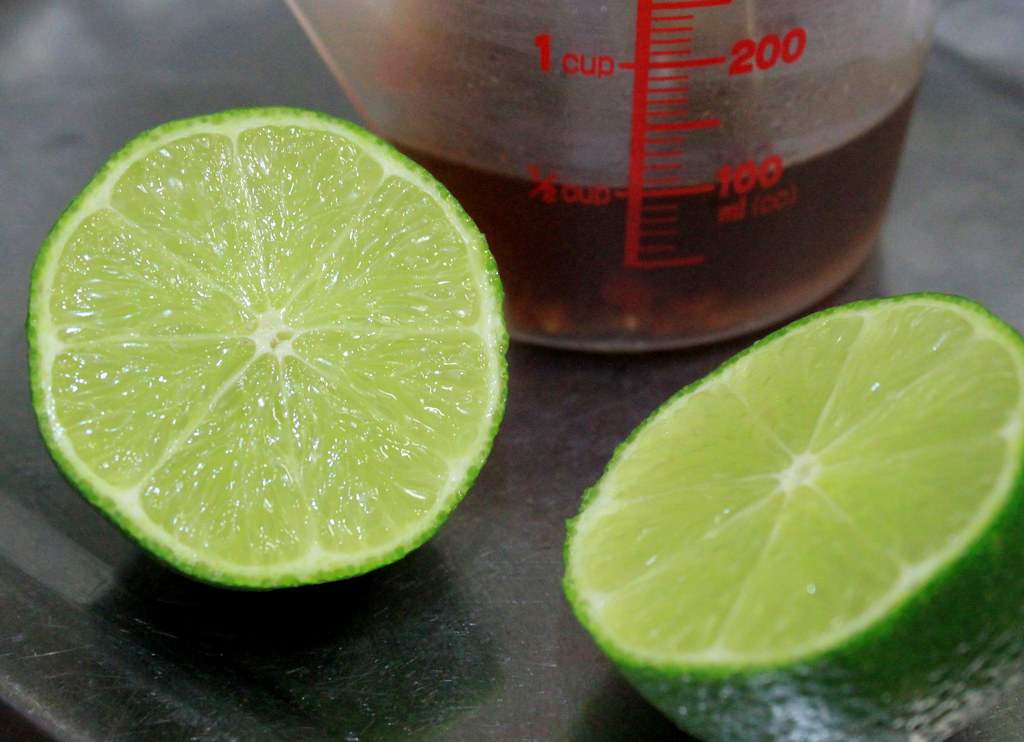
Start with making the sauce. For this kind of rolls, I want the sauce to be light, sweet, savory, slightly spicy, and tangy. You can use your favorite sauces or condiments, but I used my leftover tsuyu or light soy sauce infused with dashi. Tsuyu is usually served with cold noodles like soba or somen, but I think it has a light sweet savory taste that should go well with the rolls. For the heat, I add Sichuan-style chili sauce or tobanjan.  I also add lime juice to give some refreshing tartness.
Stir everything well and keep the sauce in the refrigerator.

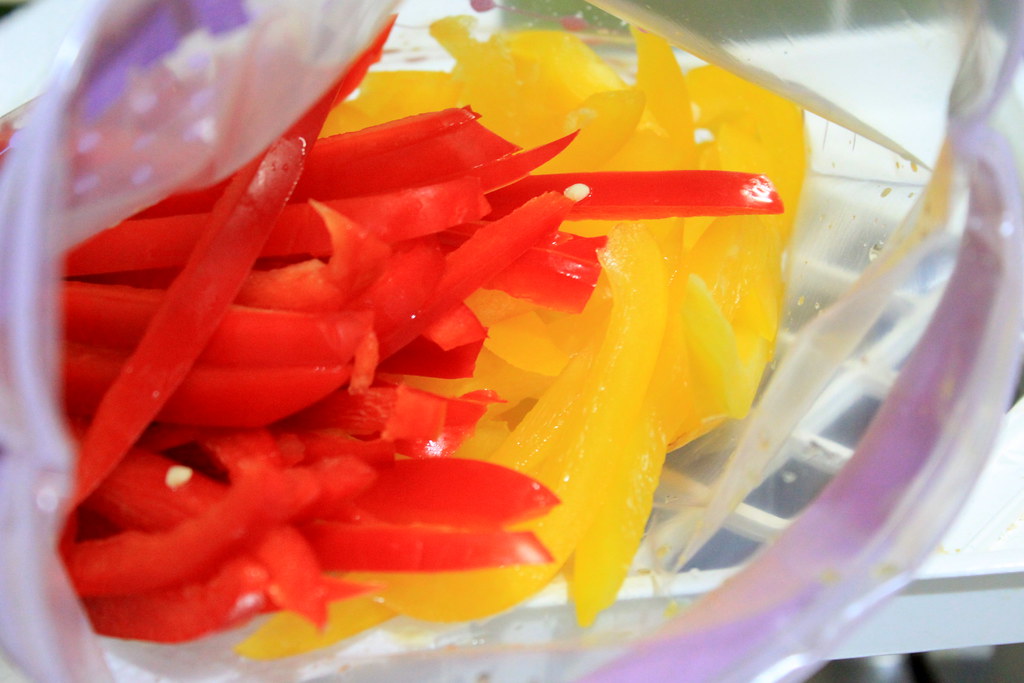
I chose the all-plant option for the filling, so I used julienne bell peppers, carrots, and cucumbers. It is common to include shrimps for the rolls, but I think meat should be great too.
My baby veggies. Look at these colors. 

And these.

And these too.
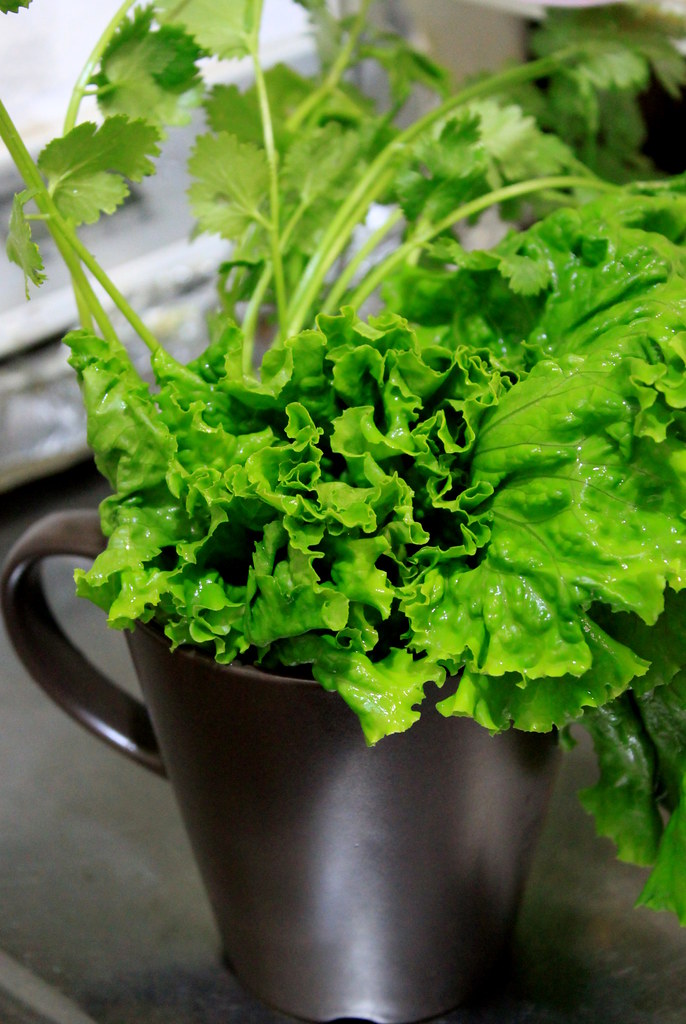
What you don`t need to julienne are lettuce leaves and cilantro. I really love the lemony note from the cilantro. If you haven`t tried using it for making the rolls, then you should. Really.

 
After all the vegetables are prepared, immerse a sheet of rice paper in lukewarm water for a minute or until it has slightly softened (or follow the instruction on the pack). Overdoing this will make the paper too soft and very easy to get torn. But really, this is not about perfection (obviously, this is me talking), so a few holes here and there should not be problems as long as you can use it to wrap the veggies.

Spread the softened sheet on a chopping board or counter and arrange vegetables on it. I placed them on the middle, but slightly closer toward me. Also, I arranged some part of the veggies so that they came out from both ends.

Start rolling away while carefully wrapping the veggies as tight as possible and secure the edge by sealing the sheet with water.

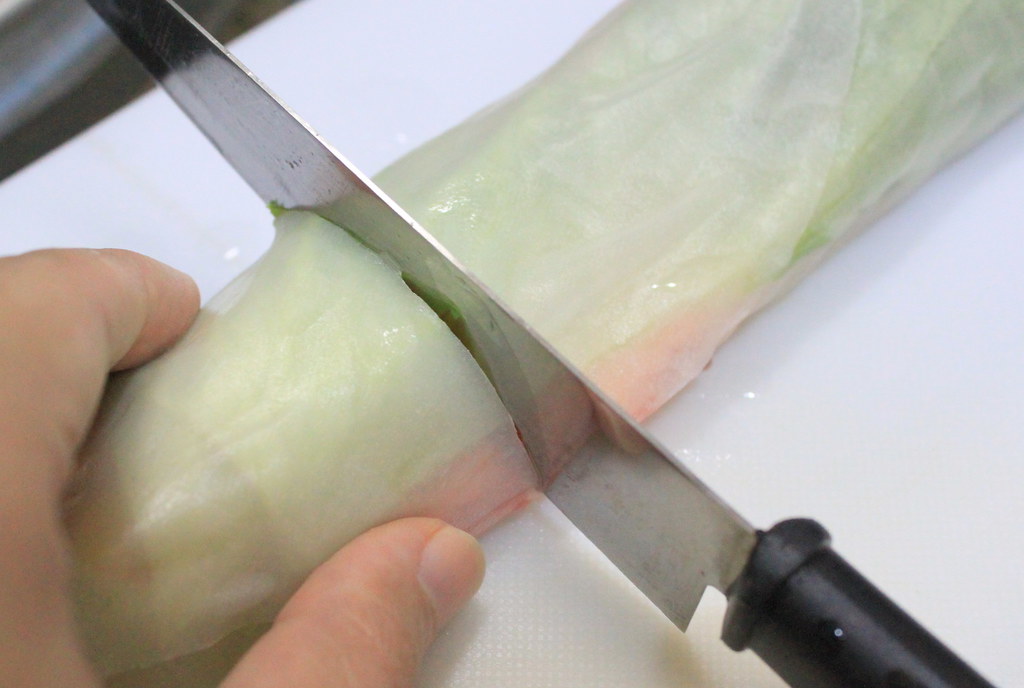
Wet the blade of your knife with water and cut the roll to your preferred size. 

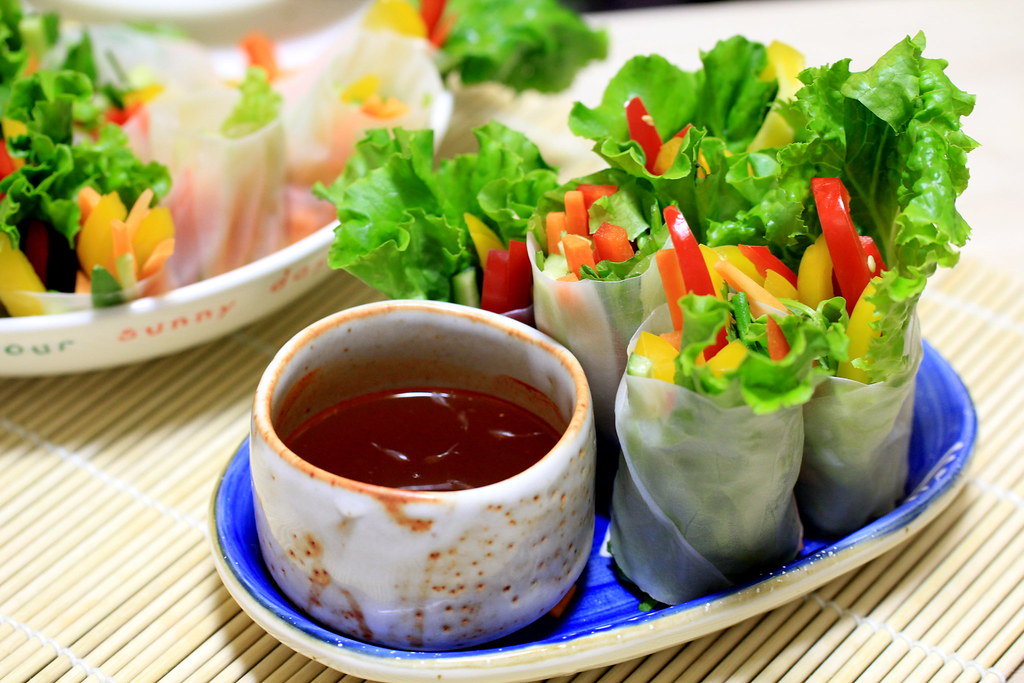
Arrange the rolls on a plate and serve with the chilled sauce.
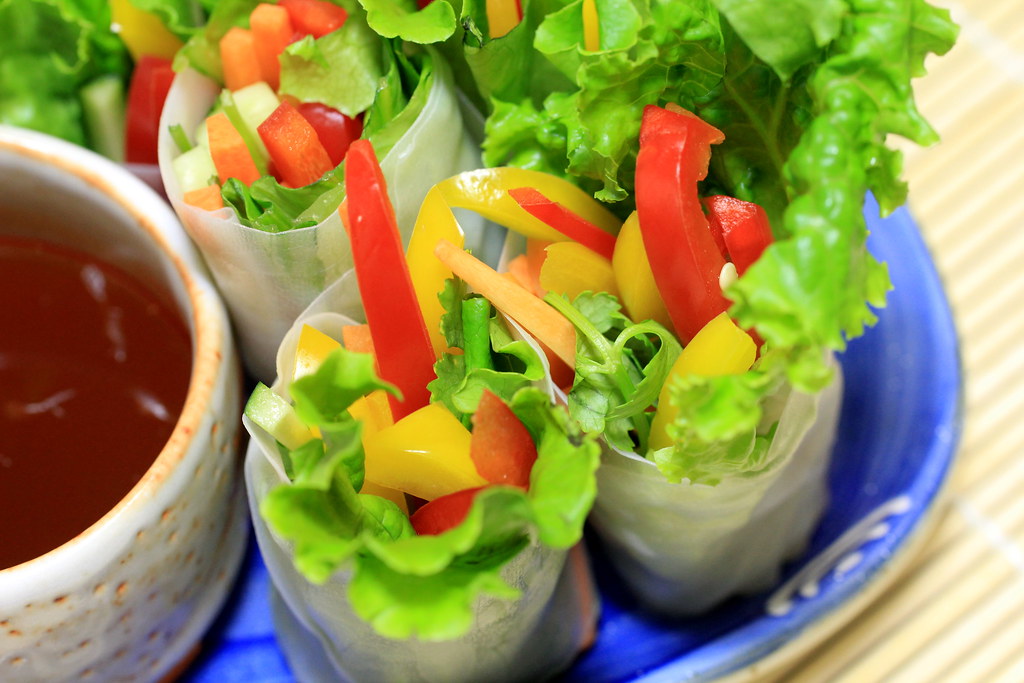
What I have here is a plate of the successfully made rolls (or at least I think so) and another one of random-looking rolls. Both looks clearly didn`t bother me and my husband (thank you, sweetie) because we just kept eating and eating. 
Now, my friends, dip the rolls in the sauce and enjoy the crunch and yum moments!

VEGETABLE ROLLS
Serves 2-3 people 

Ingredients:
1 red bell pepper
1 yellow bell pepper
3 carrots
2 cucumbers
5-7 lettuce leaves
Cilantro

For the sauce:
100 ml tsuyu (light soy sauce with dashi for cold soba or somen)
1 tsp chili paste
1 tsp lime juice

Method:
1. Prepare the sauce by combining the tsuyu, chili paste, and lime juice. Keep in refrigerator until serving.
2. Julienne all vegetables, except the lettuce leaves and cilantro, and set them aside.
3. Wet the rice paper in lukewarm water until slightly softened and carefully spread it on a chopping board or clean counter.
4. Arrange the vegetables horizontally on the paper with some parts of the vegetables coming out from both ends.
5. Start rolling away and seal the edge with water.
6. Cut the rolls to the desired size and serve with the chilled sauce.

Saturday, July 7, 2012

Horse mackerel with tomato and jalapeno pepper

Before I forget, I`d like to inform my non-blogger and/or non-Gmail user readers who told me that they have difficulties in putting comments on my blog. If you`re one of them, don`t worry. To leave a comment, you don`t need to have a blog, or a Gmail account, or any account whatsoever. If you don`t find the comment form, that probably because you`re on the Home page, not on the post page. So, all you have to do is click the title of the post on top of the post or x comment(s) at the bottom of the post. Clicking them will bring you to a single-post page. Keep scrolling down and you`ll find a comment form at the end of the page. I`d really appreciate if you can leave your name (real name, nick name, initials, but preferably not anonymous) because it`ll be easier for me to refer you in my reply later. I`m pasting this info to my About page now right on top on how to follow my blog. If you`re new to this blog, you might want to start from there first.
Hope this helps and I can`t wait to hear from you!

Now let`s have our food talk.
It`s been a while since I posted fish recipes, so today I`d like to share one using horse mackerel or "aji" in Japanese. I usually buy the ready-to-use butterflied aji, which is very easy to find at our nearby stores, because handling fish from scratch still won`t budge from my to-avoid list.
Anyway, since this dish was for our Saturday`s brunch where I wasn`t even sure if I was fully awake when I made it, it won`t take rocket science to whip it up within 30 min assuming that you use ready-to-use fish or fish fillet. After all, I know nothing about rocket, anyway. 

Here`s the fish where they are already cleaned and butterflied. But I rinsed them again and patted dry with kitchen paper.

Lightly dust the fish with corn starch to help it crisp up and hold its shape during frying later.

And by frying, I mean add a bit of olive oil on a frying pan over medium heat and put the starch-coated fish there.
I love hearing something sizzling on Saturday morning. Anytime before 12 is morning, right?

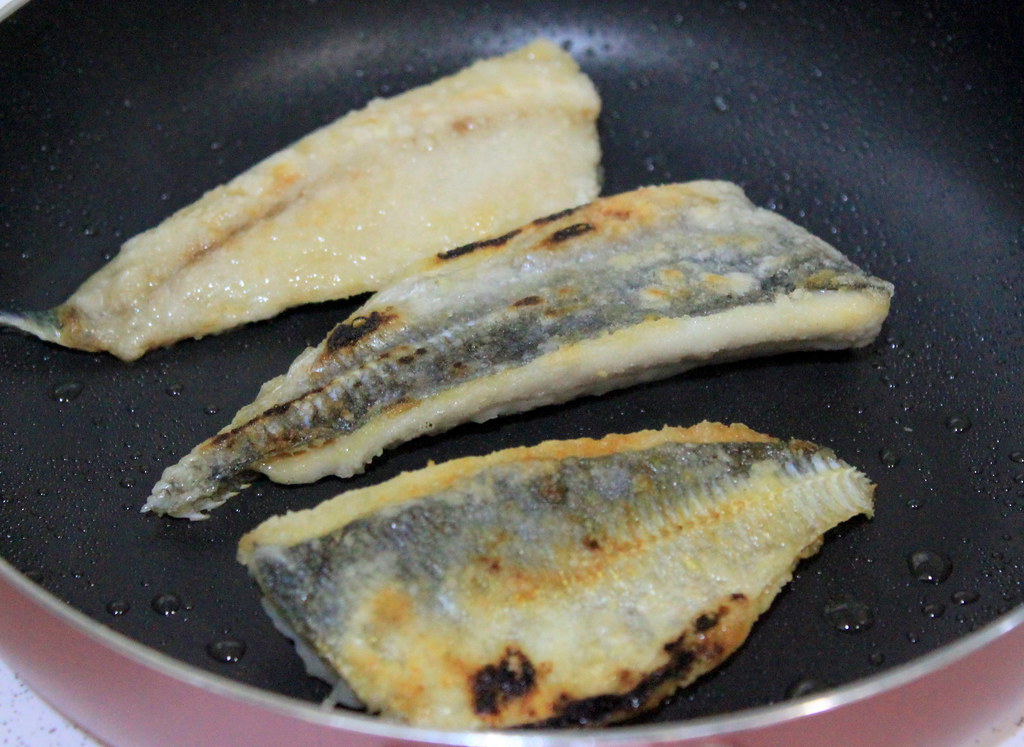
When the fish has turned white and curled in, set them aside on a plate. 
The chars were unintentional and I love how they made the grilly look on the fish.
I won`t blame you if you add salt to the fried fish and then..poof! They`re gone. It`s not your fault.

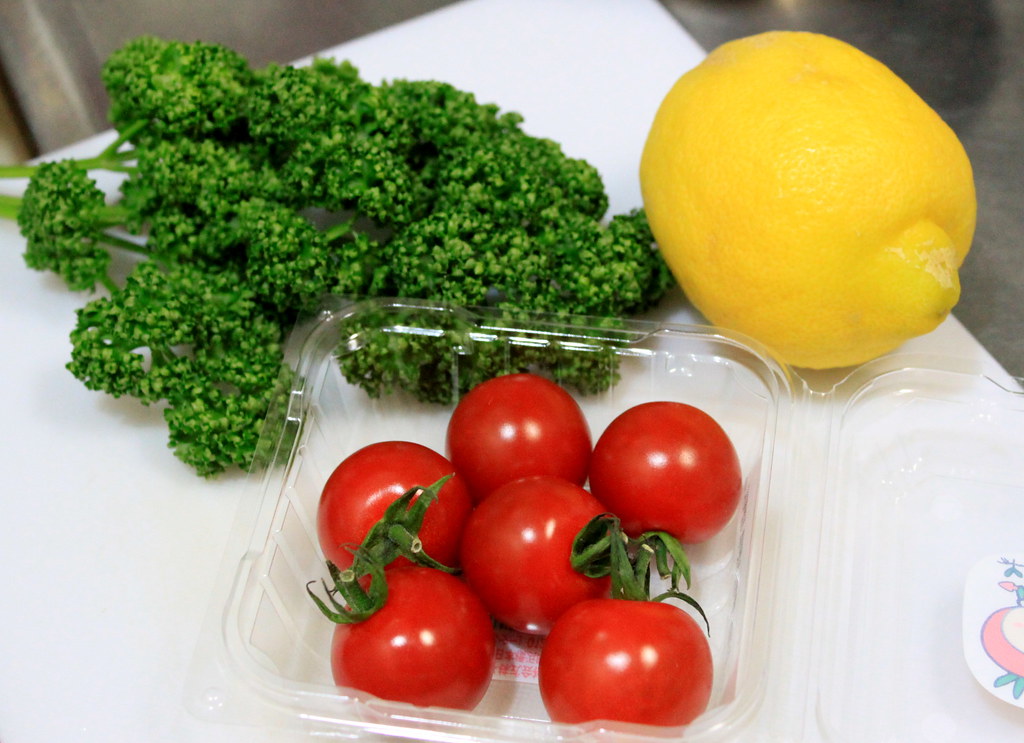
But if you can hold yourself a bit, here`s a little extra work Parsley, cherry tomatoes, and lemon.
Those colors are what my eyes need to open up. I feel healthy already just looking at them.

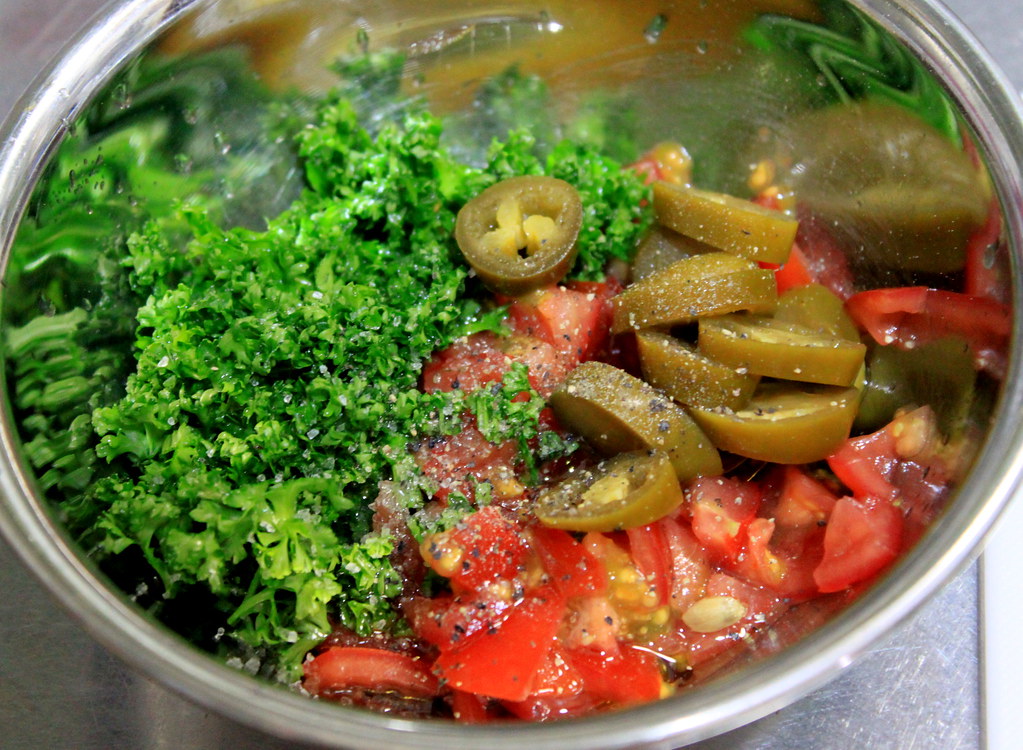
Chop up parsley and tomato, but leave a few whole tomatoes for serving later. Stir in olive oil and squeeze in lemon juice. Add the zest too if you want. Throw in sliced pickled jalapeno peppers and season with salt and black pepper.
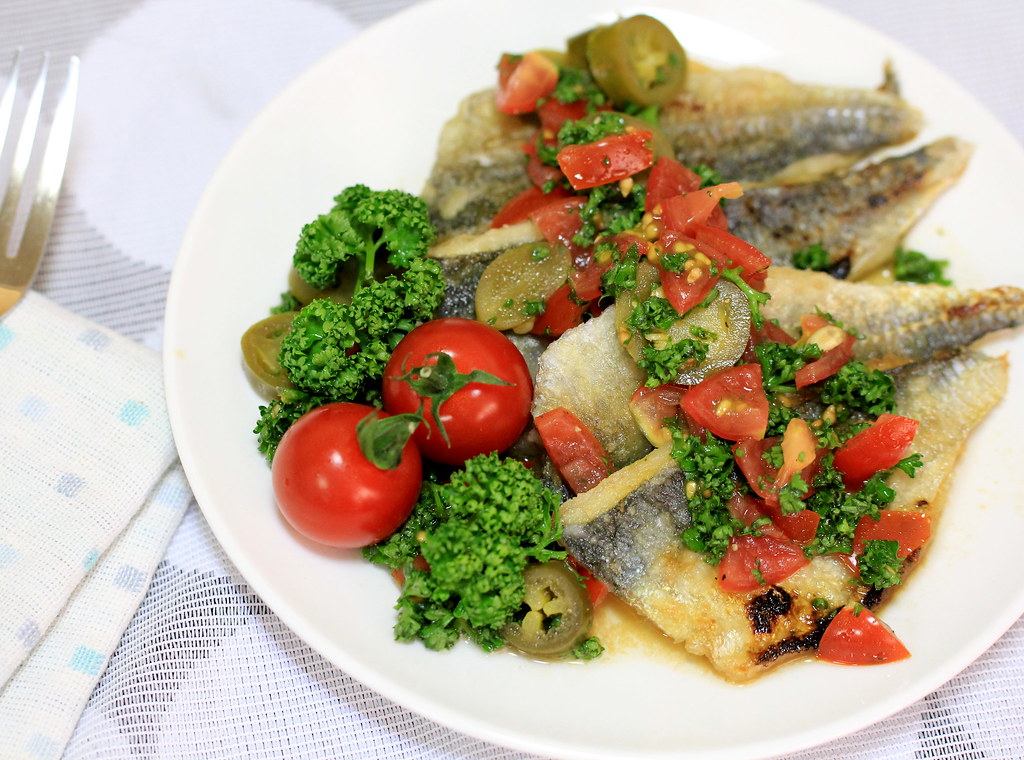
Stir everything to combine and adjust the seasoning to your liking. When you`re done, add it to the fried fish you prepared earlier.

The fish is crispy on the outside but still juicy inside and the addition of sweet-tangy-hot salsa will make you chew them up quicker and add more on your plate. My husband enjoyed this with a plate of rice, but I wish I had some baked potatoes that day. It seems like I have to recreate this soon!
HORSE MACKEREL WITH TOMATO AND JALAPENO PEPPER
Serves two persons

Ingredients:
4 horse mackerel, cleaned and butterflied
1-2 Tbs corn starch for dusting
1 cup chopped cherry tomatoes
2-3 whole cherry tomatoes
2 Tbs lemon juice
1 cup chopped parsley
3 Tbs sliced pickled jalapeno pepper
1 Tbs olive oil
Salt
Black pepper

Method:
1. Clean and butterfly horse mackerel. Lightly rinse and pat dry with kitchen paper.
2. Lightly dust the fish with corn starch.
3. Add a bit of olive oil on a frying pan over medium heat and fry the fish.
4. When the fish has turned white and curled in, set them aside on a plate. 
5. In a bowl, stir chopped parsley and tomato, olive oil, lemon juice (add the zest too if you want), and sliced jalapeno pepper. 
6. Season with salt and black pepper. 
7. Serve the fish with the tomato and jalapeno salsa. 

Wednesday, July 4, 2012

Tokyo Banana Tree

It`s late now, but my eyes are still wide opened and I`m too awake to be sleepy. So, I guess I`d better use my energy to post something here because I happen to have something unusual to show you. One thing got my full attention when I came to Japanese stores was the vast options of baked goods and food specialties that are meant for souvenirs. But what impressed me most was the visual presentation. The food itself looks already delightful on its own, but the packing brings it to a higher level in aesthetic department. It`s obvious that in Japanese culture, you enjoy the food with your eyes before you actually eat it. And when we want to bring them as souvenirs or presents, the visual gorgeousness surely add up the whole happiness for both sides. Although environmentally speaking I`m not too keen on the individual packaging, especially for the bite-sized cakes or cookies, sometimes I think it comes in handy under some circumstances.

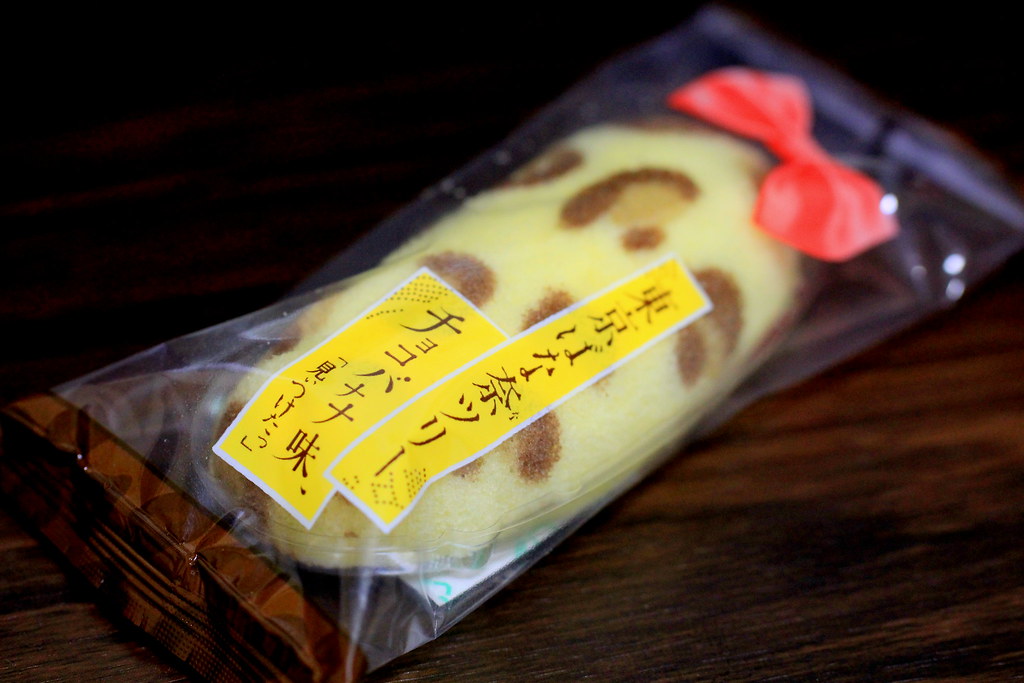
So, the coffee table in our laboratory is often filled with some food specialties brought as souvenirs (called "omiyage or お土産" in Japanese). As usual, they`re usually pretty and neat. But this one was very interesting that once I saw it, I brought one home because I knew I just had to take some pictures of it.
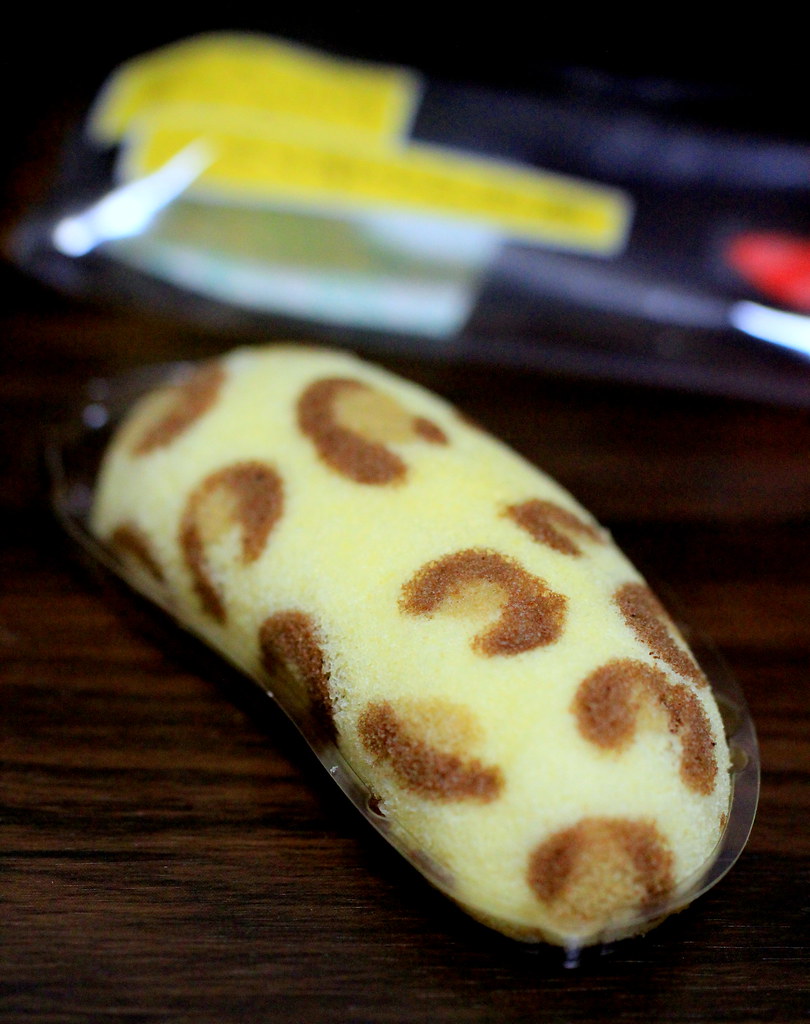
If you come to Japan, chance is you`d hear about Tokyo Banana and you`d probably won`t leave Japan without bring some home with you. Alright, I`m a little exaggerating here, but the point is, it`s super famous. It`s actually a banana-shaped banana sponge cake with bananaey custard filling. But recently, with the opening of Tokyo`s SkyTree, the Tokyo Banana maker released Tokyo Banana Tree with Choco Banana custard filling...with leopard printing on the cake!

I`m definitely not into leopardy stuff (because honestly, I`m so much more into cows!) and I really have no idea how the leopard connects with the banana or cake. If you have some info on it, please share with us here because I`m so intrigued right now.

Is this art giving you some new ideas for your next kitchen projects already?

Done with the outside. Now the inside.
The thick custard had a quite strong accent of banana, although I wish the chocolate flavor stood out more. But generally, you won`t disappoint anyone with presents like this :)

Now I`m getting hungry and I think I want to grab a banana (the fruit, not the cake) before going to bed.
Nite nite!

Tuesday, June 26, 2012

Green tea and chocolate soy ice cream

This Sunday I`m going to take an exam for Japanese language proficiency and I`m supposed to meditate s-t-u-d-y, like right now. I was studying, but then my husband offered me to have a cup of ice cream I made this weekend (again!) and just like that, I`m now much more interested in sharing about it with you.So, it will be his fault if I end up abandoning my textbooks tonight.

Ice cream talk now. I`ve been wondering why I can`t find ice cream made of soy milk here in spite of the various products of plain soy milk or the flavored ones. I`ve learned that when the food I want is not available at the stores, or is not affordable for me, that means either I just forget about it or make it myself. Obviously, with my new toy in the kitchen, I did the latter one. Another reason why I make my own ice creams is I can adjust, aka. reduce the sweetness. I don`t actually often buy ice creams (or the popular Japanese soft cream) because I always find they`re too sweet for me. If you follow my recipe here and find that it`s not sweet enough for you, feel free to adjust the sweetness.
Just for a reminder, in making ice creams, I still don`t cook/heat anything and I don`t add eggs. 

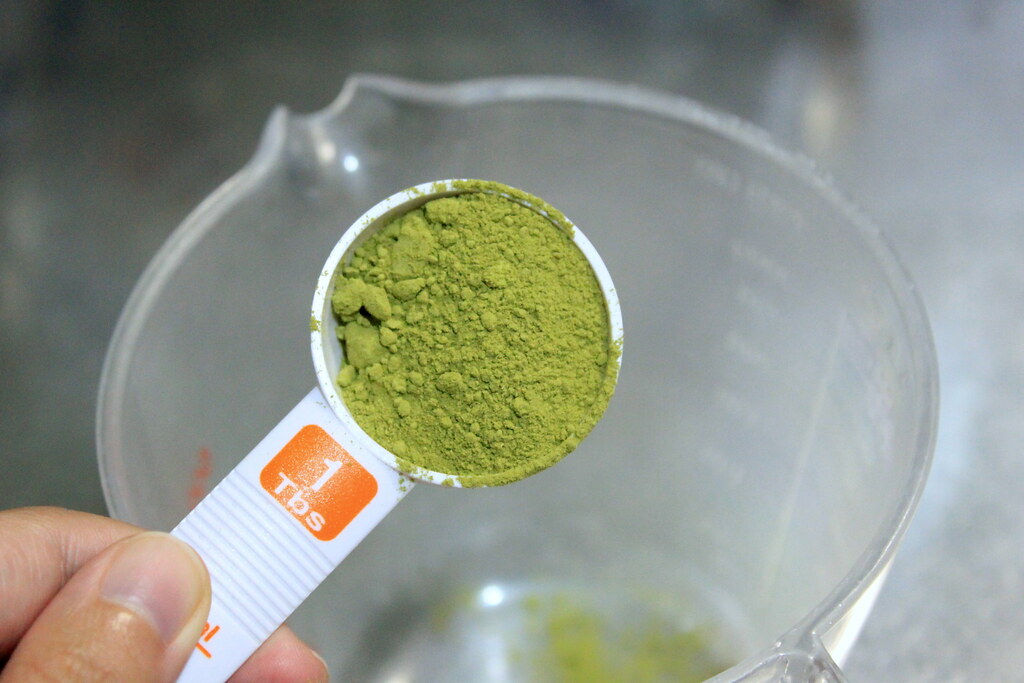
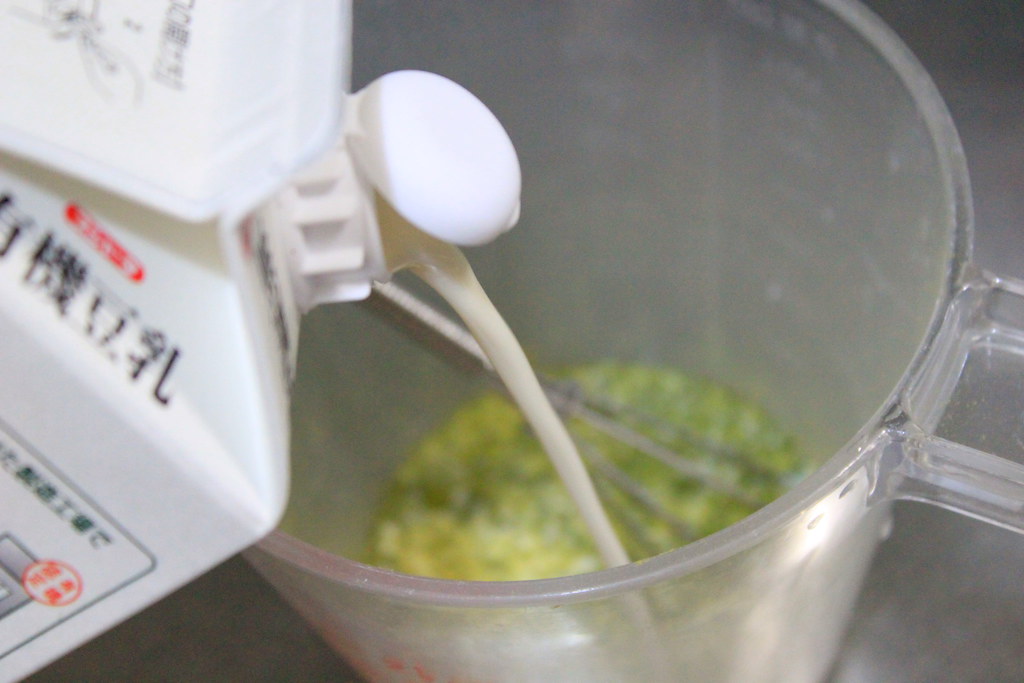
Start with dissolving the matcha (green tea) powder with soy milk gradually in a container. 

The mixture will be frothy at first, but that`s alright.

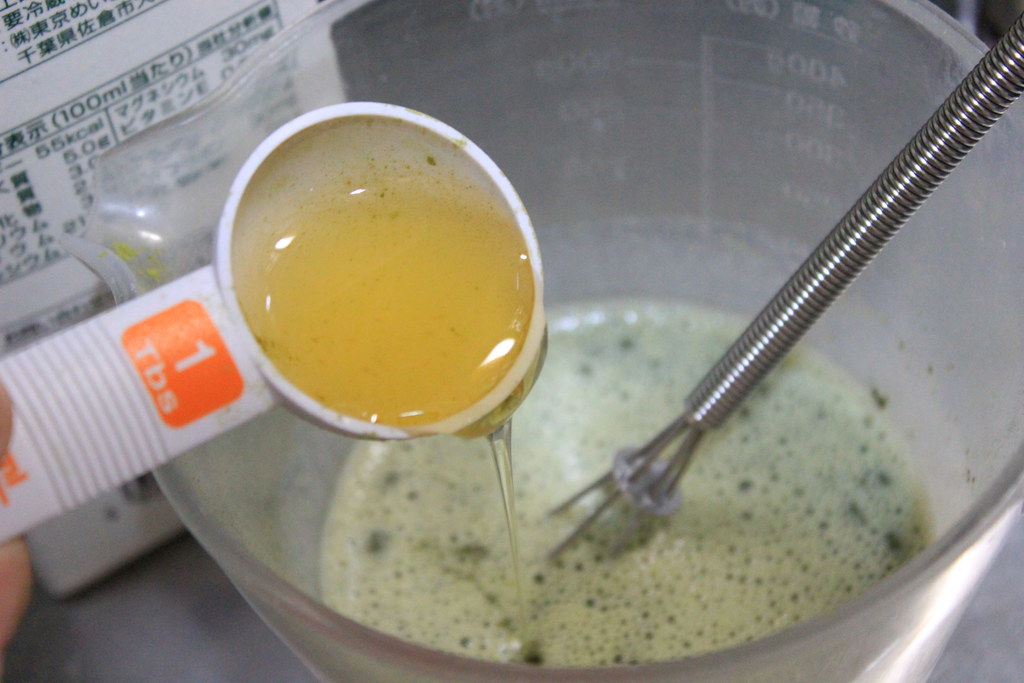
While dissolving the matcha powder, stir honey or sugar in.
Add the remaining soy milk and pour the whole mixture to a different container while pushing it with the back of a spoon through a sieve repeatedly until no lumps are visible.
Taste it, stir in more honey or sugar if necessary, and add a pinch of salt.  When you`re done, chill the mixture in the refrigerator 2-3 hours.

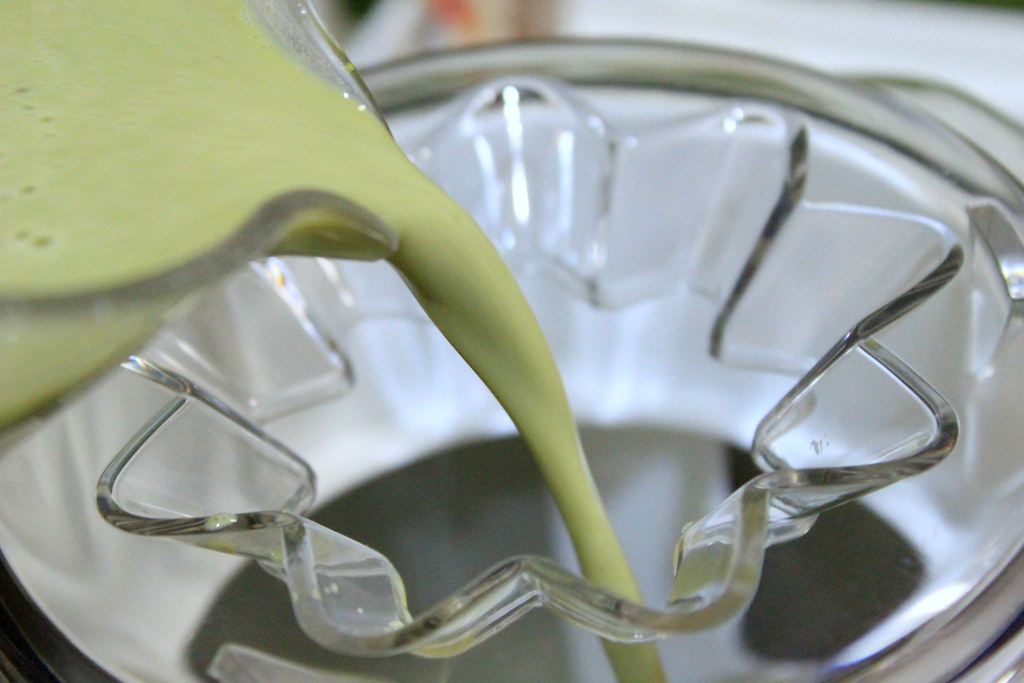
After the mixture is chilled enough, start churning it in an ice cream maker. 

..until it has turned thick.
Transfer the ice cream to a container and keep it in freezer for 2-3 hours.

Shouldn`t I be studying now?I can feel the books staring at me. Ugh.

Alright, to shorten this post, this is the chocolate soy ice cream that I made the next day. The method is pretty much the same, only this time I used cocoa powder.

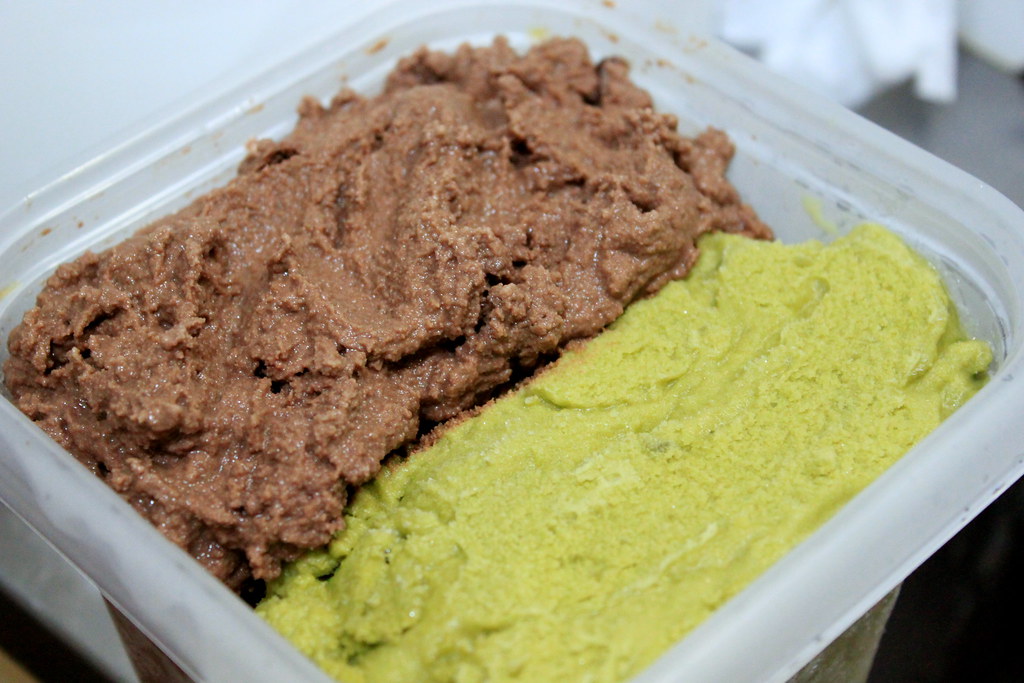
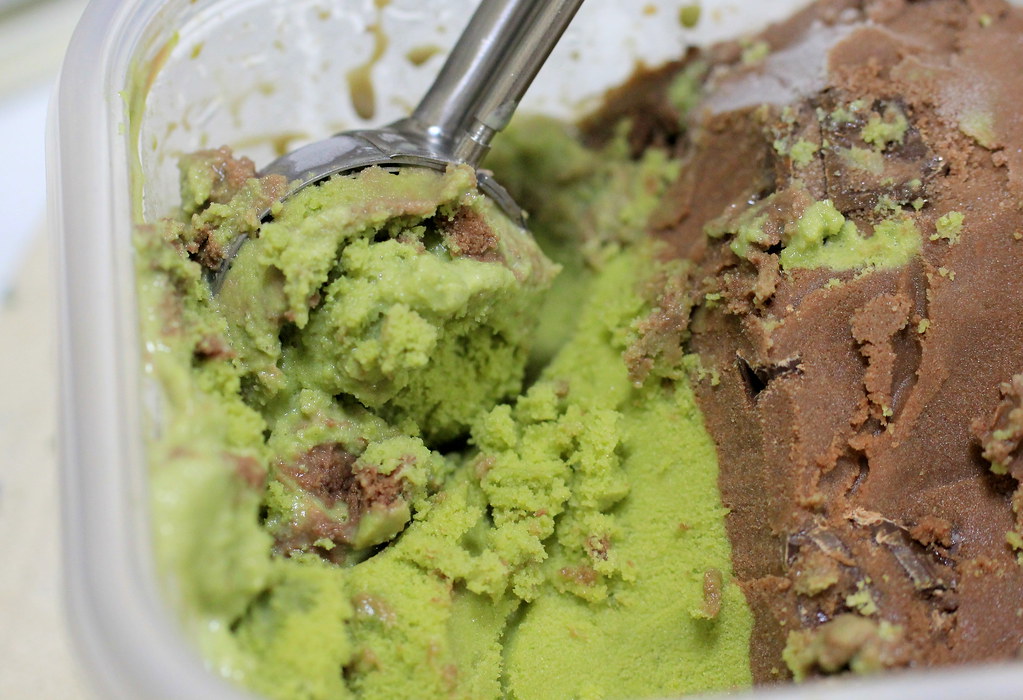
This is how I kept the ice creams in one container.

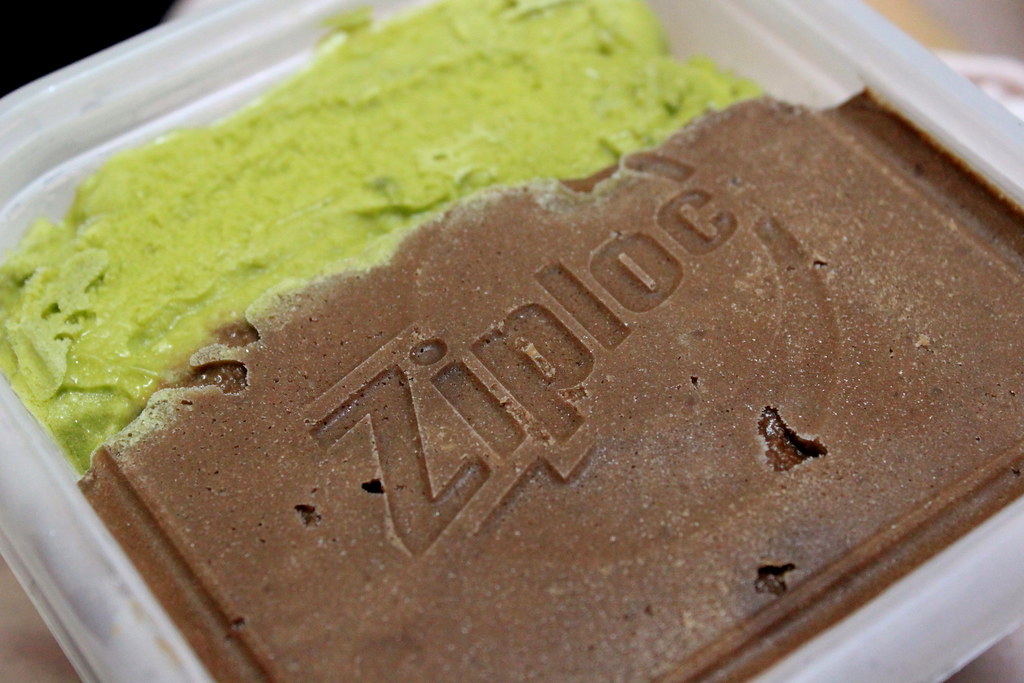
 And I didn`t do this on purpose.

Scooping time! 
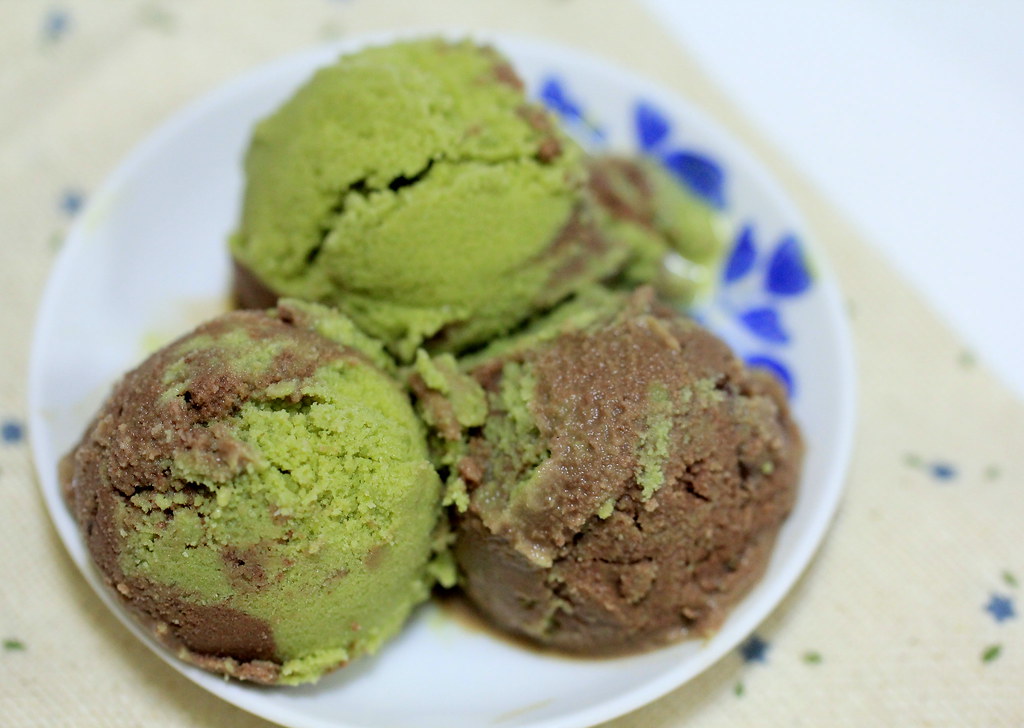
I`m sorry for showing you this green-brown messiness, but in my defense, the messiness is my signature.

Creaminess-wise, this soy ice cream is somewhere between sorbets and dairy cream-based ice creams. Much lighter than the regular ice creams, but still "creamier" compared to sorbets. It has a soft crunchy texture that might bring sorbets to mind, but the milkiness of the soy ice cream might make the difference.
I remember how I can feel the sweet stickiness remaining in my mouth when I eat the regular ice cream, which I don`t find in this soy ice cream. It melts and it`s gone very quickly. I don`t know if this is good or bad, but if you`re looking for a lighter version of ice cream like me, then this one is probably for you.
Enjoy!
MATCHA (GREEN TEA) SOY ICE CREAM
Makes about 500 ml

Ingredients:
1 1/2 Tbs matcha (green tea) powder
450 ml plain soy milk
4 Tbs honey
A pinch of salt

CHOCOLATE SOY ICE CREAM
Makes about 500 ml

Ingredients:
3 Tbs cocoa powder
450 ml plain soy milk
6 Tbs honey
A pinch of salt

Method:
1. Dissolve matcha or cocoa powder and honey gradually with soy milk in separate containers.
2. Pour the mixture through a sieve repeatedly until no lumps are visible.
3. Add a pinch of salt, stir a bit, and chill in the refrigerator for 2-3 hours.
4. Churn all the ingredients in an ice cream maker according to the manual for 30 minutes or until the mixture has thickened up.
5. Transfer the ice cream to a freezing container and keep it in the freezer for another 2-3 hours before serving.
Note: If using only one freezer bowl, make the ice cream one flavor a day.