Tuesday, June 26, 2012

Green tea and chocolate soy ice cream

This Sunday I`m going to take an exam for Japanese language proficiency and I`m supposed to meditate s-t-u-d-y, like right now. I was studying, but then my husband offered me to have a cup of ice cream I made this weekend (again!) and just like that, I`m now much more interested in sharing about it with you.So, it will be his fault if I end up abandoning my textbooks tonight.

Ice cream talk now. I`ve been wondering why I can`t find ice cream made of soy milk here in spite of the various products of plain soy milk or the flavored ones. I`ve learned that when the food I want is not available at the stores, or is not affordable for me, that means either I just forget about it or make it myself. Obviously, with my new toy in the kitchen, I did the latter one. Another reason why I make my own ice creams is I can adjust, aka. reduce the sweetness. I don`t actually often buy ice creams (or the popular Japanese soft cream) because I always find they`re too sweet for me. If you follow my recipe here and find that it`s not sweet enough for you, feel free to adjust the sweetness.
Just for a reminder, in making ice creams, I still don`t cook/heat anything and I don`t add eggs. 

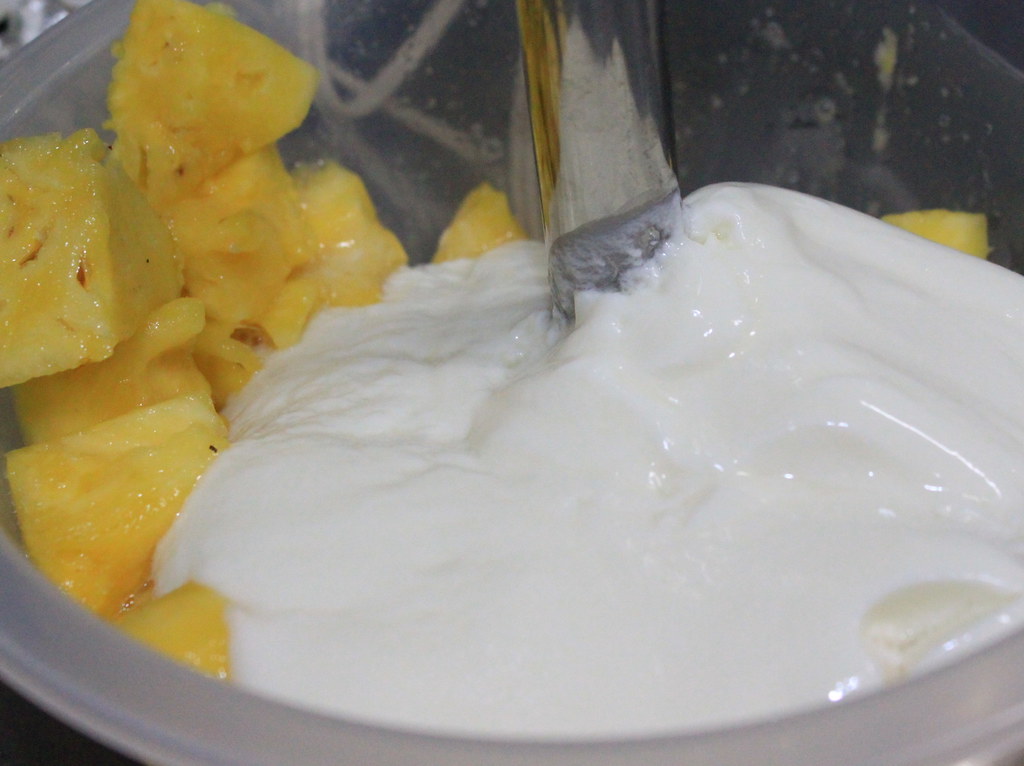
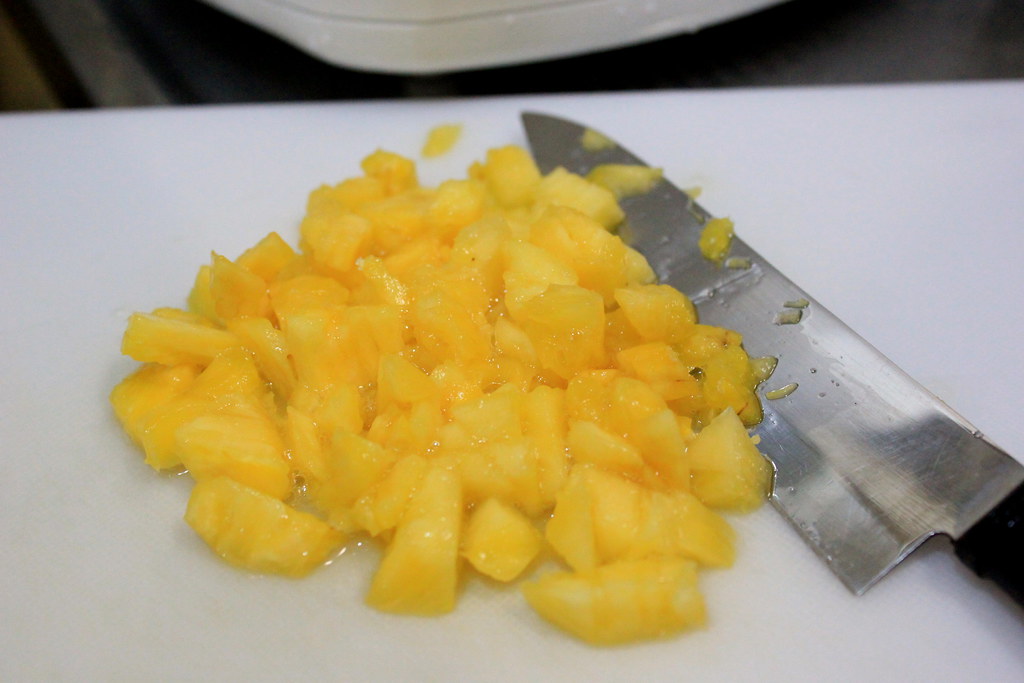
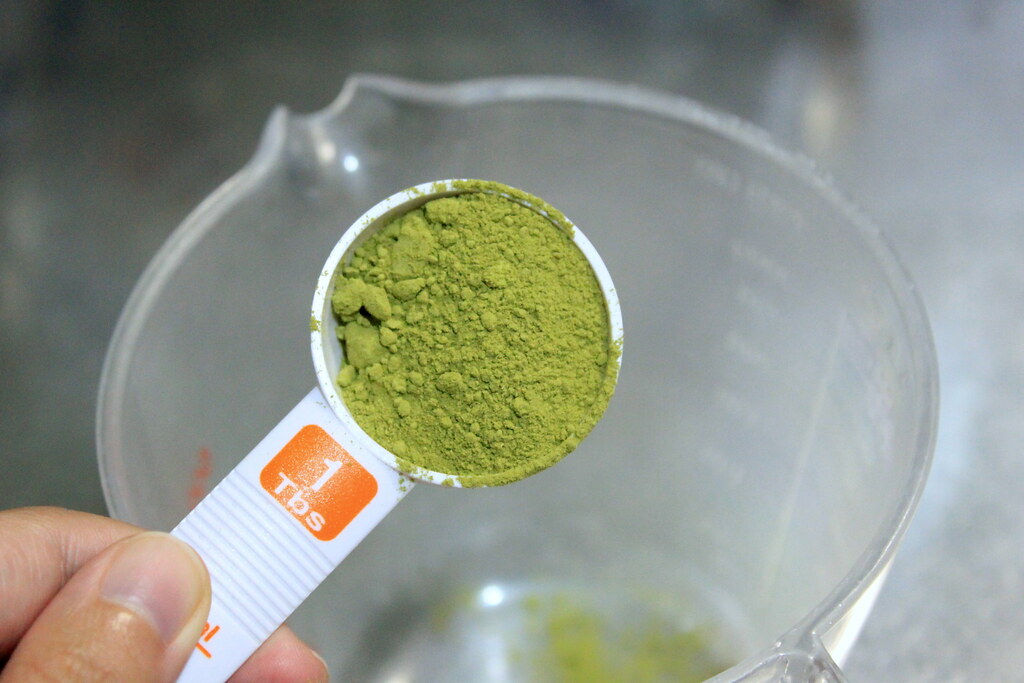
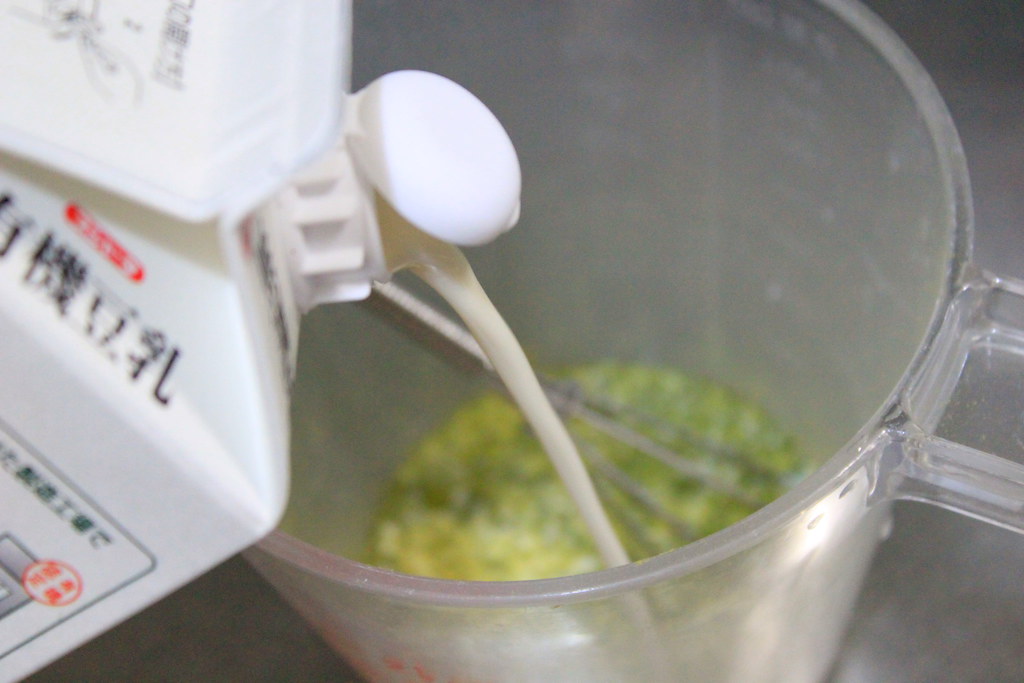
Start with dissolving the matcha (green tea) powder with soy milk gradually in a container. 

The mixture will be frothy at first, but that`s alright.

While dissolving the matcha powder, stir honey or sugar in.
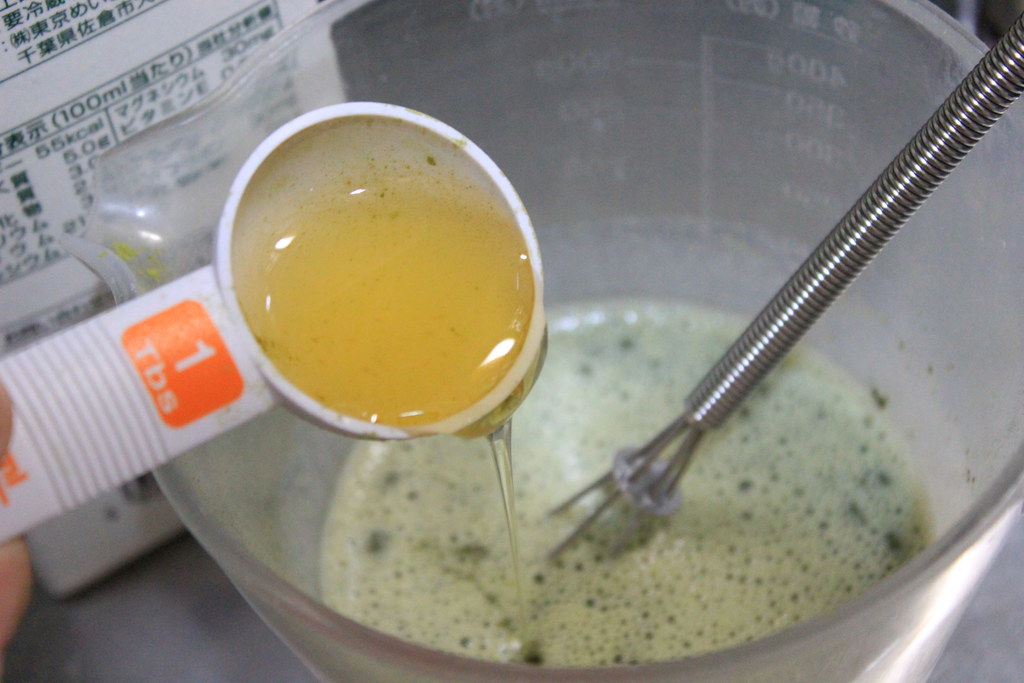
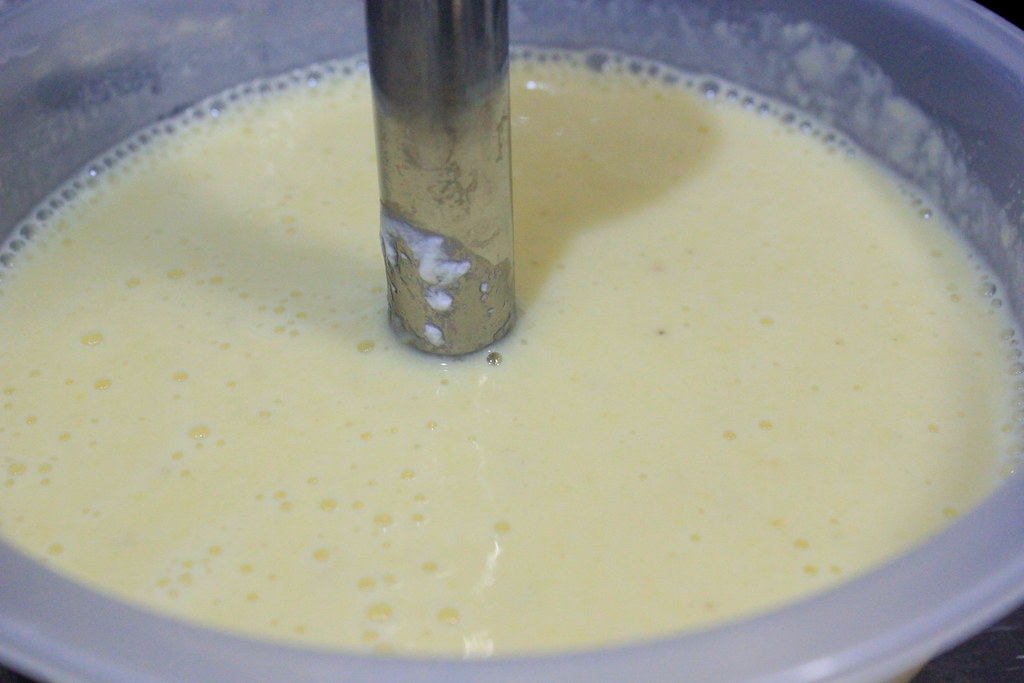
Add the remaining soy milk and pour the whole mixture to a different container while pushing it with the back of a spoon through a sieve repeatedly until no lumps are visible.
Taste it, stir in more honey or sugar if necessary, and add a pinch of salt.  When you`re done, chill the mixture in the refrigerator 2-3 hours.

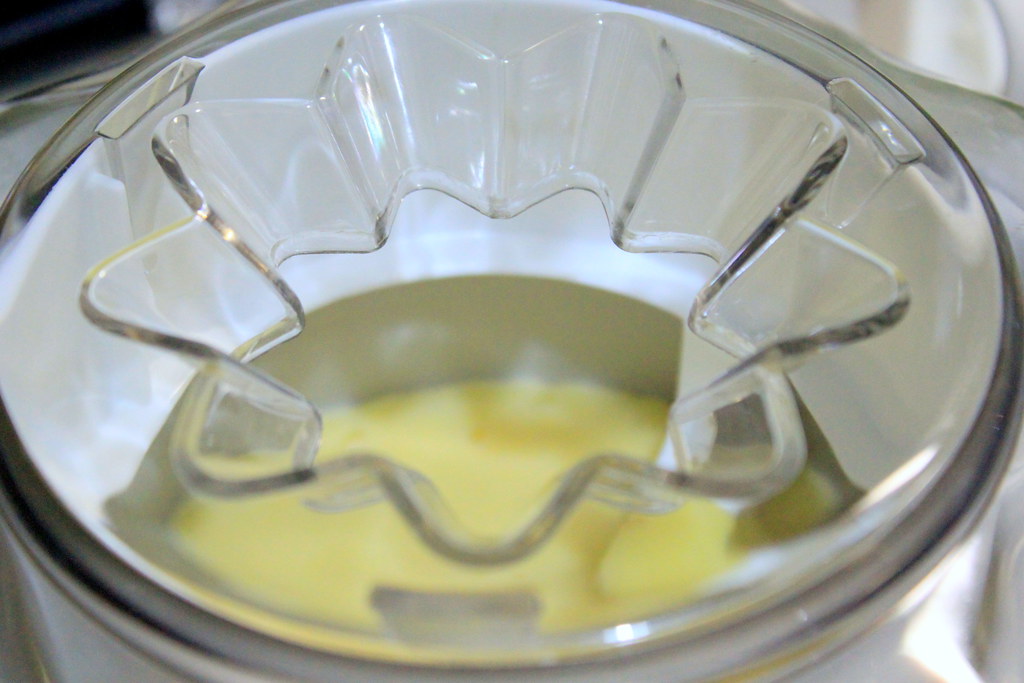
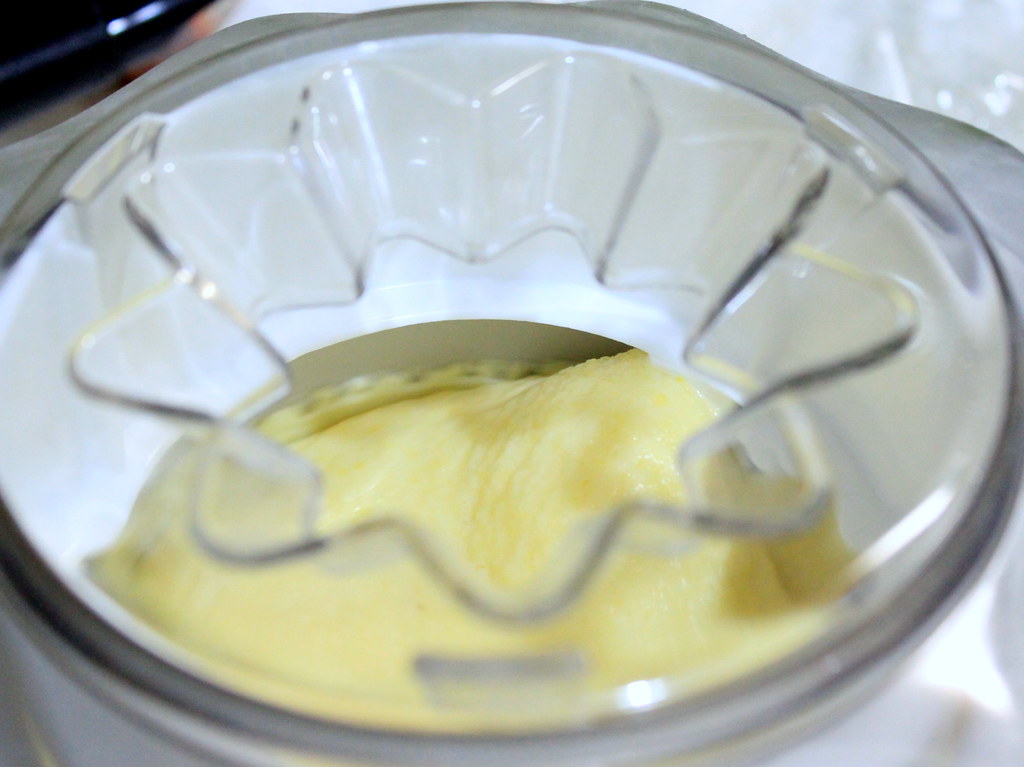
After the mixture is chilled enough, start churning it in an ice cream maker. 

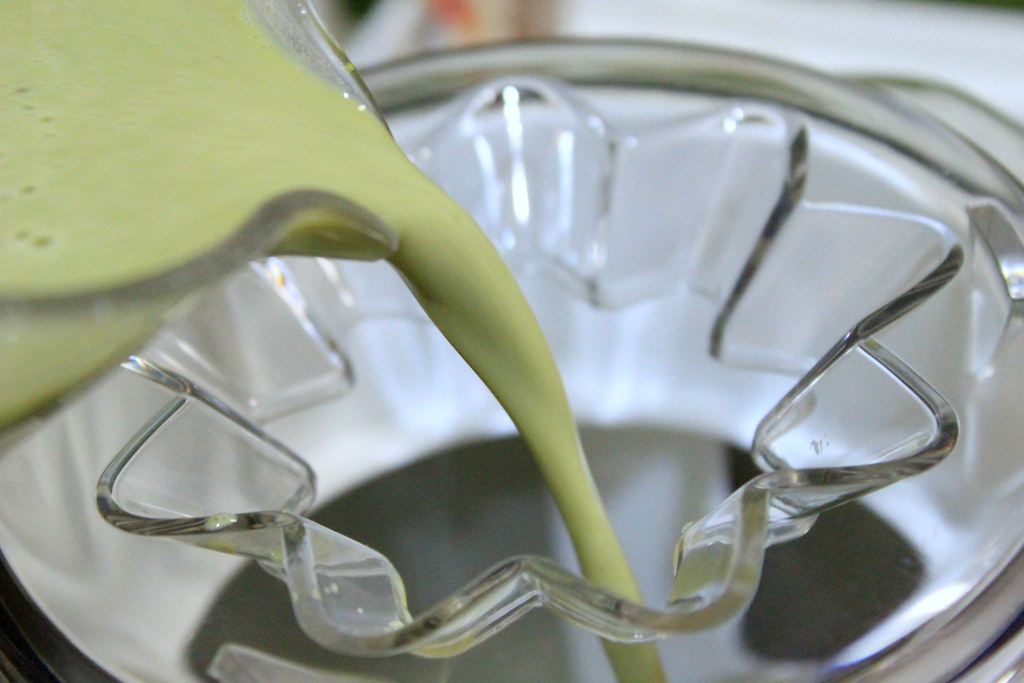
..until it has turned thick.
Transfer the ice cream to a container and keep it in freezer for 2-3 hours.

Shouldn`t I be studying now?I can feel the books staring at me. Ugh.

Alright, to shorten this post, this is the chocolate soy ice cream that I made the next day. The method is pretty much the same, only this time I used cocoa powder.

This is how I kept the ice creams in one container.

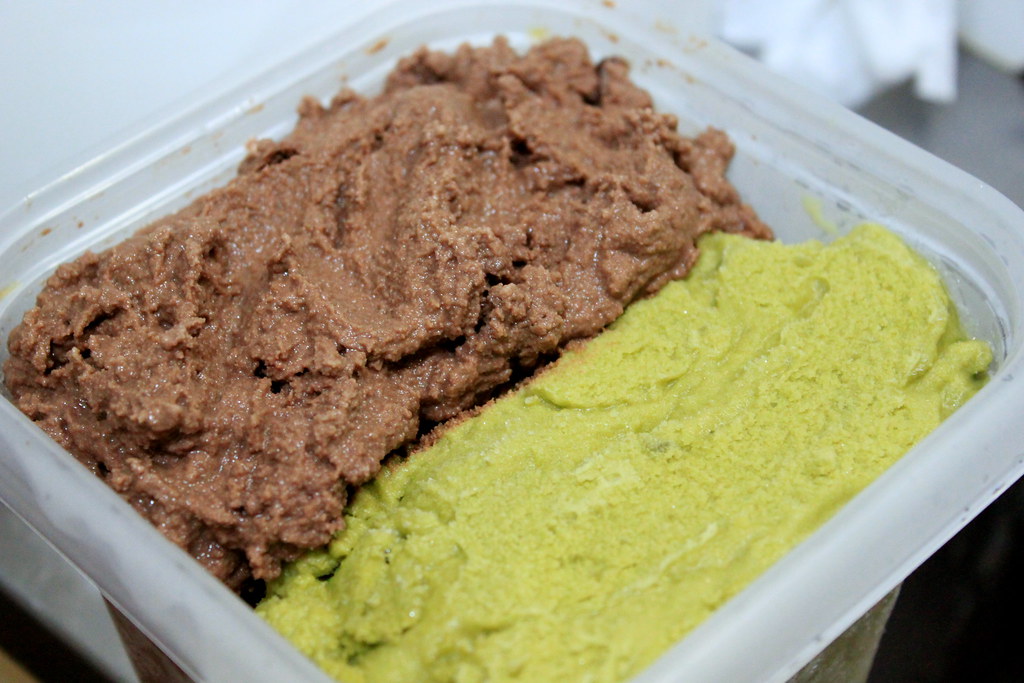
 And I didn`t do this on purpose.
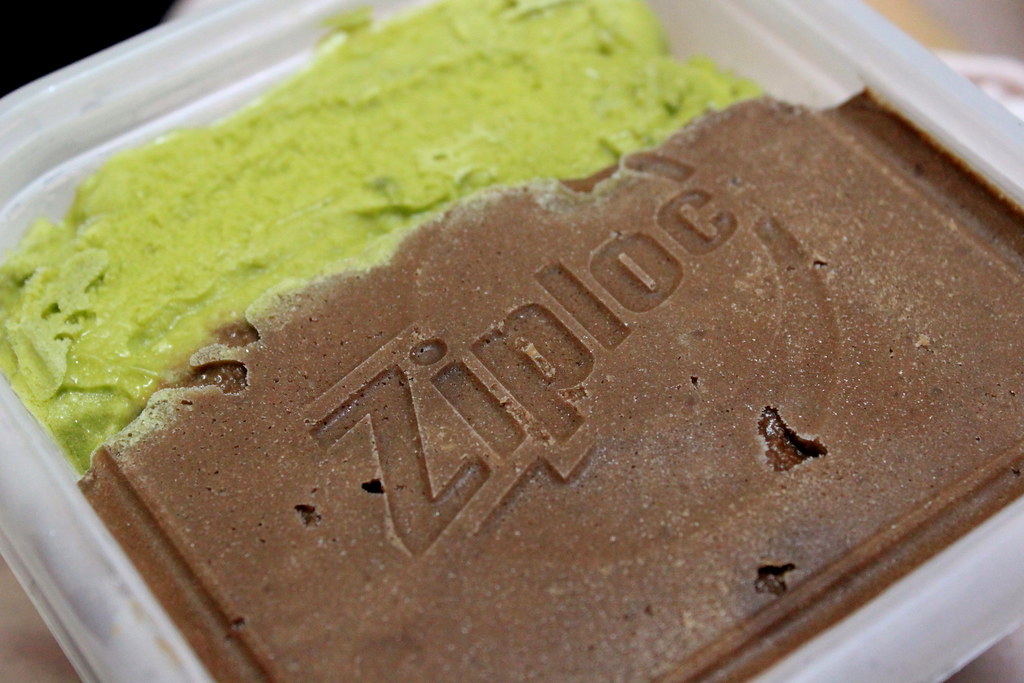
Scooping time! 
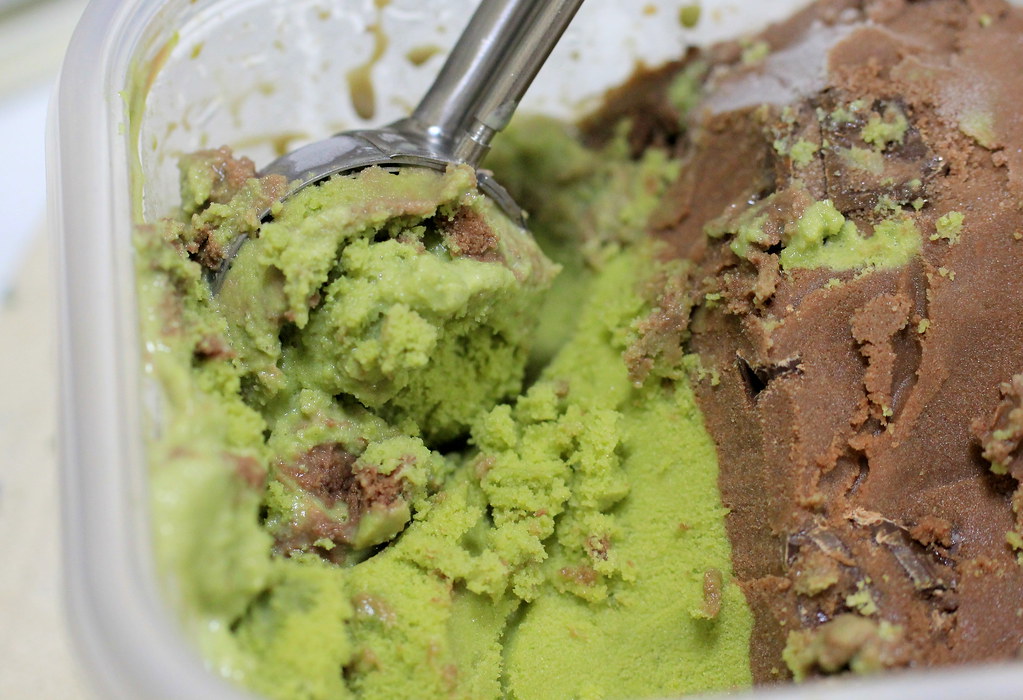
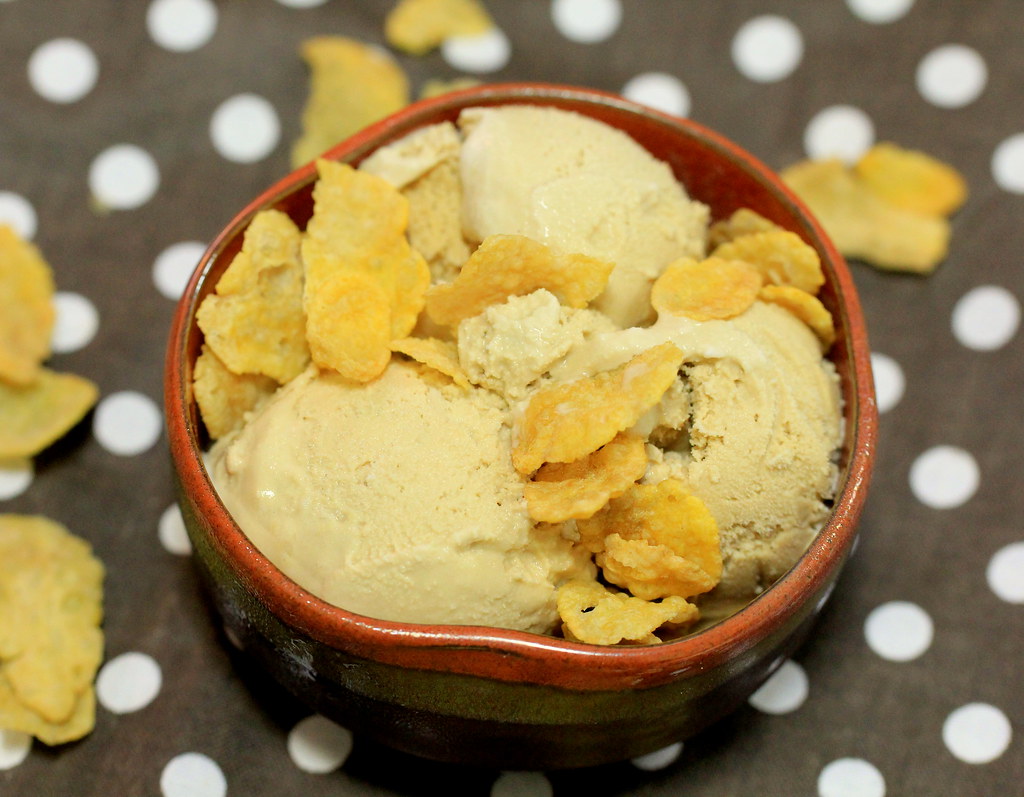
I`m sorry for showing you this green-brown messiness, but in my defense, the messiness is my signature.

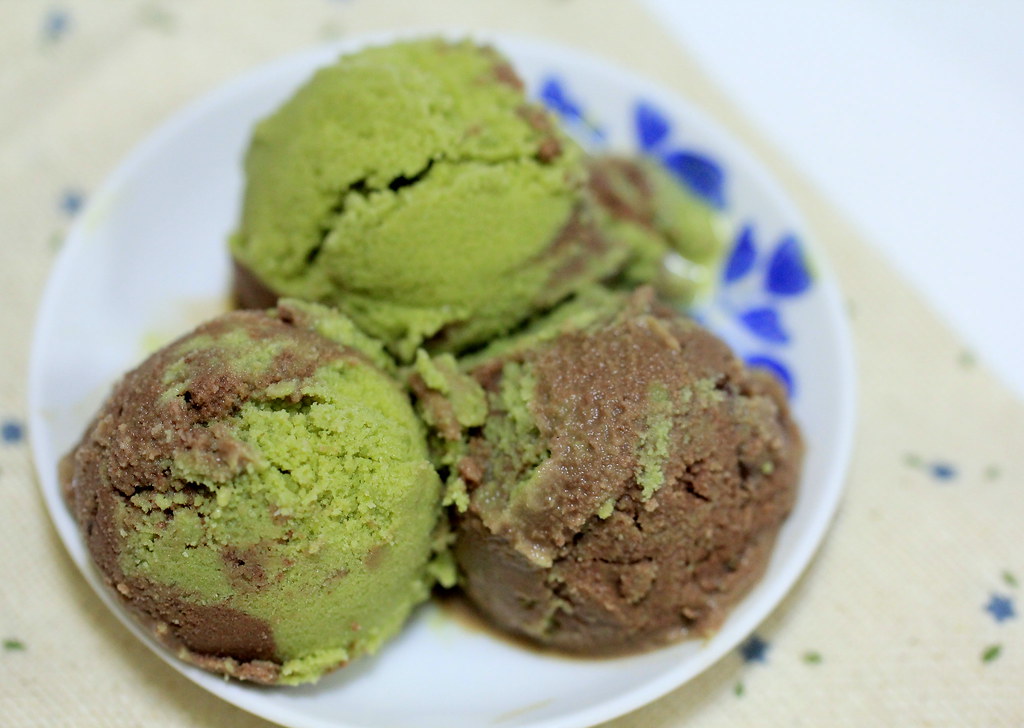
Creaminess-wise, this soy ice cream is somewhere between sorbets and dairy cream-based ice creams. Much lighter than the regular ice creams, but still "creamier" compared to sorbets. It has a soft crunchy texture that might bring sorbets to mind, but the milkiness of the soy ice cream might make the difference.
I remember how I can feel the sweet stickiness remaining in my mouth when I eat the regular ice cream, which I don`t find in this soy ice cream. It melts and it`s gone very quickly. I don`t know if this is good or bad, but if you`re looking for a lighter version of ice cream like me, then this one is probably for you.
Enjoy!
MATCHA (GREEN TEA) SOY ICE CREAM
Makes about 500 ml

Ingredients:
1 1/2 Tbs matcha (green tea) powder
450 ml plain soy milk
4 Tbs honey
A pinch of salt

CHOCOLATE SOY ICE CREAM
Makes about 500 ml

Ingredients:
3 Tbs cocoa powder
450 ml plain soy milk
6 Tbs honey
A pinch of salt

Method:
1. Dissolve matcha or cocoa powder and honey gradually with soy milk in separate containers.
2. Pour the mixture through a sieve repeatedly until no lumps are visible.
3. Add a pinch of salt, stir a bit, and chill in the refrigerator for 2-3 hours.
4. Churn all the ingredients in an ice cream maker according to the manual for 30 minutes or until the mixture has thickened up.
5. Transfer the ice cream to a freezing container and keep it in the freezer for another 2-3 hours before serving.
Note: If using only one freezer bowl, make the ice cream one flavor a day.

Friday, June 22, 2012

A night to celebrate and share

Today is kind of a special day for me because....it`s my birthday!
For my birthday this year, we had an almost spontaneous celebratory dinner at Higashiyama BBQ (ひがしやま焼肉) and we really enjoyed our whole evening there!

We ordered this Korean namul or vegetable dish that consisted of gosari (bracken fern stem), bean sprout, spinach, and julienned daikon.


And of course, the Star of the night: the beef.
The beef was incredibly tender, but the beef tongue, which appeared on the picture above as small chunks, were a big hit too!
It`s amazing to see how health-conscious my husband is becoming now as he only ordered the small portion of rice (same like me!) and had a small amount of beef. By small I mean like 3 thin pieces of beef and 5 small chunks of tongue. We were in a BBQ restaurant and that`s all the meat we had!

Other than the health-concerned reason, though, we actually reserved some space for the next treat: Korean seafood and garlic chives (nira) pancake or usually called as chijimi in Japan. There were like 9 pieces of it and we started getting full before finishing the last 2 pieces.

Now, for the birthday girl me, the restaurant provided this dessert for free! Judging from the picture on the menu, the regular size of the dessert is probably 2 or 3 times bigger than this. Since it was only two of us, I specifically asked them to make it smaller and I was glad that I did because this was the right amount for us! What`s inside? Roll cakes, ice cream-filled cream puff, marshmallows, frozen fruits, whipped cream, and strawberry syrup. Saying those words makes me feel guilty, but under the name of annual celebration, we enjoyed them a lot. 
Other than being free, it came with sparklers too!! I think both of us were so excited to see the sparklers on the dessert that we shamelessly kept saying "COOL!" when it was served on our table. It turned out that we got to get photographed with this dessert+sparklers by the waiter as a birthday present from the restaurant. Free dessert and a photograph. Double cool, right?!

So this is the birthday present to bring home! A birthday card with a postcard-sized photograph of us and the dessert. Thank you!!
Just a little introduction for those who are not familiar with Japanese calendar, in Japan, in addition to the regular calendar system, another year-naming system based on the year number of a Japanese imperial reign or era is commonly used in daily life. Currently, we are in the 24th year of Heisei era. So, as shown above, my birthday this year is written as:
平成24年(Heisei era-year 24, meaning year 2012) 
6月(month 6, meaning June) 
22日(day 22)

Finally we left the restaurant feeling very full and happy! Next, before heading home, we strolled around a bit near the Sendai station to play with the night shots. The weather was good, the wind was almost absent, and the sky...oh...just look at the sky!
 

Here is a picture taken by my husband. No matter how many times I came here (and I`ve been living in this city for 7 years!), I`m always amazed with this fantastic view of taxis lining super-neatly! If you come visit Sendai Station, you really have to see this spot yourself, although it`s probably hard to miss as the location is pretty much right in front of the station. 

What a wonderful night we had! Now I`m a year older and happier. And hopefully healthier.

Monday, June 18, 2012

Pineapple banana frozen yogurt and coffee ice cream

A while ago after I saw the gorgeous shots of strawberry cheesecake ice cream by Nami of Just One Cookbook, I couldn`t stop thinking about getting myself an ice cream maker. Although I`m usually more into frozen yogurt than ice cream, the idea of making such desserts at home sounds terrific to me. And hellooo...summer is so close already!
I`m really glad that Nami also gave the Amazon link for her ice cream maker because I was totally clueless about any ice cream maker. Although it turned out that the one that I wanted isn`t available here and there is a 100 USD shipping charge if I purchase it from Amazon US (unbelievable, right?!), I decided to purchase the older version of the Cuisinart ice cream maker through Amazon Japan and my new toy is here now! Yeehaaa!


My first ever homemade ice cream was blueberry ice cream using the recipe that came with the manual. The recipe was a quick and simple one as it doesn`t involve any cooking. Just chill the ingredients and churn them altogether in the freezer bowl. I`m also a bit hesitant about including eggs in making ice creams, so I decided to make no-cook and eggless ice creams. Using this method, my blueberry ice cream turned out okay for a starting point and I`m so excited to learn and create more. 

My second product is this coffee ice cream, which is still no-cook and eggless version. I also used decaffeinated instant coffee as I don`t want to stay awake all night after devouring it. I was initially worried about the texture of ice cream because I omit the eggs and the cooking process, but the result was still pretty much satisfying. My husband and I super lllllove this ice cream both for the taste and texture and I had to keep an eye on him because otherwise he would easily finish the whole batch I made. I guess I don`t need to go to Baskin-Robbins for a cup of coffee ice cream anymore!

After having nonstop sugary and creamy days, for my next trial, I made frozen yogurt using pineapple and banana. The idea is to use as many fruits as possible and borrow their natural sweetness for the dessert. For the fruit, I initially intended to use pineapple only, but then I thought that I needed something to give more thickness in the mixture and that led me to include banana.
So this is where I have the pineapple and banana cut into chunks and I was ready to puree them until.....

I remembered that I forgot something. The yogurt. So typical me.

After everything has turned into this pale yellow smoothie texture, I tasted it and decided to add a few tablespoons of honey. Sweet and sour. I`m happy now.
So I did still add more sweetener here, but comparing it to how much sugar I used for my previous ice creams makes me feel better.

Here it comes my magic bowl!

I set the mixing paddle in the freezer bowl, which had been kept in freezer overnight, put the lid on, turn the machine on, and pour the puree through the spout. 
I set my timer for 30 minutes and let the magic happens. 

While waiting for that,  I chop some of the pineapple chunks that I have reserved.

After 20 mins or so, the puree thickened up and started to reach the top of the paddle. How exciting is this!

The frozen yogurt turned thicker and thicker and before I turned off the machine, I sprinkled in the chopped pineapple and churned it for another 5 minutes.

Voilà! It`s done! The mixture might seem too gooey at this step, but after another hour in the freezer (not the bowl), it set nicely.
Oh, I`m totally in love with my ice cream maker. 

I`m not sure if I`ve ever tried sorbet, or at least a decent one before, but this dessert looks more like sorbet than frozen yogurt to me, especially if I compare it to Golden Spoons` products. I`m not sure why, but probably the absence of milk or double cream in it have something to do with that. And speaking of sorbet, the day when I made this dessert and finished my photo-work, I found that Nami has posted her pineapple sorbet with banana too! Maybe the weather has made us think of exactly the same fruits :D
 なみさんへ:同じようなデザートを作っちゃって、すみません!
I apologize for the wilted look of the mint leaves, but I hope it doesn`t suck out all the sunshinyness of the dessert. A verdict on the taste, next time I probably will use less banana for this as the banana turned out to have very strong aroma that almost overpower the pineapple. But all in all, the result made me smile from ear to ear!

PINEAPPLE BANANA FROZEN YOGURT
Makes approximately 1 liter

Ingredients:
1 pineapple, cored and cut into chunks 
Reserve some of the pineapple chunks and chop up
2 banana (or less), cut into chunks 
400 g plain yogurt (I used non-fat)
4 Tbs honey

Method:
1. Puree all the ingredients and chill the puree in refrigerator for 2-3 hours.
2. Churn the puree in an ice cream maker according to the manual for 30 minutes or until the puree has thickened up.
3. Five minutes before stopping the churning process, add the reserved pineapple to the frozen yogurt.
4. Transfer everything to a freezing container and keep it in the freezer for another 2-3 hours.


COFFEE ICE CREAM
Makes approximately 1 liter

Ingredients:
400 ml double cream
200 ml milk
150 g sugar
3 Tbs decaffeinated instant coffee
1/2 tsp salt

Method:
1. Chill all the liquid ingredients in the refrigerator for 2-3 hours.
2. Dissolve instant coffee with some part of the milk. 
3. Churn all the ingredients, including the dissolved instant coffee, in an ice cream maker according to the manual for 30 minutes or until the mixture has thickened up.
4. Transfer everything to a freezing container and keep it in the freezer for another 2-3 hours.

Saturday, June 16, 2012

Ketupat sayur (spicy vegetable soup with rice cake)

It was a cold Sunday night when my husband and I were craving for a bowl of spicy soup and we ended up drooling over our imagination of a bowl of spicy vegetable soup with rice cake pieces underneath. That dish is called "ketupat sayur" or "lontong sayur" in Indonesia and you can read about the ketupat/lontong description, including how to make the rice cake using a very simple trick, in my post here. I realized that although I`ve made several dishes served with the rice cake, ketupat/lontong sayur wasn`t among of them. So I made them the next night and next thing I knew, each of us was holding a bowl of it devouring all the goodness. As my rice cake was rather in rectangular (ketupat) pieces than cylindrical (lontong) ones, I decided to call this dish as ketupat sayur, even though the rice cake wasn`t an original ketupat rice cake and the soup contained quite different vegetables.

Let`s cook now!
First thing to do is gather all the spices you have at home and I`m half kidding saying that. 
You can see the spices I used in the list I provide at the end of this post, but you certainly can experiment with your favorite spices. I also love adding dried shrimp or shrimp paste to this kind of spicy food. If you are not big with the "stinkiness" of the shrimp paste, then I recommend you to use the dried shrimp instead as it gives a much milder shrimpy aroma. 
Last year me would have blitz all these spices in a food processor until they turned into paste, but this year me is lazy and happy enough with the chop-chop work.

Next, heat oil in a pot and cook all the spices in the list and add the shrimp too until oh-so-good smell fills the whole kitchen.

After the solid, here comes the liquid. I use coconut milk powder dissolved with water, but you can also add chicken or beef stock for more flavor. One thing to consider with the liquid volume is you`d better add the coconut milk to fill only one third to half of the pot because you need to leave some space for vegetables later. If you need to, you can add the coconut milk or water again later after all the vegetables are in.
Stir and adjust the taste. For seasoning, I use fish sauce, brown sugar, salt, and pepper.
By the way, to make this dish as a vegan diet, just omit the dried shrimp/shrimp paste and fish sauce and use water instead of chicken/beef stock.

Veggie time!
I always use pre-packaged boiled bamboo shoots, so what I do is just wash and chop them.

For the 1000th time, I`m sorry to show you this shimeji mushroom again. Since I have lived here, I just don`t know how to live without it. Or any mushrooms, as a matter of fact.
Stir and simmer for about 15 minutes while adjusting the taste if necessary. 

After you`re done adjusting the soup taste, last thing to add is bean sprouts. Since the sprouts are very quick to cook, just turn off the heat, and put a lid on for 10 minutes to let the sprouts cook with the heat and steam.
Although I haven`t had the original ketupat sayur for certainly a long time, I still can remember how it tasted and adding these bean sprouts in the ketupat sayur dish really gave me a whole new pleasant experience.

Alright, the vegetable soup is done and now is time to arrange the dish.

What you need for ketupat sayur other then the vegetable soup is rice cake. My husband is always in charge with the rice cake making. So here`s the rice cake he`s made by pressing hot steamed rice in a tupper bowl lined with cling wrap and let cool for a while.

Cut the rice cakes, place them in a bowl, and add fried tofu strips. Please remember that this rice cake is basically a compact version of regular cooked rice, so although the rice cake pieces in the bowl seems not enough, it`s actually very fulfilling.
You can add the fried tofu in the soup instead, but I personally prefer this way.

Next thing to do is ladle the soup over and garnish with green onion and fried onion. I don`t have fried onion in hand, but I really wish I had.
It`s spicy, red, full of vegetables, and fulfilling. You certainly can serve the soup with regular cooked rice or even noodles, but in my opinion, the nice compact consistency of the rice cake brings a different texture to the whole dish.

I hope you will give this a try and love it too!
Have a nice weekend!


KETUPAT SAYUR (spicy vegetable curry with rice cake)
Serves 3-4 persons

Ingredients:
Spices
6 cloves garlic, chopped
1/2 onion, chopped
3 chili
4 Tbs chili powder 
1 Tbs grated ginger
1/2 tsp cloves
1 tsp cardamom
3 star anise
1/2 tsp turmeric

1 Tbs dried shrimps
1 Tbs fish sauce
500 ml coconut milk (or 1 cup coconut powder dissolved in 2 cups water or chicken/beef stock)
3 cups bamboo shoots, chopped
2 cups shimeji mushroom
3 cups bean sprouts
1 tsp brown sugar
Salt
Pepper
Fried tofu strips for garnish
Chopped green onion for garnish
Fried onion (recommended, but not shown here)
Cooked rice for rice cake (check out the method here)

Method:
1. Heat oil in a pot and cook all the spices until fragrant.
2. Stir in coconut milk.
3. Add chopped bamboo shoots and shimeji mushroom to the pot.
4. Season with brown sugar, salt, and pepper and let simmer for about 15 mins with occasional stirring..
5. Add bean sprouts to the pot, turn off the heat, and put a lid for about 10 mins to let the sprouts cook.

To serve with rice cake
1. Cut the rice cake into desirable shapes and arrange the pieces on a bowl.
2. Add fried tofu strips to the bowl, pour over the soup, and garnish with chopped green onion and fried onion.

Tuesday, June 5, 2012

Tamago kakegohan (hot steamed rice topped with raw egg)

After repeatedly whining about my foodless posts these days, I finally had something post-able today that doesn`t include my scooter. But as you might already guess from the title, I must warn those of you who are not into eating raw eggs. I`m perfectly aware of how the sight of raw eggs eaten as they are can be quite challenging in some cultures. I myself did not grow up in "raw food" culture, except for some vegetables. First time I saw this raw egg served on a bowl of hot steamed rice called tamago kakegohan in Japanese was on TV during my first year in Japan and I kept saying, "Why? Why? Why???". Years passed by and I still couldn`t make myself have it despite how intriguing it looked to me. It was only recently that I finally challenged myself and later decided that this tamago kakegohan is certainly one of my comfort Japanese food next after (or before??) natto.
So, if you think you are not comfortable with this particular food, then you might be better stop scrolling down your mouse and browse my other recipes instead :)
And for those of you are curious and interested in trying, I need to say these few things loud and clear first. 
1. Only eat raw eggs when they are still fresh. As fresh as possible. In Japan, most of the eggs in the stores are stamped with the "use before" date, which usually also indicates the safe period for raw consumption. But please confirm the safety instruction on the pack if you`re not sure. For me, I usually only eat them raw within 3-4 days after I bought them and kept in the fridge. Longer than that, the eggs will be served as cooked dish or baked items.
2. If you are pregnant, sick, or are having problem with your immunity system, don`t eat the eggs raw unless you have consulted with your doctors. I`m not knowledgeable enough to tell you what`s good or bad, but generally speaking, one needs to be extra cautious about the food choice during such conditions.
3. If you live in Japan, it`s very likely that you won`t have any problem with finding "suitable" eggs for raw consumption. But if you don`t and you`re not sure about the food safety, pasteurized eggs seems to be a good option. I found this tips from Rachael of La Fuji Mama (thank you, Rachael!), so you might want to hop over her blog to see her version of tamago kakegohan too.


Now I`m finished with the cautions, are you ready for the adventure?
First thing to do is to stay away from your stove. Instead, go get a bowl of hot steamed rice, make a little well in the center, and crack in a fresh egg.
Sometimes I don`t bother to make the well and I just place the egg right on top of the rice.

The simplest way in making tamago kakegohan  is probably by drizzling soy sauce or sprinkle salt over.
But I never do that and I don`t know why. I always add something for topping. What I`m showing you here is sesame seeds and dried shrimps. If I had kimchi, I would have added it in too.

Then, I have to add ra-yu, or chili-infused sesame oil. Whatever topping I use, ra-yu is always in it.
I sprinkle a bit of salt too as this whole set would be quite bland without it. When I want the nuttiness from the sesame seed and sesame oil to stand out, I usually opt for salt rather than soy sauce.

On top of everything, I added shredded nori (seaweed) paper and sprinkled some more sesame seed.
Done! How long was that? 5 seconds??

Now here`s my most favorite part of the eating ritual.
Dig the chopsticks in to break the egg underneath, stir it in circular movement until the rice is gradually coated by the creamy egg. Then, hold your breath...

...and scoop the eggy rice now...yum yum yum!
This rich, creamy, and comforting bowl of rice despite of its simplicity is a real no-fuss food, which is also my go-to menu after a hectic or exhausting day. This dish seems to be popular as breakfast menu among Japanese, but I often make this for my express dinner. One thing I feel inside every time I have this bowl of tamago kakegohan in my hands is, "Ah, it`s good to be home".

Hope your adventure goes well too!

TAMAGO KAKEGOHAN
Serves 1 person

Ingredients:
1 bowl of hot steamed rice
1 fresh whole egg
1 Tbs sesame seeds
1 Tbs dried shrimps
2 tsp Ra-yu (chili-infused sesame oil)
Shredded nori paper
Salt

Method:
1. Prepare a bowl of hot steamed rice (Optional: make a well in the center).
2. Crack a fresh egg in the center or on top of the rice.
3. Sprinkle sesame seeds, dried shrimps, and salt over.
4. Drizzle ra-yu (chili-infused sesame oil)over.
5. Sprinkle shredded nori paper and some more sesame seeds.

Saturday, June 2, 2012

Reintroducing my Baby G

I`m back! But still not with food to share, sooowww-rrryyy....!
I think I`m really having a crisis in my cooking department as I can`t even think a single home-made dish to blog about. And to make things worse, whatever I baked turned out to be disasters. What is happening to me?? Have you ever experienced that? 
So, while I`m crossing my fingers (again) hoping that my cooking and food-blogging days will be back soon, I`d like share some detailed pictures of my Baby G scooter I`ve written about last month.

As I`m a newborn baby in motorcycle world and this Giorno is my very first scooter, I know practically nothing about the technical matters. But as someone who now commutes on a scooter everyday, I do have some thoughts on the design as well as the featured functions that I`d like to share. This Honda Giorno is the latest version of 4-stroke 50-cc Honda scooter released in January 2011. It seems that Honda will release this Giorno under a different name in US too called Honda Metropolitan. So if you`re in US and already eyeing that, maybe these pictures can give you more previews to consider before getting one. If you`re a motorcyclist or a scooter-lover, hopefully you`ll find this post enjoyable. But if you`re not a motorcycle person at all, I still hope that this post will give you some new insight about a one-person commuter alternative with much less fuel consumption and carbon emission than an SUV.

Let`s start with the front view. 
If you`re familiar with Honda`s classic Super Cub, you`ll probably see the resemblance between the Giorno`s headlight and the Cub`s. After parking it side-by-side with my husband`s 110-cc Super Cub, I noticed that the Giorno`s headlight is bigger and rounder like a big bubble. The winker lights on the right and left also have round shapes making them look like two small bubbles. Now, if there`s only one keyword to describe Giorno`s design, it is: CURVY. Almost every part of the body is curvy and that fits me really well as I didn`t want a scooter with strong lines and pointy sides. I also love the U-shaped line on the front cover as it reminds me of my dream Volkswagen`s new Beetle.


This is the left handle where the headlight switch, winker light switch (slide right/left to turn the light on and push to turn off), and klaxon are placed near to it.

Next to the right throttle is the electric starter button. This scooter has a kick starter on its left side, but the mechanic told me to always use the electric starter and I`m more than happy to follow that. Simply hold the left brake, push the starter, and off you go!

 Another closer look of the headlight and winker light.

And this is probably the part I love the most. I wouldn`t ever guess that I could fall in love with a speedometer!  But with a speedometer as cute as this, how could not I?? The font type and color really add up the total cuteness of the scooter not to mention how BIG the whole speedometer is. I probably haven`t seen enough scooters or other 50-cc motorcycles in my life, but this speedometer is definitely the biggest one I`ve ever seen.
As in other speedometers, it shows the fuel amount (the full amount is 4.6 liters),  speed in km/h unit, overspeed indicator, and starter lamp. The manual says that the scooter runs for approximately 70 km/liter at 30 km/h speed, which is the speed limit for a 50-cc motorcycle according to Japan`s traffic regulation. But my husband said that given that the scooter doesn`t run on that speed constantly, that is sometimes at 40 km/h and sometimes stopping for a few minutes during red lights with the engine still on, it should consume slightly more fuel than what stated. He predicts that 50 km/liter seems reasonable enough and I`m still confirming on that.
As for the lamps on the lower right, the lower lamp blinks for a few seconds when the key is turned to ON position. The upper lamp is an overspeed indicator as it blinks when the scooter runs faster than 30 km/h.

The rear view. Again, everything looks round. The backlights, the seat, the rear holder, and the compartments. It`s plural?

It is! First, tadaaaa...the inner compartment where I can keep my helmet, gloves, important motorcycle-related documents, and a tire lock, which I never use. I`ll explain about this in a minute.

The second compartment is placed behind the front cover. This compartment is actually shallower than what I`ve expected, but it still comes in handy for keeping some stuff. Here I have my raincoat on the left and a 500-ml water bottle on the right. On the middle there are two connected hooks where I usually hang my hand bags. One small thing I`m not keen on these hooks is its height from the floor. I wish they were at a higher position so my long-shouldered bags don`t have to touch the floor. But hey, they are still much better than nothing at all, arent`t they?

A closer look on the key panel. Other than the engine key, handle lock, and seat lock, the panel is equipped with a key shutter, which is a common feature for motorcycles here. This key shutter is a very convenient way to lock the motorcycle, thus becomes the reason why I never use my tire lock, which I got from the shop for free.

Last, the side view.  In my opinion, there are two main things that make a two-wheeled motorized vehicle a scooter other than they have to look like Vespa or Lambretta. I`m sorry. I just feel really weird writing long post about scooter without mentioning those names. Now, which parts of Vespa and Lambretta define the scooterness? One, the design that makes the rider sits on the motorcycle as if sitting on a regular chair or a car seat where the rider`s knees don`t need to stay far apart. No fuel tank in the middle, just nothing.A good reason too why scooters are more popular among female riders compared with other motorcycles.  Two, the tires are small. Much smaller than a kid bicycle parked next to my Baby G.
I know there are other scooters with different seat design, riding position, and bigger tires, but for me, it takes me those two things above to call something a scooter.

I`m finished explaining about my Baby G, but I`m dying to show you my two dream 50-cc scooters. After having the "cute", someday I want the "bold and fun" too :)))
Like this handsomeYamaha Vox...


Or this super fun-looking Honda Zoomer (or Honda Ruckus in US).

Did I say two or three? Three, right? This is the third one. I`m still not sure about this Yamaha`s electric motorcycle EV-03, but totally curious.


Thanks for bearing with me and my scooter-talk! Enjoy your weekend, everyone!