Monday, January 31, 2011

Rice cake

I was really happy to see a post on Ellie`s Almost Bourdain about rice cake. She calls this rice cake as nasi impit. Indonesian usually refer this rice cake as lontong or ketupat. Lontong is a log-shaped rice cake wrapped in banana leaves while ketupat is rice cake wrapped with coconut or palm leaves shaped into a rectangular pouch. Since I came here, I only made rice cake once. Just once, because the only method I knew back then was quite complicated. I know, I know, I`m just a lazy person.
So, when Ellie showed an incredibly easy method to make this rice cake, I was like, WOW! Now this, is what I call FUN!

I slightly changed the method simply because I was hurrying when I made this and didn`t have time to look up her post. So I just did what I could remember from what I`ve read. I hope she forgives me for this.

What you need is simply a container (I used a casserole dish like she did), saran wrap (cling wrap), hot steamed rice, and a rice spatula. Seriously, no fuss whatsoever involved. Not even your stove!


Cover the dish with saran wrap. Not a neat person here.


Place some amount of hot steamed rice in the dish, and start pressing the rice with the spatula. I did this layer by layer because I thought that would be less tiring for me to press it down and it would make the rice tighter.


After done with the pressing (I was quite tired, though), cover the top with saran wrap and let it sit until the rice is cold.


Look! This is how it looks when it`s cold. If you`re Indonesian, please tell me that you`re seeing an unwrapped ketupat!


Cut it up to mouth-bite sizes and serve with curry, rendang, or anything you love to have with rice.
Thanks, Ellie!


 p.s. Placing white on white is definitely not a good trick, which reminds me how desperately I need multicolor tableware collection :D

Opor ayam (spiced chicken stew)

I`m a planner, but apparently a bad one (d`uh, like I don`t know that), especially when it comes to self-motivated activities. Every time I planned to devote my weekends or holidays to write up here, that never rarely happened. Things always came up and I hate to say that they`re not always good ones. But hey, I didn`t start this blog so that I can whine up. Na-ah. This is a happy place for me. And for you too I hope!

So, what to cook today? It`s chicken, sweetie. It`s Indonesian opor ayam, which is basically made by braising chicken in coconut milk. If you ever had Indian chicken curry (which I looooooove!), this one is different. Keep scrolling down (and up if you must) and you`ll find out why.

Opor ayam usually use chicken with bones and skin that give more flavor to the soup, but I just had chicken fillet in the fridge. No problemo!
Brown the chicken first.  I was thinking to lightly grill them, but sauteing them on a pan without oil will be a faster method. The chicken doesn`t need to be cooked through. When the surface starts to get nicely browned, set the chicken aside.


Next is spice paste. This paste is incredibly simple despite the common long-list of spices used for curry paste; it only contains garlic, onion, and ginger. Yup, that`s it.
Saute the spice paste to bring out the fragrance.


Now get a pressure cooker, place the browned chicken in it, top with the sauteed spice paste, throw in lemon grass (pound it first and lightly cut the stalk lengthwise just to loosen up the layers) and lime leaves.


Then, pour in water just enough to cover the chicken, close the lid, and cook it for 15 mins-30 mins. It depends on how much chicken you put in (and the type of your cooker), but 15 mins cooking and another 15 mins for steam releasing were enough to cook 500 g chicken in my pot.


So, after 30 minutes waiting, this is how it looks like. Yellowish chicken soup with a very great fragrance that can make your husband hurries to the kitchen and excitedly asks, "Can I eat now??". Men.
Alright, a confession to make here. Traditionally, opor ayam is usually cooked over a very low heat in long hours so the spices can perfectly sip in the meat and the meat gets so tender that it falls off the bone. I`m not a modern person (hellooo, MS Office 2003 is my best buddy and I get crazy whenever I have to work with Vista or Mac!), but I just can`t say no to my pressure cooker. I cooked chicken with bones many times with this cooker and the meat did fall off the bones! Hooraah!


Am I high today??

Turn on the stove again on medium heat, and pour in coconut milk. Gorgeous.
By the way, as adding coconut milk will increase the volume of the soup, aka. dilute the richness of the spices , you need to estimate the amount of water used to cook the chicken so that you don`t end up having this soup too watery. Oh forget it, just have the fun with cooking! After all, if your soup does become too watery, just saute some more spices and toss them in the soup. Ole!


No idea why I said it, but that`s fun!
Back to the food. As I can never cook anything with only meat in it, which he keeps complaining about (I`m the cook, you know), I used this bamboo shoots. I love this vegetables very much. Crunchy yet meaty and tasty. And it goes perfectly well with this opor ayam!


Toss in the bamboo shoots and season with salt, sugar (just a pinch! trust me), and pepper. This color is usually fine for opor, but I want a bit more yellowness so I added a pinch of turmeric powder.


Tadaaaa....opor ayam with bamboo shoots. People usually eat this with rice cake or just regular steamed rice. But I think noodles will do great too. Let me know if you do try it!


Ingredients:

Spice paste:
Garlic
Onion
Ginger

Lemon grass
Lime leaves
Turmeric (optional)

Chicken, lightly browned
Bamboo shoots, chopped
Coconut milk
Salt and pepper to taste
Brown sugar, a pinch

Sunday, January 23, 2011

Grilled fish with ginger and garlic (Jun`s recipe)

This is going to be very short. Yes, you`re welcome.

I didn`t take pictures as usual because at Jun`s Indochine Kitchen you can see far more awesome pictures with recipe in details for this fish with ginger and garlic.
Once I saw this fish dish on her post, it just caught my mind. For days.  I knew I just had to make it. And I`m glad I did! He was glad too!
Here are two things I did differently:
1. Fish was grilled instead of being fried
2. Jun used more ginger than garlic while I (unintentionally) did the opposite.
Err..three things?
3. The garlic-ginger infused oil was used to make sambal

This tasted GREAT! Oh I really wish I can be more specific in describing the deliciousness, but for a garlic addict like me, this topping is unbeatable. The ginger and sesame oil added very nice mild heat and flavor to the garlickyness.
And as time after time I kept forgetting to take step-by-step pictures for making sambal, I hope this will somehow help.
With this dish? We overate again, of course.
Thanks for the recipe, Jun!


p.s Judging from my very poorly sliced ginger, Jun (and her mother) probably would tell me to go to a cutting/slicing/chopping class (which I`d love to if only I could find a free one, lol) 

Tuesday, January 18, 2011

Okonomiyaki (Japanese sweet savory pancake)

There was a half of cabbage sitting alone and sadly on my kitchen counter for days. I`ve planned on using it for "something", aka. undecided menu. Then, finally the day came. The day when I remembered how we really enjoyed our okonomiyaki in a restaurant late at night after our date in a temple and I finally got something to do with my cabbage. Now, you may wonder what okonomiyaki is and I`m more than happy to let Wikipedia get you the answer. In my own words, okonomiyaki is a thick cabbage pancake glazed with sweet soysauce and mayonaise and topped with seaweed and benito flakes. It has sweet and savory taste with a soft texture like pancake and it`s very filling too. And you probably already read my previous post about Korean Boochim, which is also called as savory pancake (or crepe in my version as I like it thin) but without any hint of sweetness as sugar or anything sweet is not used in preparing the boochim itself and its dipping sauce. I love them both. Love!

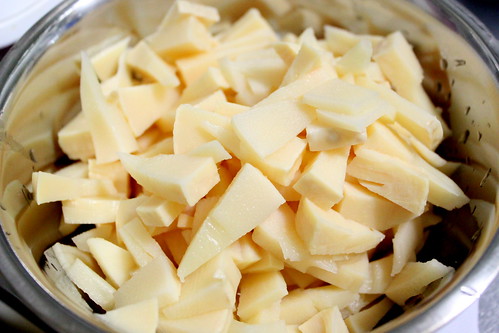
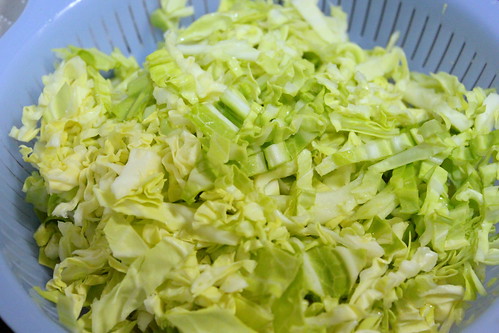
Alright, now get the cabbage, wash, thinly slice it up, and set aside.
I bought 2 (two!) cheap cabbage slicers and they just didn`t work for me. Goodbye, 2 dollars! I ended up slicing up my cabbage with my knife, just the way I always do.


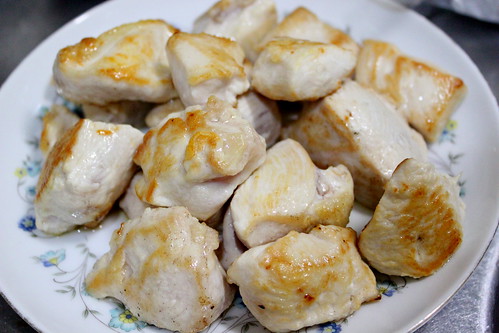
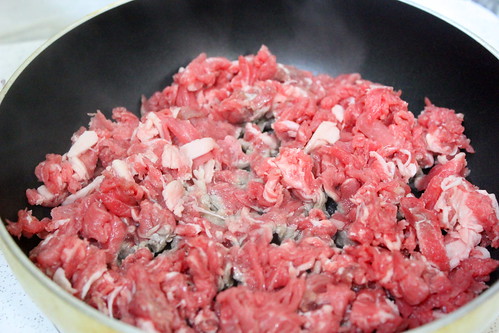
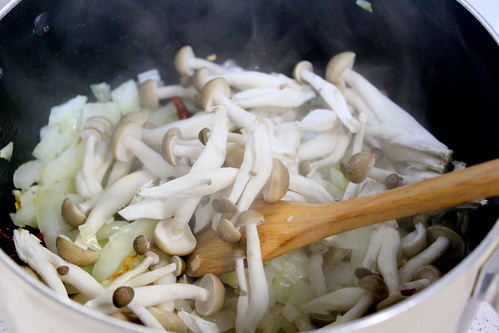
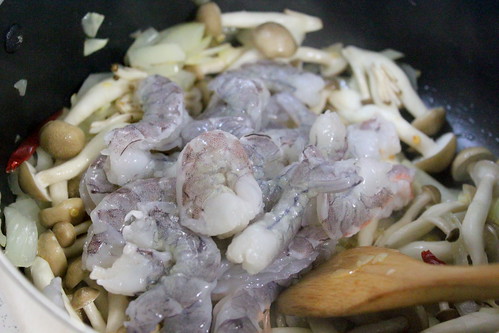
You can use pretty much anything for your okonomiyaki. One thing to consider though,  if you use something raw like meat or fish, you should cook it first before mixing it with other ingredients. Otherwise there`s a chance for you to end up having something not properly cooked inside your okonomiyaki. I used beef for mine, by the way. If you too want to use beef, slice or chop it up thinly. Or you can use minced beef instead.


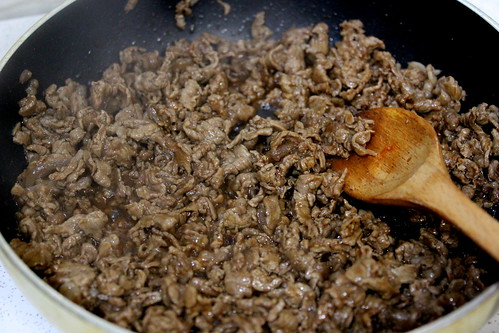
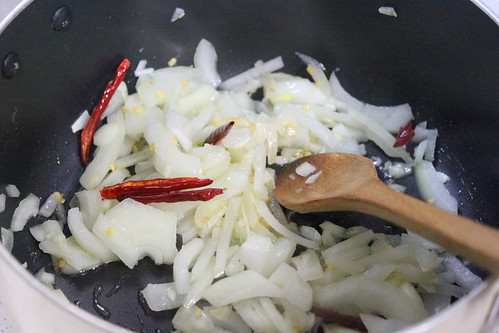
Heat a non-stick frying pan without oil and cook the beef.


When the beef looks cooked, season it with soy sauce, sesame oil, pepper, and fish sauce. Yum! Set aside when the beef is done.


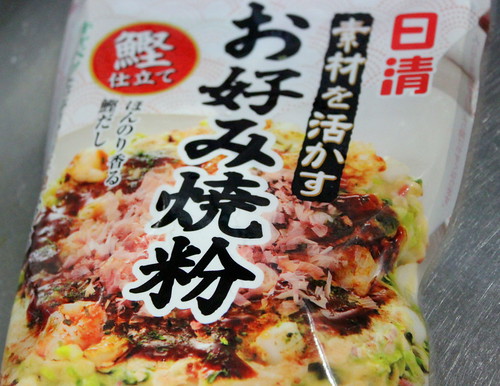
Now, the flour. It`s very easy to find okonomiyaki flour mix here and I hope you can find it too at your place.


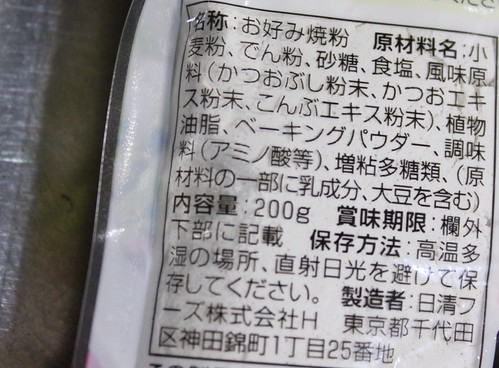
But, in case you can`t find one, let me just show you roughly what`s inside the mix. So, basically it`s flour mixed with sugar, salt, dashi powder (which contains of benito and konbu seaweed), vegetable oil (now I honestly have no idea how they do this), baking powder, and flavor enhancers (aha, it sounds a lot like MSG). If I have to prepare the flour mix by myself, I`d use flour, sugar, salt, and baking powder.


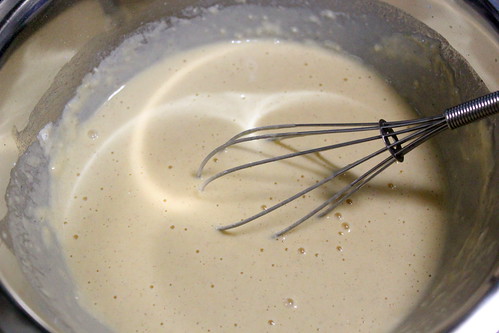
Place the flour mix in a bowl, throw in eggs, and pour in water. I used plain water here, but you surely can add dashi-infused water instead, especially if your flour doesn`t have dashi in it. And to make your life easier, please beat the egg first before stir up everything.


Stir up until the batter turns smooth. My batter did turn out fine, but using beaten eggs sounds much neater.


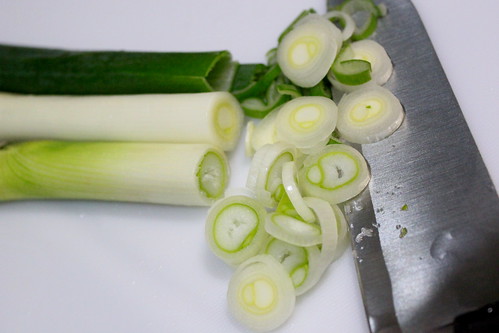
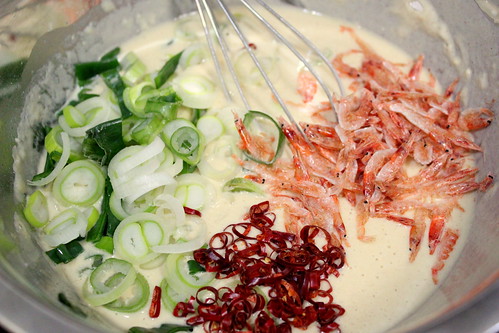
Other ingredients for the filler are spring onion...


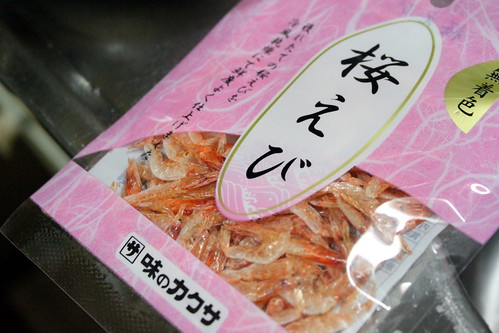
Small dried shrimps. Name is sakura ebi here.


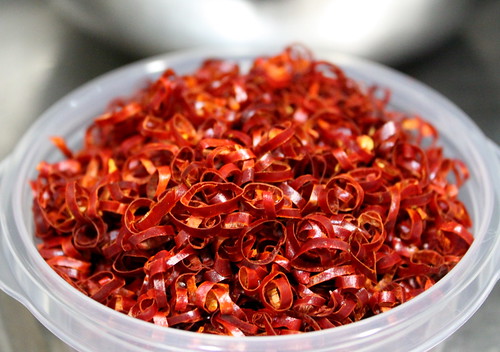
And chilli! This comes from a chilli-crazy person (aka.me). I wonder if there is any okonomiyaki restaurant in Japan serving their okonomiyaki with chilli. Please let me know if you know some place!


Throw in the trio to the batter. They`re singing in there, very happily. You can sing along while stirring them up.


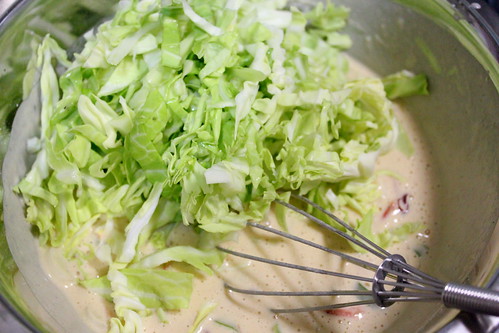
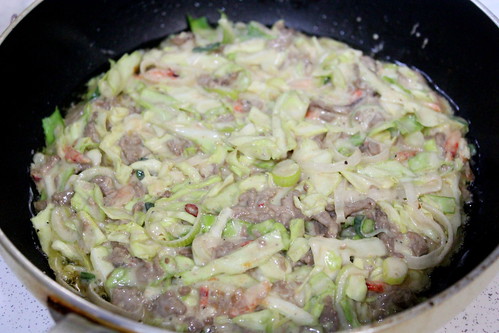
Remember the cabbage? We`ve been neglecting it (again) for a while. Time to stir it in!


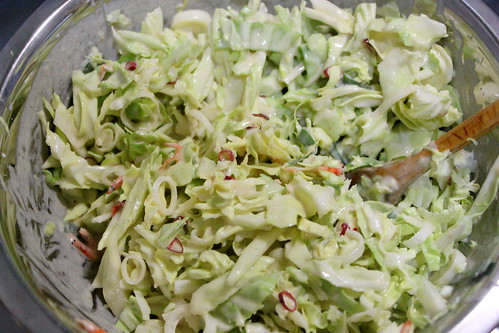
Wohooo...this is the okonomiyaki mix! With the fillers in, the batter should not be runny. This may seem like it needs more batter, but this is actually fine.


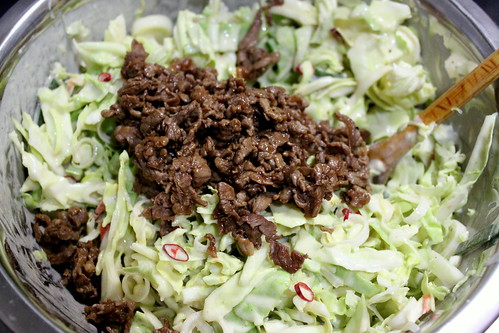
Don`t worry, I`m not forgetting about the beef. Well, I almost did, though.


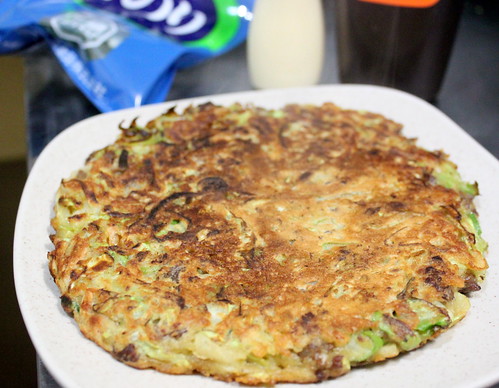
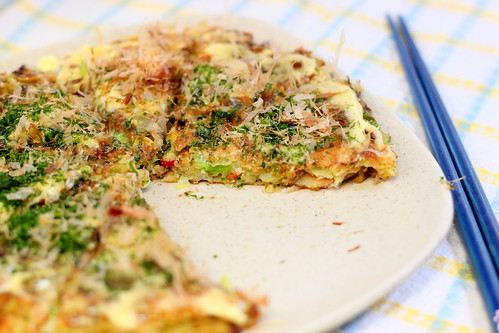
Now the okonomiyaki IS ready!


Heat a bit of oil just enough to cover a non-stick frying pan, add the batter, cook on low/medium heat. Okonomiyaki is usually 3-cm thick, but mine was probably only 2-cm. Just make sure that you cook it on low heat if your okonomiyaki is a thick one. When the bottom gets browned and crisped up, flip over and cook until the other side is done.


Place the disc on a plate and we`re gonna spread some fun here.


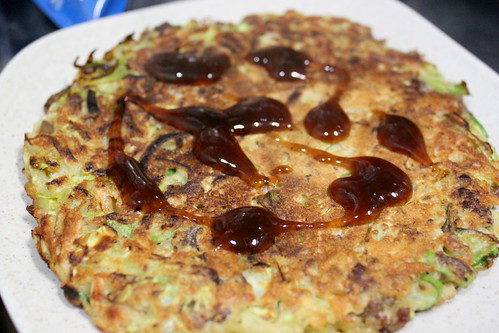
First is okonomiyaki sauce. I hope you can find it too there. Or you can just use soy sauce mixed with oyster sauce and a bit of sugar (and dashi for extra flavor). Normally people use a brush to spread the sauce, but I just use the back of a spoon.


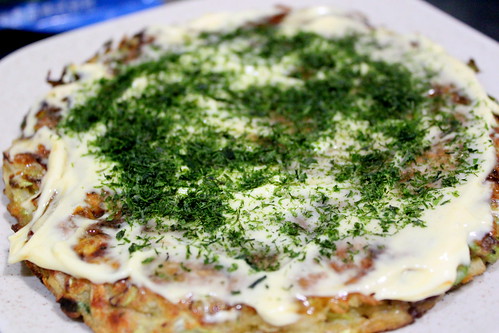
Second is mayonnaise. Spread it too. Too much? No, you can`t stop me.


Then, sprinkle seaweed flakes. Green is beauty. Seaweed on top of mayonnaise is divine.


Last is benito flakes. I really really really hope you can get this benito flakes as I`m clueless for any substitution.


Did I mention "last"? The fun is not over, darling. In fact, it`s about to start!
Get ready for a magical moment.


Cut a piece of it and place it on your plate.


And eat it. Can you hear your taste buds singing???
My cabbage looks totally happy here!


Ingredients:
This will roughly make for 4 or 5 discs of okonomiyaki with 18-cm in diameter and 2-cm in thickness

Filling (300 g)
Cabbage, thinly sliced
Beef, cooked
Chilli, cut
Dried shrimp

Batter
200 g okonomiyaki flour mix
2 whole eggs, beaten
250 ml water

Thursday, January 13, 2011

Spicy miso soup

I`m really sleepy right now, but I just can`t wait till tomorrow to share our dinner with you. So pardon me if you can hear me yawning like in every minute. Sleepy and getting excited at the same time. Weird?

*Yawn*
 Zzz....


Quick quick.
Saute garlic, onion, and chili. Add some more chili if this doesn`t look spicy enough for you.


Throw in shimeji mushroom...


...and shrimp. Stir a bit. In case you`re worried, I always wash and devein my shrimps no matter how sleepy I am. So please tell me that you do the same.


Back to the spiciness, this is what I use to make my spicy food looks redder without making it too spicy. Gochujaru, Korean chili powder. I drool every time I look at red food.

*Yawn*


Now this is my new ingredient. Plain soy milk. Correct, not cow`s milk or coconut milk either. Soy milk. I`m really glad I used this!


Pour in soy milk in batches according to the thickness you want and stir well.


I just never get bored with this konnyaku. I mean, its chewiness and blandness are just perfect for including it in many many dishes. Almost zero calorie. Ha, another goodness there.


*Yaaaawwn*
Am I dreaming right now?

Miso paste. Because we`re making miso soup. Keep in mind that miso has a very rich flavor (with high-sodium content), so you don`t want to overuse it.


As it has a very thick consistency, it will turn into lumps if you just plunge them in directly to the soup. From what I watched learned on TV, a good way to do this is by placing it in a small strainer and stir it with chopsticks with the strainer half soaked in the soup. Thing is, I always cook my soup with a spatula. So I just push it out with the back of spatula and it always works fine for me.
After stirred in the miso, you can adjust the thickness of the soup. More water to thin out, or more milk to thicken up. Or more miso for richer taste.


Don`t you want something green in your red soup? I always do. Throw in green paprika slices.


And bean sprouts too. This is a veggie party in a pot. Stir well and taste.


And serve. A bowl of spicy vegetable-soymilk-miso soup. Rich. Spicy. With fibers.


Oyasuminasaaaai, everyone. Nightie night!


Ingredients:
Garlic
Onion
Chili
Shimeji mushroom
Shrimp
Konnyaku
Green paprika
Bean sprouts
Soy milk
Miso