Saturday, October 30, 2010

Urap sayur

Next Monday will be my turn for a paper presentation. I work in the same lab, but no longer a student. And yet my name is still on the list of presenters after 5 years. So after spending weeks searching papers and sighing, I`ve finally got one.
It`s already Saturday night now, yet my PowerPoint is still far away from done. Not to mention the script. Not to mention the review. Bored already?

Sorry. Let`s get back to my other world. The fun world. The yummy world. The no-paper world. Ooops..no "paper" word anymore, promise.

Alright. This is the theme. Fibers.
 I, as the person in charge with providing meals in our house, am perfectly aware that we are lacking fibers in our daily food. Proven by his weight and BMI. Oh!

So this dish, called "urap sayur" in Bahasa Indonesia,  is one of my tricks to manipulate my self into eating more vegetables. It`s basically steamed or blanched vegetables mixed with spicy grated coconut. BUT, grated coconut is something very rare and and expensive here. The good thing is, I found something really really good here. So now I proudly present:

OKARA.
Or soy pulp. A by-product from tofu-making process. Okara is (very) high in fibers. And cheap. Perfect!


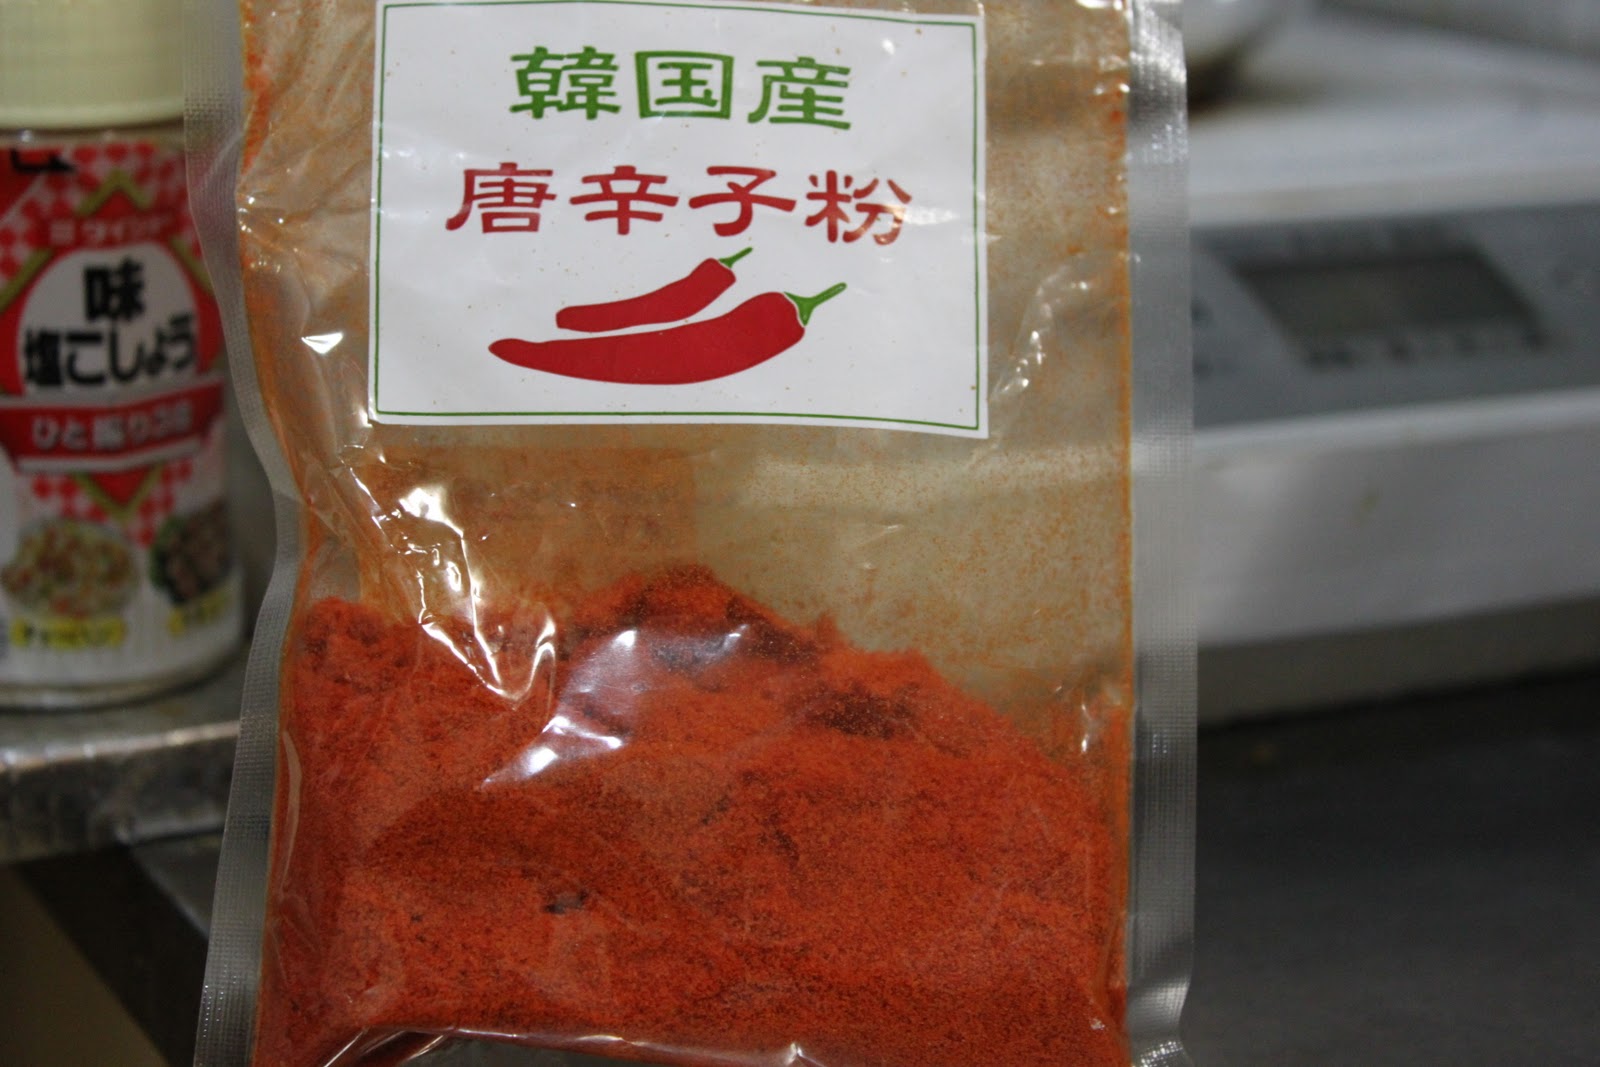
Now, let`s begin with sauteing chopped garlic, ginger, sand galangal (kencur in Bahasa Indonesia), kaffir lime leaves, and chilli powder. Add soy sauce and fish sauce at this stage.


When you can smell the fragrance, dump in the okara, and mash it up while also mixing with the spices. The okara will start breaking down into lumps at the beginning. Keep stirring until it starts losing the water content.


When it gets drier and drier, it will turn into something look like dessicated coconut. I`m not specialized in technical cooking terms, but I think this process somehow can be called "toasting" as you will feel as if you just heat-dried okara on the pan without the presence of oil, which is almost instantly absorbed by okara itself, or liquid, which was in a very small amount and already evaporated throughout the drying.

Now adjust the taste by adding salt, pepper, a pinch of brown sugar and cardamom powder.


Also, since okara is apparently a strong absorbent, when you add soy sauce or anything liquid, it will quickly absorb it and make it a bit difficult to distribute the sauce evenly. That`s why I think it`s better to add the sauce when you start sauteing the spices. But you can surely add salt or pepper or anything in powder now.

So, when your okara looks like something in the picture above, it`s done. If you have left overs, you can keep it in a tupper box or zip-locked bag and store it in fridge for like 3 days. Actually my okara finished after 3 days (thanks to his appetite) and the last batch was still good.

Now,  the other fibers. It`s Fiber Day, remember?
I used steamed cabbages and bean sprouts.Cost-friendly buddies. Love them.


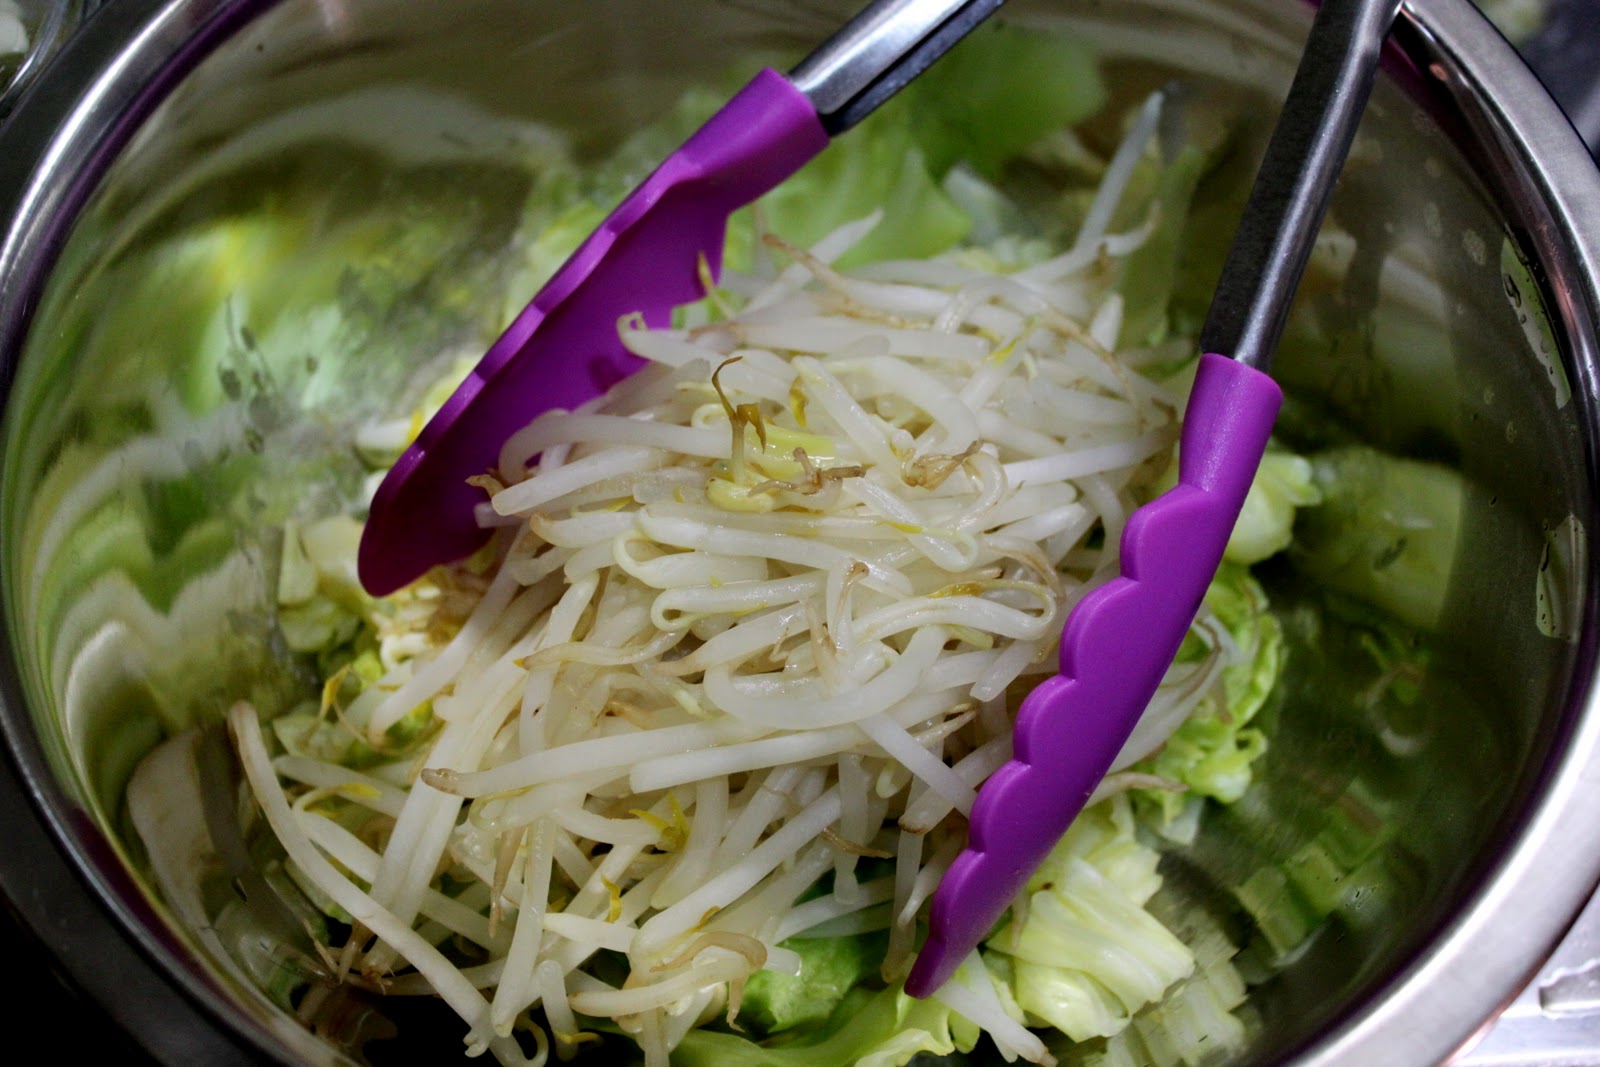
 Place them in a mixing bowl and throw in the spiced okara.


Mix them up. I used tongs for this. You can use your (clean! very clean!) hands if you like.
I also added cilantro (my love) and the taste and smell just got much much better!


Done mixing? Now, go get your plate and steamed rice and then place the urap sayur on top, or on the side, or in a different plate, whereever you like!


Enjoy your fibrous healthy meal!


Oh yeah, I`m so busted!

I admit I can`t be a vegan. Even only for one meal.
After getting my urap sayur done, I can`t help cooking something meaty (and less healthy) for the side dish.
I promise I`ll get back on that in the coming post. It tastes really really great you have to try it.

Happy Sunday!

Oh...shoot! It`s Sunday already....!

Ingredients:
Okara
Garlic
Ginger
Sand galangal
Chili powder
Soy sauce
Fish sauce
Brown sugar
Cardamom
Salt
Pepper
Cabbage
Bean sprouts

Tuesday, October 19, 2010

Avocado smoothie

When it comes to avocado, I can be a very annoying picky eater that you`ll regret for offering me a plate of avocado salad or avocado sushi. "I want avocado smoothie!". That`s what you will hear from me.
Perhaps this stubbornness of mine came out from 23 years living in a place where people only have avocado as smoothie. Smoothie only. ONLY.
Here in Japan, I almost choked when I was watching cooking program on TV showing avocado in salad, sushi, hamburger (hamburger!), stir-fried dishes, ....and many other dishes, but not in desserts whatsoever. At the beginning, I kept disagreeing on using that fruit (yes, my mind calls it fruit) for dishes. But now I just watch and watch and watch. No complaint, although I still think that I would love it better as smoothie. I know I should have a try on them (avocado dishes), but maybe later.

I know there`s a very little chance (probably zero chance!) that you don`t how to make avocado smoothie, but I`ll just share the recipe anyway. This smoothie is super easy and quick to make yet it has a very rewarding deliciousness.

Cut the avocado lengthwise into halves and remove the seed out.


Scoop out the flesh with a spoon.


If you use a stick blender like I do, grab a measuring cup or glass or anything your blender can fit in to nicely. Consider about the smoothie`s volume you want to get when choosing your container. In my case, I used 2 (my) palm-sized avocados and I made about 500 ml smoothies.


Place the avocado flesh into your cup, add sugar (or honey for a healthier choice), and milk.


Put in your blender and start pureeing the mixture.


Now is time to adjust the sweetness and texture. I didn`t have any avocados left so I added a very low amount of milk. That way, my smoothie won`t get too watery and in fact, it was very thick at the beginning.Then I added some more milk in batches until the texture is fine for me.


Sadly, adding more milk means more sugar as well.


Keep adjusting until you get it right.


By right I mean you touch it with your finger, lick it, and say "YUM!"

 
And this is the final touch, which is very important for me. Chocolate syrup. Or sweet condensed chocolate milk. Or melted chocolate bar. Anything liquid tastes chocolate and sweet will do fine.


 I`m drooling now.

Sunday, October 17, 2010

Mackerel braised in tomato liquid

Look what he brought me when he`s back from fishing!!


Don`t believe it? Of course you don`t. I won`t believe it either. Next time we go fishing for real, I`d surely include some photos during the fish catching to convince you, and MY SELF.
Let me come clean then, we got these mackerels from the store,  with a very amazing price, 1 USD for one fish. Nice, right?!


My family used to have canned mackerel when my mom didn`t feel like cooking from scratch. The mackerel comes with tomato gravy and it`s quite tasty I must say. She would stir-fry chili, shallot, and fresh tomatoes and add the canned mackerel in it. Now I still occasionally have this canned mackerel for the same reason. Convenience.

But last night was different. I wanted to cook this mackerel in tomato gravy without any can involved. I was surrounded with fresh mackerel and fresh tomatoes, and I have a pressure cooker (my superhero!), so I didn`t any see reason not to cook it from scratch! Apparently, "convenience" has been replaced with "fun".


Start by removing fish head, fins, and guts. Wash it and cut up into your preferred size.


I think it will be easier for the heat and pressure to process the bones to be completely tenderized and edible if I cut it into small chunks. Plus, I love bite-sized food. By the way, I`m horrible at cutting and that should explain why these cuts look scary.


Place onion, ginger, and lots of tomatoes in food processor and puree them. Set aside.


Fry garlic and chilli with olive oil until fragrant in a pressure cooker.


Pour in your tomato puree and stir a bit. Season with soy sauce, fish sauce, salt, and pepper.


Now, this is one of my favorite buddies. Korean chili powder called "gochugaru". Mine is in Japanese version and the good thing of this powder is, it has a mild spiciness despite the redness. That really helps when I need to cook something that supposed to be red-colored by fresh chilies without having to burn my husband`s tongue. But again, as the level of spiciness tolerance varies among us, just make sure to add this little by little.


After gochugaru, dump in the fish chunks into the puree. Remember, do not add water unless you want it to be fish soup instead of gravy. If you put enough tomatoes, you`ll notice the large amount of water released from the tomatoes. I also threw in some dried kombu (seaweed) and kaffir lime leaves for extra fragrance.


Put the cooker`s lid on and let it cooks for 15 mins. Please read your cooker`s manual to make sure that you do it correctly (and safely).


After 15 minutes cooking and 20 minutes cooling (or until pressure is completely released and you can safely open the lid), open it and see how beautiful it is inside!


Now test if the bones are tender enough to be eaten. If it`s still hard, try to cook it for another 10 minutes or cut the fish into smaller chunks first before recooking it. Mine was done with 15-min cooking and all the bones came out tender that makes this dish literally an all-you-can-eat food.


And this is how I enjoyed my mackerel this morning alone while he was still sleeping.


I ate too much. Again.

Ingredients:
Mackerel
Garlic
Onion
Chili
Ginger
Tomato
Soy sauce
Fish sauce
Dried kombu seaweed
Salt
Pepper

Friday, October 15, 2010

Tiramisu wannabe

Ladyfingers??? Where can I find them??
Those were my questions days ago when I was looking at several recipes for tiramisu. I was about to forget about making tiramisu from scratch until I finally came up with this.


"Yeah, this should work", I thought. And in fact, it did!
I won`t say that toast can be a good substitute for ladyfinger because honestly, although I had tiramisu from cake shops before, I don`t know what ladyfinger tastes like in the first place. But if you need to kill your curiousity on my weirdness, give it a try and let your taste buds do their jobs.


So, remove the bread crust (if any), cut up the bread into sticks, and bake them at 180 C for 15 minutes. Set aside.

Next, whisk egg yolks and sugar in a mixing bowl until the colors turns into pale yellow


Heat up water in a pot which your mixing bowl can fit in without being completely soaked. Simmer the water and place your bowl on it. Softly whisk up the batter. Be careful not to splatter water in it.
 

After 5 minutes, the batter will be more thick, creamy, and pale.  Cool it down or keep it in fridge for a while.

Now let`s work on the cream. Start with cream cheese. Actually there`s nothing to do with this one, except letting it softened at room temperature and stirring it until it gets softer.


Whipped cream, on the other hand, is the real work. And before I continue, here is an important message from my cream carton.
"Put your mixing bowl in a bigger bowl filled with ice cubes while whipping the cream"
I`m a follower, but I hate to waste my ice cubes. So here`s what I used instead.
Ice cubes in bag (their real bag) and my cold pillow.
Okay, the latter one sounds controversial. It`s actually a cooling gel designed as a pillow to combat the heat in summer, which is a very cool item to have! 


Okay, enough about the pillow, back to the cream.
Pour in heavy cream to a mixing bowl, add sugar, and start whipping with your mixer. Start with low speed unless you don`t mind having your face and clothes covered with liquid cream (speaking from experience).
Keep mixing until your cream can form a stiff peak. I sometimes have fun playing with the peaks and forget for a while that I`m in the middle of something.


Now dump in the softened cream cheese and mix them up. I actually only used my spatula at this step and I got so many cream cheese chunks in my tiramisu. So using mixer should be better if you want a real smooth cream.
Take out your custard-like egg cream from the fridge and dump it into the cream mixture. Mix them up with spatula until everything combined. Now your cream is done.


Ooops..almost forgot coffee. Very strong coffee or espresso are recommended in most recipes I read. But I used regular instant coffee and dilute it with this instead of water:

It`s my childhood butterscotch candy in a drink. Y-u-m-m-y.
And I was happy to find that the mixture of coffee and this caramel-tasted drink turned out great.


Prepare a casserole dish and arrange your toast sticks into a layer. Don`t worry about the size differences.


Spoon the coffee mixture over all toasts, but only to wet them, not soak them. Apparently the toast could absorb liquid more than I thought. New things to learn everyday, indeed!


After done with the toast, place a dollop of the cream and spread it evenly all over the toasts. Add some more if you like. You`re the king (or queen!), so go wild!
 

Now this is fun. Sprinkle the cocoa! I could feel my heart beating faster looking at the cocoa slowly coloring the cream.The tiramisu is coming out already!


Oh my...


Alright...done with the first layer. Now continue making the second layer. Start over again from arranging the toasts...


Wet them with coffee, cover with cream, and sprinkle cocoa.


Mine only had two layers so I stopped at this step. If you have a bigger dish, some more layers will be great too!
Keep it in fridge for 3 hours and serve.


Oh..heaven...
 

....this is heaven (aka. sugar, fat, and happiness) in my mouth. 


Please drag me out to get some exercise right now!

Ingredients*:

5 egg yolks
25 g sugar for egg cream
vanila
200 mL heavy cream
15 g sugar for whipped cream
150 g cheese cream
4 sheets of breads, cut into sticks, and baked
400 ml coffee mixture
cocoa powder for sprinkle

*for 20 x 20 x 6-cm casserole dish