Thursday, December 29, 2011

Happy Holidays!

Starting today I`m officially on my winter break and as one of my "vacation assignments", I have just completed making my RECIPE LIST that I placed under a new page above. I thought it would be nice for me and the readers to have a quick glance on what I`ve been posting/cooking this far without having to check out each category on the side bar. I`m planning to keep updating the list whenever I posted a new dish and hopefully the list will be better and yummier. New Year`s resolution it is!


So, I hope you all are enjoying the holiday season with your loved ones and of course, good food. 
Happy holidays!

p.s. The tiramisu cake above was made using store-bought sponge cake (aha, busted!) and Kahlua coffee liqueur. The basic recipe for the liqueurless filling can be checked out here.

Sunday, December 25, 2011

Petite sweethearts and Merry Christmas!

It`s an unbelievably freezing Sunday night at our place here. We were supposed to go outside today, but we cancelled the plan after we saw the snow started falling. Not so much for a willpower, huh. After all, the idea of staying at home with the warmth, plenty of food, and hot drinks leaves us almost no reason to go outside where the freezing air can bite our noses off. 

So, since it`s Christmas today, we`d like to wish you all a very merry Christmas! As a virtual gift, let me share with you these adorable petite cakes snowed with icing sugar on your special day!

The method to make this bite-sized cakes is very similar with making muffins, only the batter is slightly thicker than the muffin batter is. The original recipe of the petite cakes actually comes from my cake mold pack and I have modified few ingredients and steps. Here`s how to make them.

Beat whole egg and sugar until the mixture has turned creamy and pale yellow.

Beat in olive oil (or melted butter, as suggested in the original recipe) to the mixture. 

Stir in raisins. 

Fold in sifted flour and baking powder and your batter is ready.
Well, actually the original recipe suggests to let the batter sit for 15 mins before proceeding to baking. I didn`t actually do this step, but it took me a few minutes to prepare my mold and spooning in the batter. So I guess I somehow did the step half-way.

Grease the molds with olive oil or butter and spoon the batter into them until 3/4 (or 7/8, as the original recipe says) full. I filled each mold with roughly 1/2 teaspoon of batter and boy, was it challenging!
You can see here how messy I am in doing this work. And yet I keep thinking that I will get better someday. *yawn*

Bake them in preheated oven at 180 C for 15 C or until the cakes are nicely puffed up and the surface has turned golden brown. Let the cakes cool down.

Now, how petite they are? This petite. Although I call it as bite-sized cake, I`m positive my husband can eat 3 of them easily in one go.

 It`s snowy outside, and snowy inside. After the cakes are cool enough, dust them with icing sugar.

The amazing thing about this cake is the texture. The surface is soft when the cakes are just taken out of the oven, but it will firm up when it cools down. The result is a tiny cake with the whole surface, including the unbrowned surface, crusted up leaving the inside soft and fluffy.
You know what else you should try with the cakes if you don`t mind the extra calories? Chocolate fondue. Yum!
PETITE SWEETHEARTS
Makes about 40 bite-sized cakes

Ingredients:
1 egg
50 g sugar
50 ml (1/4 cup) olive oil or 50 g melted butter
1/4 tsp baking powder
1 tbs raisins
Vanilla oil
Icing sugar for dusting

Method:
1. Beat egg and sugar until the mixture turns creamy and pale yellow.
2. Whisk in olive oil and vanilla oil.
3. Throw in raisins and stir to combine.
4. Fold in sifted flour and baking powder.
5. Spoon the batter into oil/butter-greased cake mold until 2/3 full.
6. Bake in preheated oven at 180 C for 15 mins or until the surface has turned golden brown.
7. Let the cakes cool down and dust with icing sugar.

Thursday, December 22, 2011

Pretzella

First time I had mini pretzels, I knew that I had to do some makeover with them, only I was completely clueless about what I could do. To me it`s a little too dry and the taste was too plain, although fairly speaking, the only pretzels I`ve ever had were from the store packed in a bag like potato chips and they were sprinkled with salt. 
But that was a story from the past, because pretzel never looks the same to me anymore. It was last month when I stumbled upon an awesome post at Live Love Pasta showing how to make chocolate bark using pretzel and that post really got me excited to start my pretzel project. Next thing I knew, I had my chocolate-drizzled pretzels, which I named Pretzella for their pretty princessy looks, lining up on my kitchen counter.
Last December, I made 
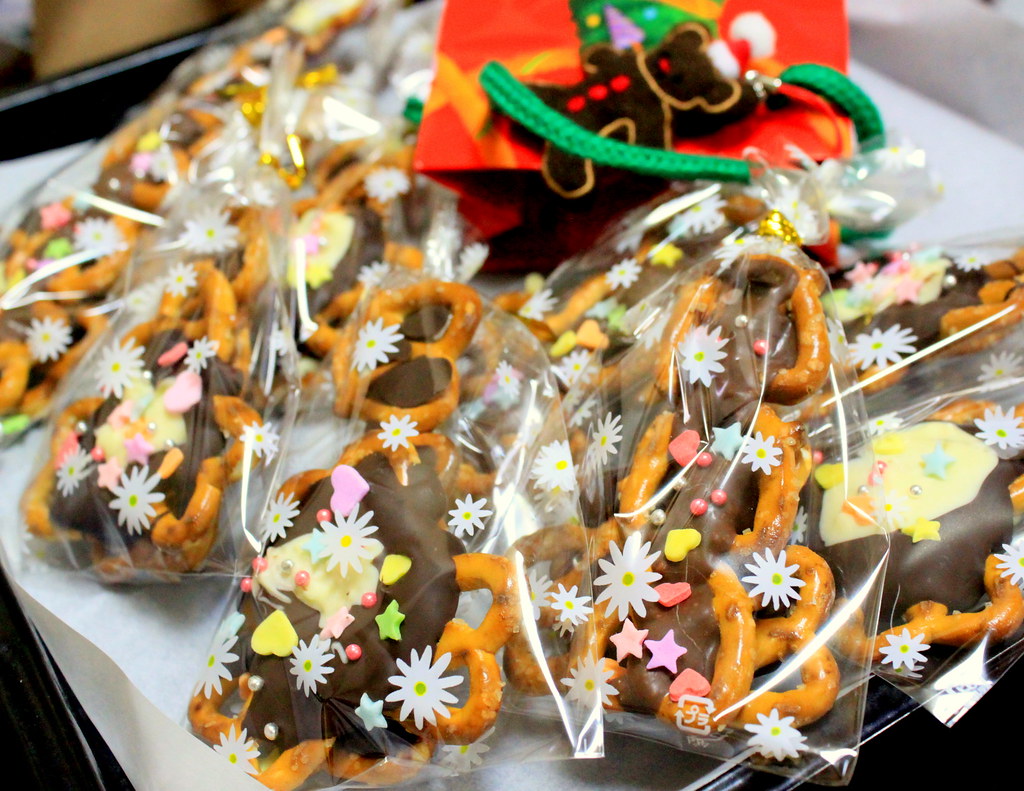
chocolate bark with assorted nuts and it was undoubtedly good not to mention how extremely easy to make it. But this time, I wanted to bring the chocolate-pretzel goodie to my lab as Christmas gifts, so I thought it was better to prepare it in individual portions. With the bark, however, I imagined it would be difficult to divide it into equal portions without the risk of cracking it (in a bad way). I`m just too clumsy to handle it.

Anyway, I finally came up with the Pretzella, certainly with simple method, and here`s what I used:
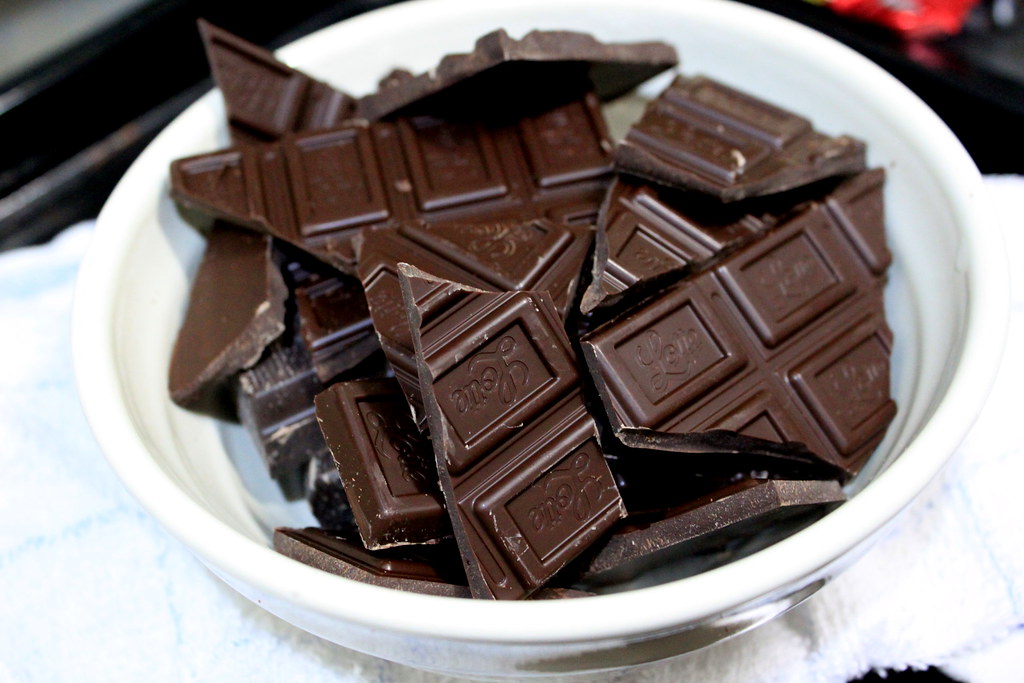
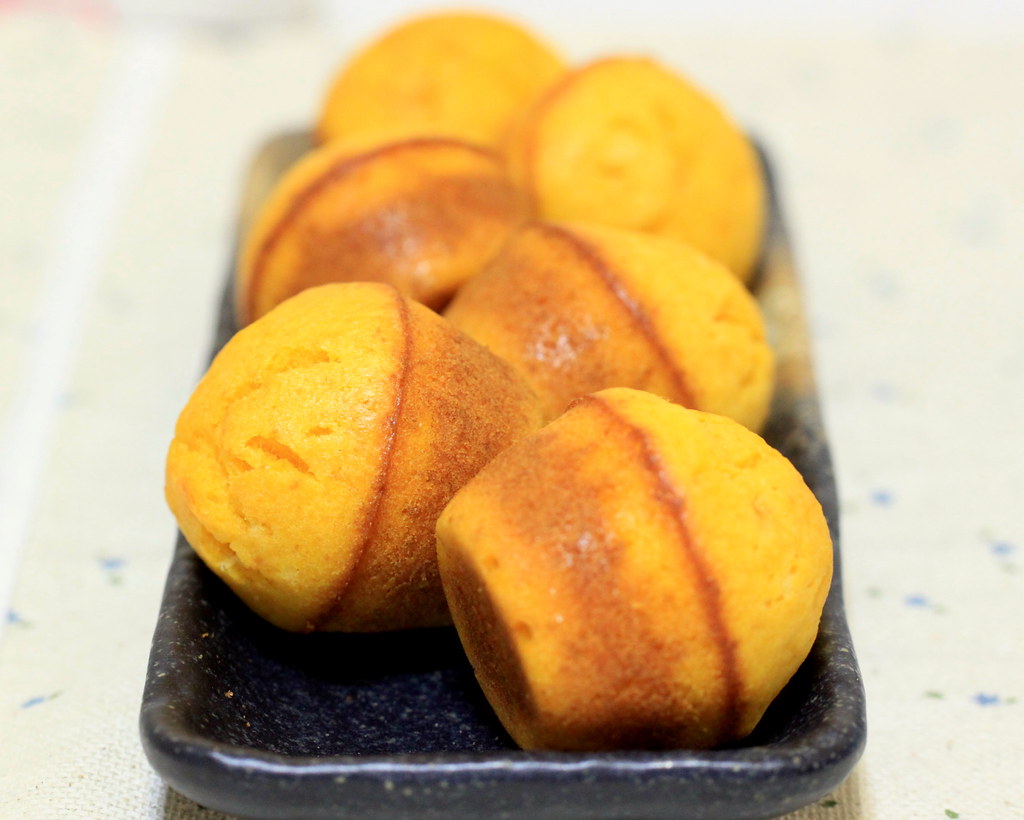
 Dark chocolate...

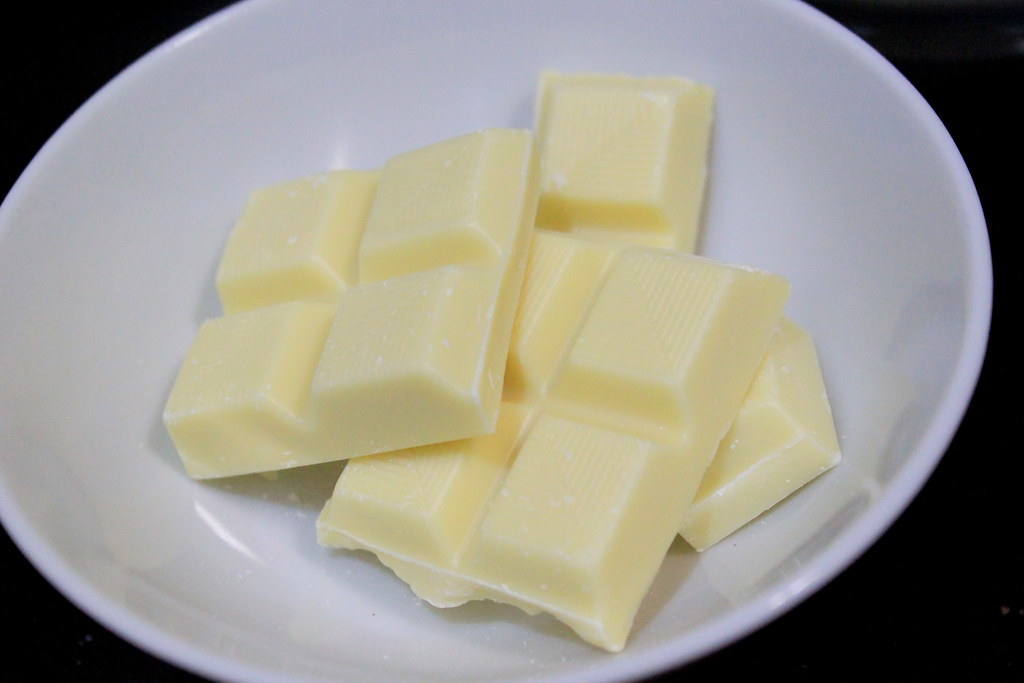
...white chocolate..and milk chocolate (no picture here).
And the last ingredient but with huge impact is....

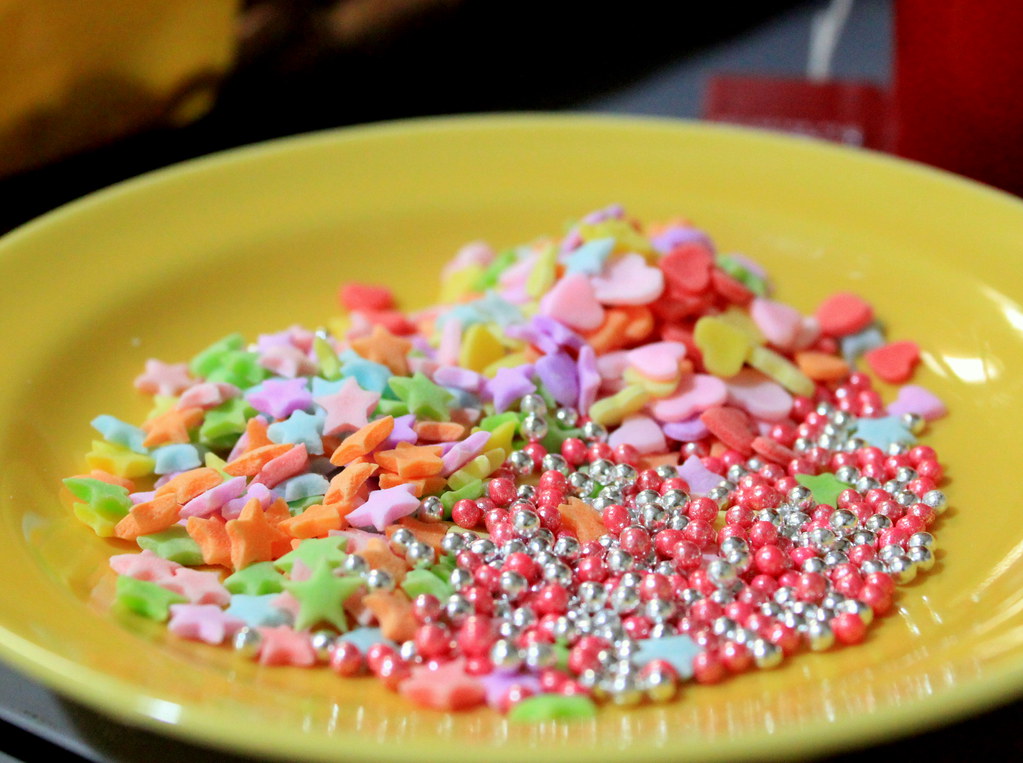
...this joyous full-of-color decorative sprinkles. I don`t usually use artificial coloring in my cooking, but this time I made an exception. This time, I was much much much happier with it.

Let`s assemble now.
 
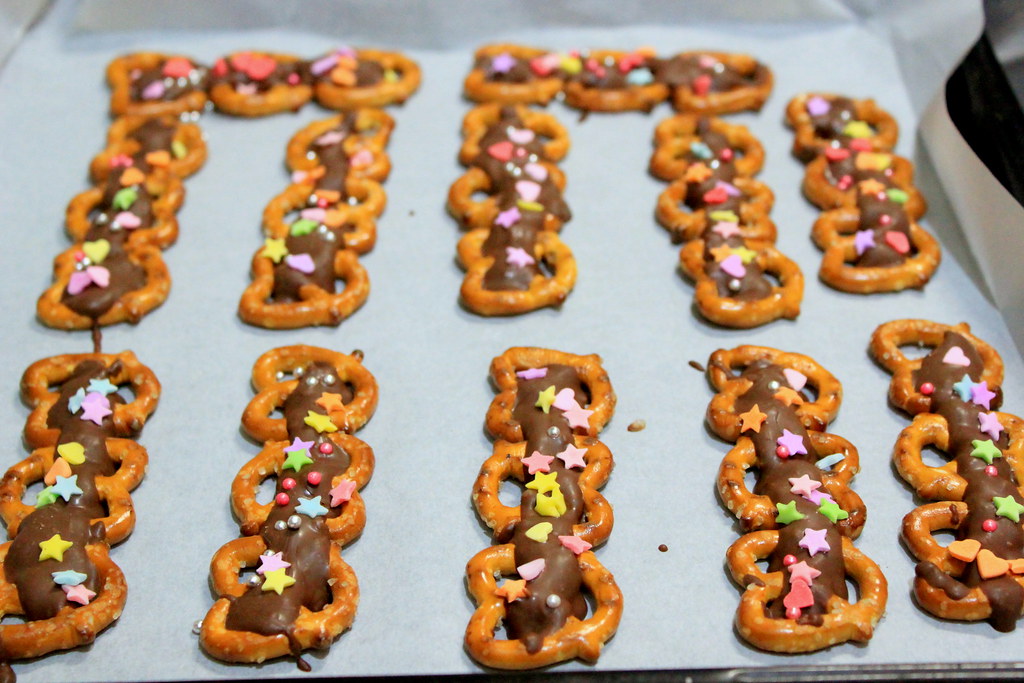
Arrange the mini pretzels on a parchment paper or aluminium foil.
Let your wildest and craziest imagination guide you designing your pretzella. For me, this was what I could think of so far and I`d love to see your version!
After arranging the pretzels, prepare the chocolate. Or, do it reversely, especially if the chocolate is quick to set.
Break the chocolate bars into pieces, place them in separate bowls, and melt them in microwave or double boiler. If you use microwave like I do, heat it for 1 min, check if it melts, and reheat if necessary. If you use double boiler, make sure you keep the simmering water even after the chocolate has melted because you may need to reheat the chocolate later.

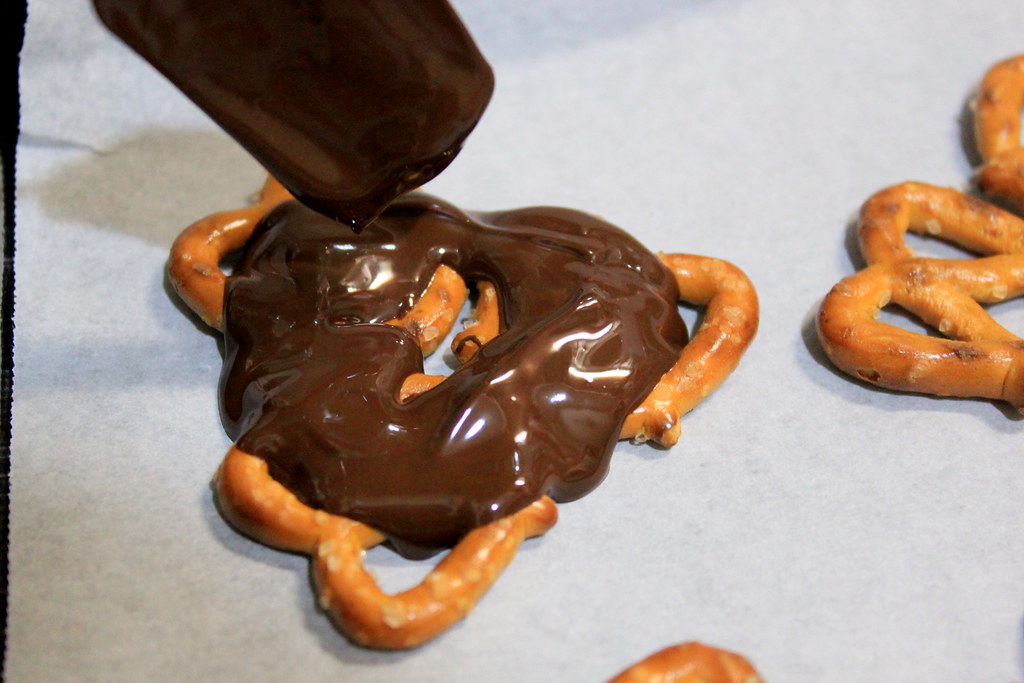
With a spoon (or whatever suits you), drizzle the melted dark chocolate over the pretzels leaving the center unfilled. The basic idea is using the chocolate to glue the pretzels together into whatever shapes you make.

Now carefully fill the center with the melted white chocolate. I flattened the "peak" of the white chocolate by gently brushing it down with the tip of a fork.
I know, it looks as if a toddler made them. In fact, if only I had kids, I would tell people it was them who did the work.

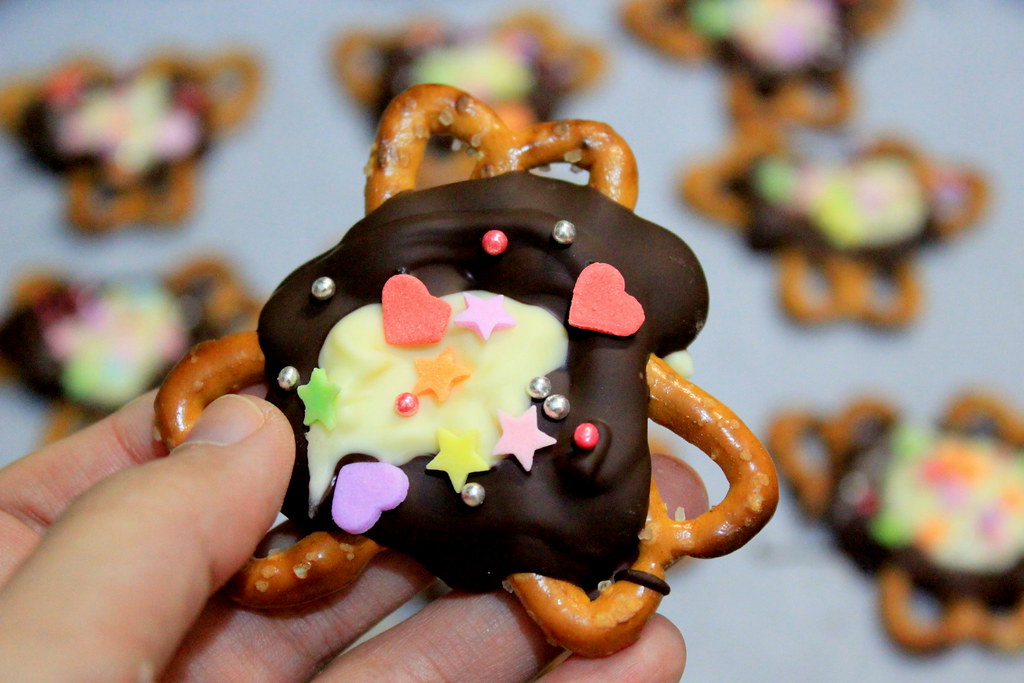
For the last touch, dress them up with the sprinkles. Make sure that you add the sprinkles quick enough before the chocolate starts to set. The sprinkles will easily come off, or won`t stick at all, if you add them after the chocolate has set.
Bibidi-bobidi-boo! The mini pretzels has turned into pretty pretzella!

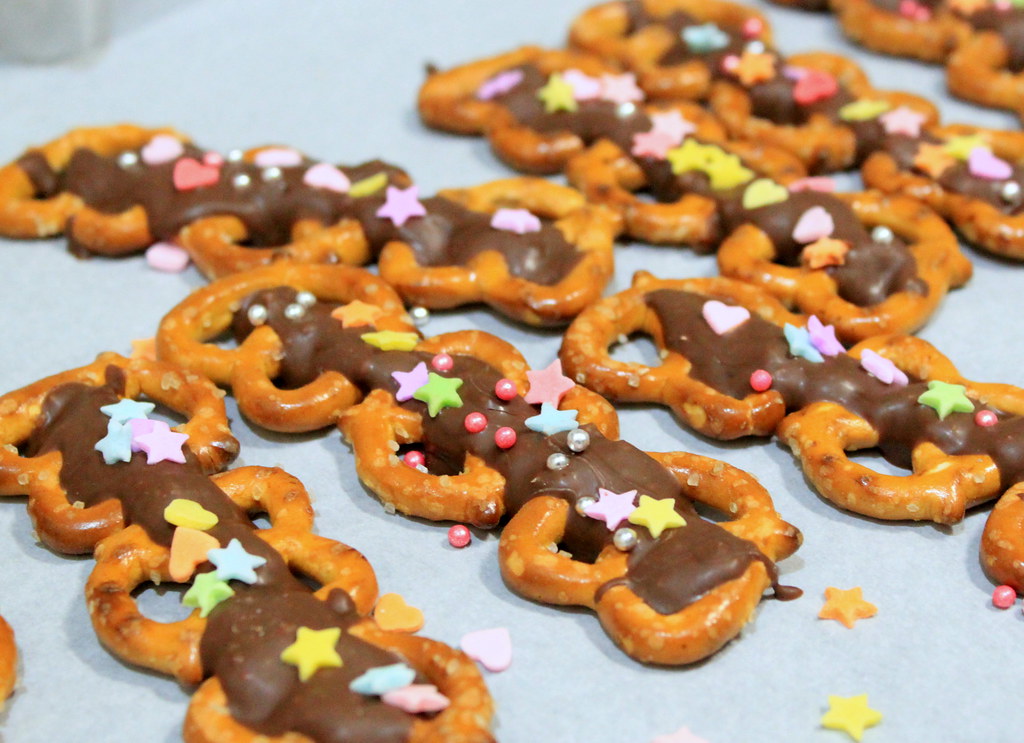
This is after I let the pretzella sit at room temperature for 15 mins or probably less. In winter, our room is usually cold because we don`t turn on the heater unless the chill is unbearable. You can keep it in fridge if you want.

And this is the back view. The chocolate enters the holes and spreads a little bit making it stick properly to the pretzel.

 And these are pretzella with milk chocolate in another design. Hair barrette, anyone?

Eye candy, yes. My husband`s face lit up the second he saw them. Crowd pleaser, of course.
After all, you can`t possibly go wrong with pretzel and chocolate, can you?

PRETZELLA
Ingredients:
Dark chocolate
White chocolate
Milk chocolate
Mini pretzels
Decorative sprinkles

Method:
1. Break all chocolate into pieces, place in separate bowls, and melt them in microwave or double boiler.
2. Arrange mini pretzels on parchment paper or aluminium foil.
3. Drizzle the melted chocolate over the pretzels to glue them together.
4. Before the chocolate sets, quickly sprinkle the decorative sprinkles.
5. Let the chocolate set in refrigerator or at room temperature if it is cold enough outside.

Tuesday, December 6, 2011

Spiced oxtail stew

I sometimes wonder if every time an Indonesian hears the word "oxtail",  this will be the first thing pops in his/her mind:


I honestly think it will. There are probably other dishes, such as grilled or fried oxtail, which I`ve never had, but from what I can remember, the oxtail has such an unbreakable bond with the soup as if the only reason why oxtail exists in the first place is because it needs to be cooked in soup. 
Having said that, for the last few weeks I couldn`t help thinking the possibility of cooking the oxtail in spice laden stewing liquid with the depth of brown sugar. I mean, what could possibly go wrong with that? And thank goodness it didn`t go wrong! When I finally gave it a try, it was so heavenly that I completely forgot about the soup and I know I had to share it with you. Don`t let the length of the ingredient list turn you off, because this stew is incredibly easy to make.  Especially if you have a pressure cooker like I use here. You just plunge everything in the pot, set your timer, and wait. 

Look at these. Marvelous. Not a very healthy day, but keep your fruits and veggies near you for detoxing later.

Parboil the oxtail for 15 mins to remove excess fat and some other impurities.
You can check out some tips on fat removal in the link I gave you above, but I have modified a parboiling tips from Hyosun of Eating and Living with her gorgeous Galbijjim. Thank you, Hyosun!

In my modified technique, after 15 mins parboiling it, I drained all the water, and rinsed with hot water. No, I didn`t worry about losing the "stock" because I believe the parboiled oxtail would still give a very good flavor to the dish. And it did.
After the oxtail is rinsed, set aside and get your pressure cooker. I really really hope you have one in your kitchen.

Heat a bit of oil in the pressure cooker and saute spices listed in the recipe at the end of this post.

Throw in the oxtail and lightly stir to coat with spices.

Pour in sauce made of soy sauce, brown sugar, lemon juice, and salt dissolved in water. I suggest you go easy with the salt at this stage, because you can still adjust the saltiness later. In fact, I usually omit the salt here and add it only when the cooking is done and I`m happy with stew consistency.

When I cook with my pressure cooker, I usually add water at least enough to cover the meat (or whatever I cook) because I think too little water won`t create enough steam and thus producing not enough pressure to tenderize the ingredients in a short time. 

It probably depends on your cooker`s type, but here`s how mine usually works. Set the lid on, lock it, crank the heat up, wait until the safety pin popped up, and turn down the heat to low to cook. And for the sake of your safety, please consult with your manual. For cooking time, I cooked this one for 40 mins and because the meat hadn`t tenderized enough for me, I recooked it for another 20 mins. 
After the meat has tenderized, adjust the consistency of the soup by thinning it out with water or thicken it up by reducing the water on high heat with occasional stirring for another 5-10 mins with the lid open. When the consistency is right, adjust the taste with salt or sugar.

 
Now that you`ve seen that 80% of the cooking process is actually the waiting without even opening the lid, don`t you think this dish is easy? You just need to be patient. Although I`m not sure the patience will stay there when the stew is done and served right in front of you with steaming hot rice, because I promise you will finish it in much shorter time than the cooking.
SPICED OXTAIL STEW
Serves 2-3 persons

Ingredients:
500 g oxtail

# Ingredient A:
1/2 cut onion
8 cloves garlic
4 dried chili
1 tbs grated ginger
3 star anise
Fennel seeds
Cinnamon
Cloves
Cardamom
Coriander
Black pepper
White pepper
# Ingredient B:
1/2 cut lemon (juiced)
2-3 tbs brown sugar
3 tbs soy sauce
2 cups water
Salt

Method:
1. Parboil oxtail in boiling water for 15 mins, drain, rinse with hot water. This will help remove the excess fat and impurities. Set aside.
2. Heat a bit of oil in a pressure cooker and saute Ingredient A until fragrant.
3. Dump in the parboiled oxtail and pour in Ingredient B. Add more water if necessary and make sure the oxtails are immersed in water.
4. Lock the lid and cook it for 40 mins, wait until it`s safe to open the lid (please consult with your cooker`s manual), and check if the meat is tender enough.If it`s not, cook it for another 20 mins or more.
5. Adjust the taste with salt and sugar and the consistency by adding more water to thin it out or cooking it longer with the lid open to thicken it up.
6. Serve with hot steamed rice.

Thursday, December 1, 2011

Kabocheese mini muffins

I know Halloween is way over and fall is even ending, but I have been planning (and delaying) to make at least one recipe using kabocha or Japanese squash/pumpkin this year. So, I finally made one today, with another weird name. I have prepared a bag of mashed kabocha in my freezer since last month, so it was real quick to whip these muffins up. One thing from this post that amazed me is how quick the whole process went in one day. I planned the recipe only a couple hours ago and now I`m writing a post on it. Even my muffin tin was just delivered today! Maybe this is my productive day. Or muffin day.

Alright, so here`s how I cook and store the kabocha: Steam the kabocha for like 20 mins in a steamer until the flesh and the skin has softened. Microwave works very well too for cooking kabocha. Remove the skin, but don`t throw away because it`s perfectly edible. Mash the kabocha flesh, wrap in a storage bag, and keep in freezer until you use  it.

Now, let`s pretend that you have cooked kabocha in your mixing bowl.

Mash the kabocha in a mixing bowl. 

Whisk in olive oil...

...whole eggs and...

...sugar.
I used light brown sugar for this recipe and with the amount of sugar I used here the muffins were not too sweet. If you prefer sweeter version, try adding more sugar.
 I wanted something to give balance to the kabocha sweetness, so I added cubed cheese...
...and parmesan cheese. Sweet and salty are made in heaven.

Fold in sifted flour and baking powder.
Try not to overmix the batter to give some fluffiness to the muffin later. Give only a few stirs and just when the flour are invisible, you`re good.

Spoon the batter into muffin cups or tin and bake them in preheated oven at 200 C for 15 mins or until the top has turned firmed and inserted skewer comes out clean. 
I didn`t use muffin cups because: 1, All my muffin cups are too big for this tin, and 2, I needed to test my new non-stick muffin tin (which was delivered today!). I was so nervous thinking about any possible disasters if it didn`t work out!

But watching them puffing up cozily in my oven really made me feel relieved. And hhhhungrrrrry.

The first word came to my mind when I saw these cuties: BELLS. I don`t know why, but their shapes definitely ring bells in my head.
They might seem dense in texture, but don`t judge muffins from their looks.

Because, these pumpkiny muffins are fluffy and moist and...look at those ooey gooey cheesy bits inside. I was so happy with how they turned out I thought now is Friday night!
KABOCHEESE MINI MUFFINS
Makes about 24 mini muffins or 12 regular-sized muffins

Ingredients:
200 g steamed kabocha (remove the skin)
150 ml olive oil
3 whole eggs
120 g brown sugar (this gives a mild sweetness)
100 g cheese (cubed into small chunks)
1 tbs powdered parmesan cheese
1 tsp baking powder
200 g flour

Method:
1. Combine mashed kabocha and olive oil in a mixing bowl.
2. Whisk in eggs, sugar, cubed cheese, and parmesan cheese.
3. Fold in sifted flour and baking powder.
4. Spoon the batter into muffin cups or tins.
5. Bake at 200 C for 15 mins or until the top has turned firm and golden brown and inserted skewer comes out clean